Create a Center
From Mifos Home page, you can create center in three different ways: Search Activities box, Clients drop-down menu, or via the Navigation bar.
- In Search Activities box, start typing the text create center. The field auto-populates. Press Enter. The Create Center page opens. Provide details in the following fields.
- Click Clients drop-down menu. Select Centers from the list. Click the +Create Center button on the right corner of the page. The Create Center page opens. Provide details in the following fields.
Point the cursor at the triangle at the left side of the screen. The navigation bar appears. Click on + Center in the navigation bar. The Create Center page opens. Provide details in the following fields.
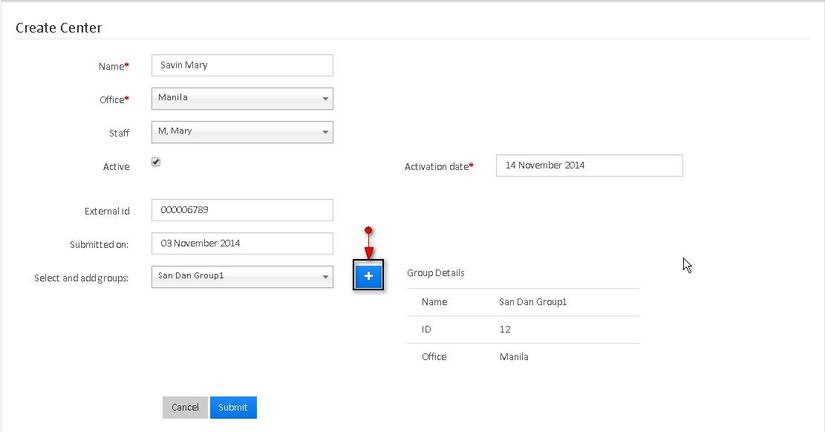
Field Name (attribute) Description Name Provide the name for the center (Mandatory Field) Office Provide the office name to which the center is registered to. (Mandatory Field) Staff Mention the staff name. ( You can select any one the employee of the office to which the center is registered) Active Select this field to activate the center while creating it. Activation date A mandatory field that appears when you select Active. Enables you to activate your account for the current date or for a back date. External id Provide some unique id (maybe alpha-numeric) which can be used as search parameter later. Submitted on Enables you to submit a center on a particular date. Select and add groups From drop-down menu, select the existing groups and add them to the center by clicking '+' button. 4) Click on 'Submit' button to create the center.
Attach Meeting Date to the Center:
1) Go to the specific center and click on 'More' tab and then click on 'Attach Meeting Date' to see the following window:
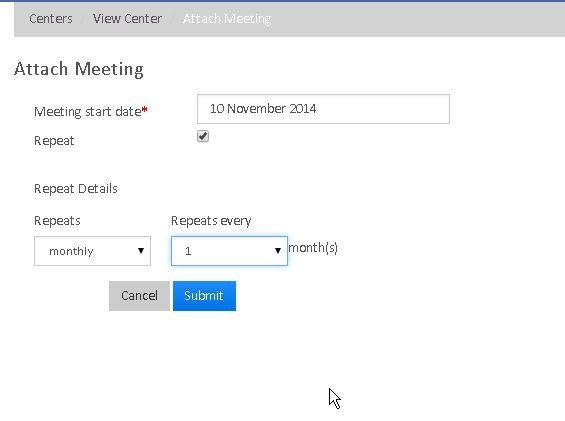
2) Enter Meeting Start Date, Frequency and the day and click on submit button to attach meeting date to the center.
Once the center is created with attached meeting date , the Center window looks like this: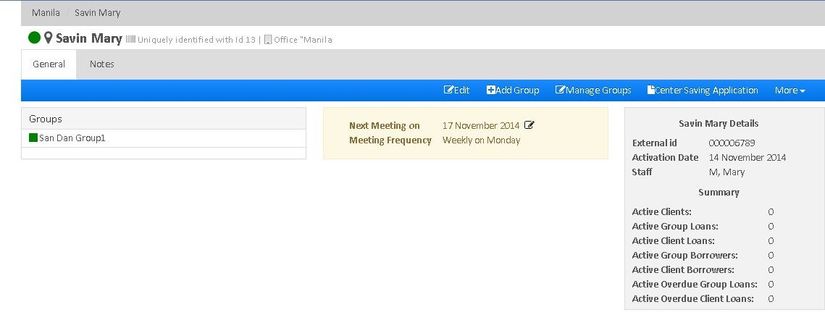
The Center window shows the list of Groups under that center, Meeting date, External Id of the center, Activation Date, Assigned staff, Active Clients, Active Group Loans, etc.
Activate a Center
You can activate a center while creating it or in future. The status of the centers that have not been activated appear as Pending.
- Navigate to the center you want to activate.
- Click Activate button.
Enter activation date. You may choose to activate on the current date or a back date.
You may also activate an existing center by choosing to edit it.
Edit an Existing Center
- Navigate to the center you want to edit.
- Click the Edit button available at the home page of that center.
You may edit the following fields:
| Field Name (attribute) | Description | Example | Validations (if applicable) |
|---|---|---|---|
| Name | Provide the new center name | ||
| Staff | Provide the new Staff name | ||
| External id | Enter the new External id | ||
| Activation date | Enter the Activation Date |
Create a New Group and add to the Center:
1) Go to the Specific Group and click on 'Add Group' tab to see the following window:
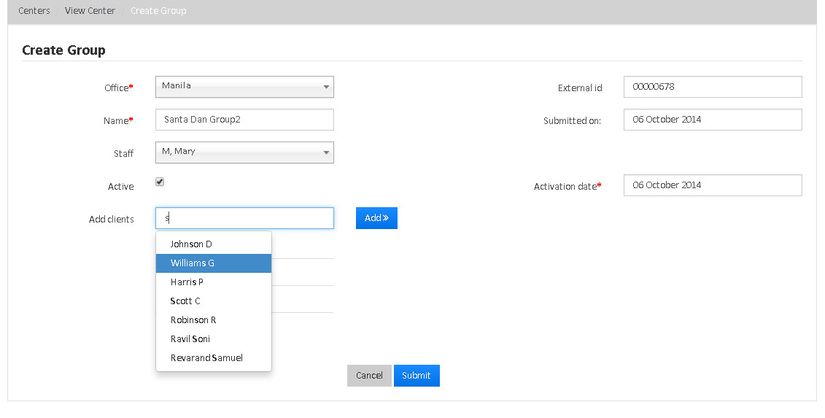
2) As shown above, enter the Group details and add the clients
3) Click on Submit button to create the group and add it to the center.
Add an existing Group to the Center:
1) Go to the specific Group and click on 'Manage Groups' tab to see the following window:
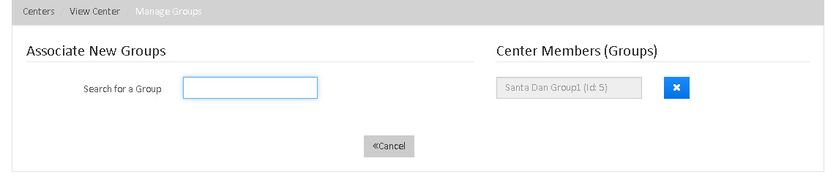
2) Search the existing Group and add it to the center.
Center Saving Application:
1) Go the Specific Center and click on 'Center Saving Application' tab to open the saving Application.
2) Select the existing Savings Product and furnish the remaining details. (to see how to create saving account, click here)
3) Click on 'Submit' button to create saving application for the center.
4) Finally Approve and Activate the Saving Account.
Close a Center
- Navigate to the center you want to close.
- From the home page of that center, click More.
- Select Close from the drop-down menu. The Confirm page opens.
- Enter details for the following fields:
| Field Name (attribute) | Description |
|---|---|
| Closure date | Mandatory field that allows you to close center on the current or back date |
| Closure reason | Mandatory field that allows you to choose from the values defined in the Manage Code section. |
Related articles
| Filter by label (Content by label) | ||||||||||||||||
|---|---|---|---|---|---|---|---|---|---|---|---|---|---|---|---|---|
|