Versions Compared
Key
- This line was added.
- This line was removed.
- Formatting was changed.
The Chart of Accounts - General Ledger Setup allow allows you to organize your different accounts within Mifos X. Accounts can be organized into Header and Detail (sub) accounts . Using using the respective account types: Asset, Equity, Expense, Income and Liability.
How to Navigate?
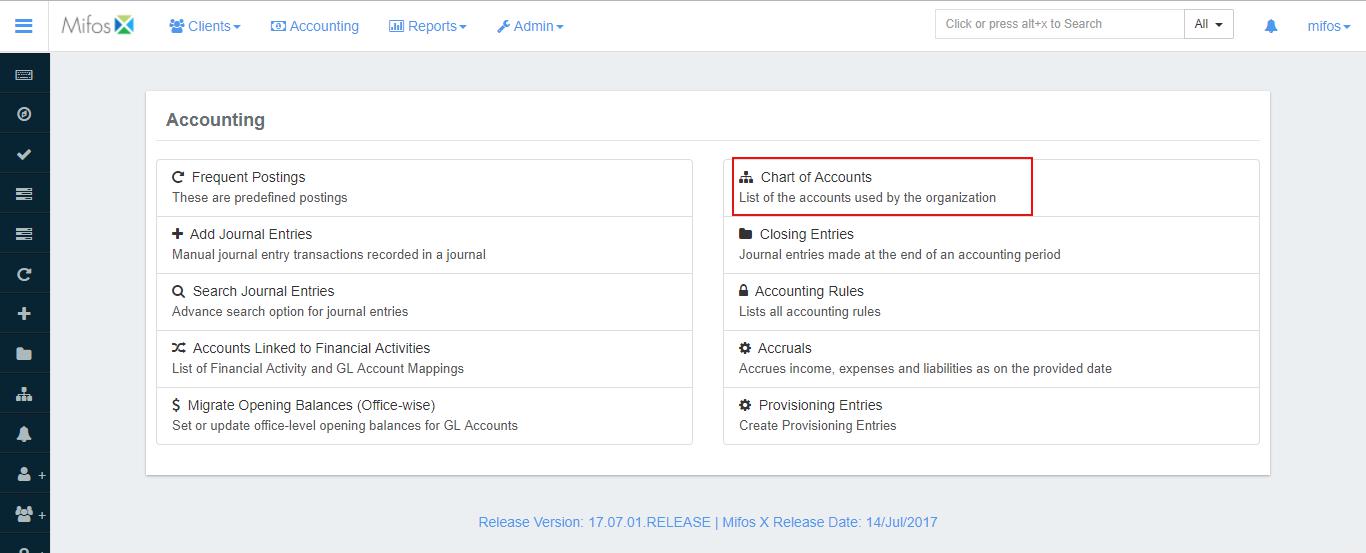
Navigate to Accounting>> Accounting >> Chart of AccountsAccounts (as shown in the screenshot below):
| Note |
|---|
Accounts Account usage is divided into Header accounts and Detail accounts. You could start creating with Header and then by switch to a sub-ledger account under thatafterwards. When setting up your accounts, it is advisable to do set them up one at a time. For example create all of your Header accounts for Assets and then set up all Detail accounts for Assets as well. Follow the same sequence for other account types i.e as well (namely Equity, Expense, Income and Liability accounts as well). |
How to Create GL Account?
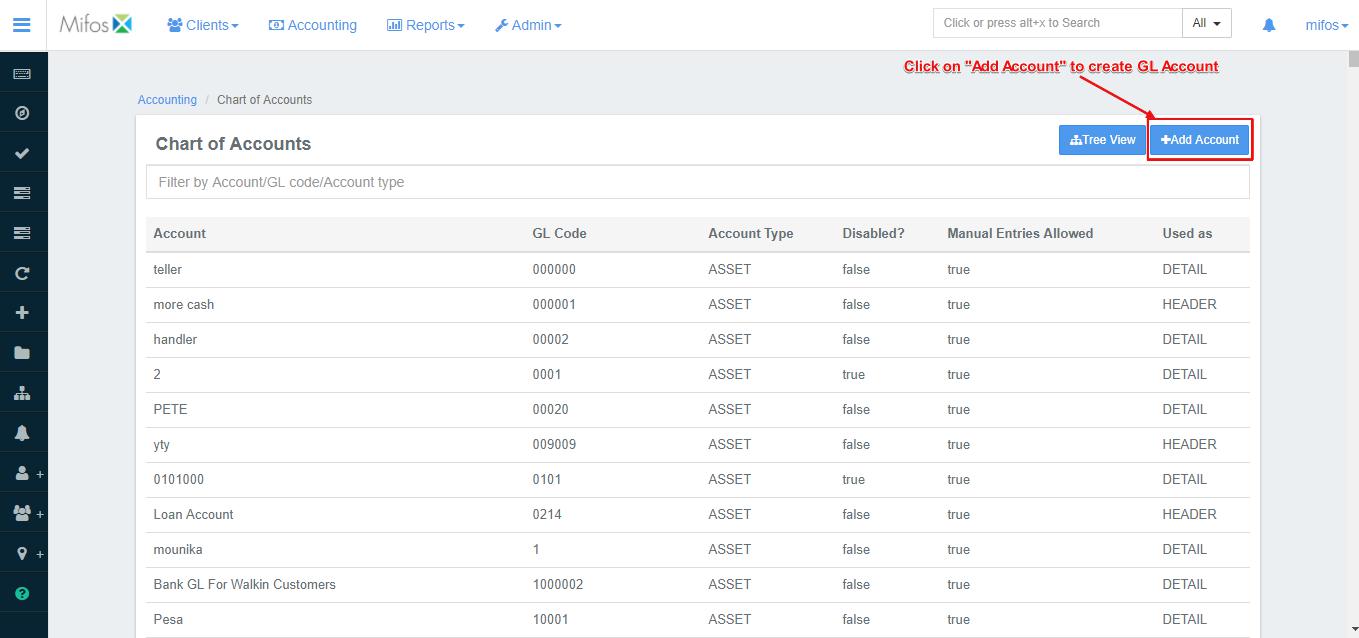
- From On the Chart of Accounts page, click the
 button at the top-right of the screen.:
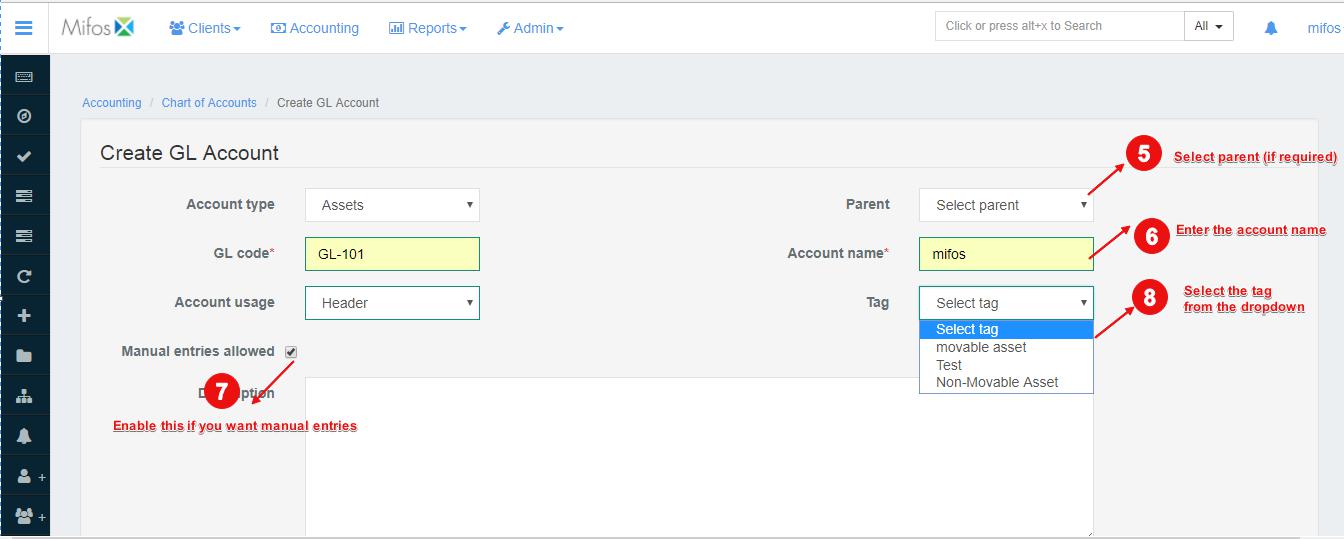
- Select the Account Type from the drop-down menu.
Next Furthermore, fill in the optional information on the right side of the screen if you choose wish to do so. - Type the GL (General ledger) Code.
ExFor example: 10000 - Select Header from the Account Usage drop-down menu.
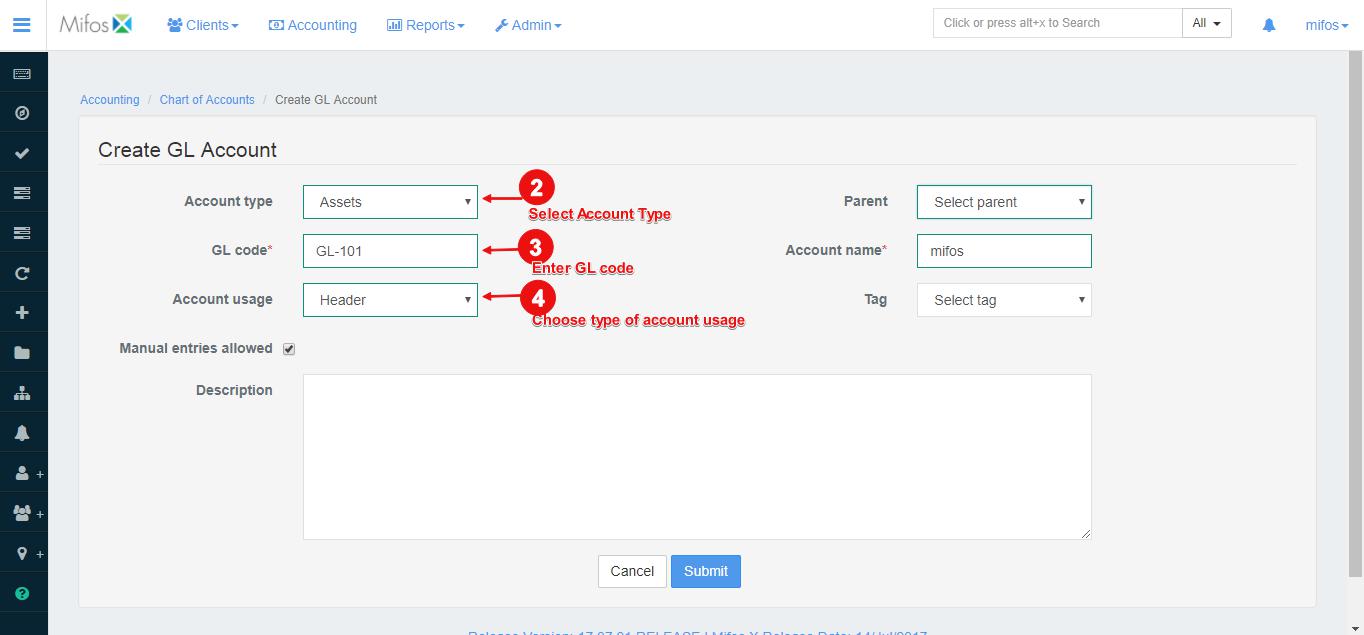
- Select a Parent from the drop-down menu ,(if required).
- Type the Account name.
ExFor example: Cash & Bank - Check To allow Manual Entries, click on the check box , if you want to enable - Manual Entries are allowednext to it to make sure it is checked.
Select a Tag from the drop-down menu.
How to
createCreate Tag?
- i) In the search bar Search Bar on the top of the page, type "Tagstags", and a list of tags associated with assets, equity, expenses, income and liability are shownwill get displayed:
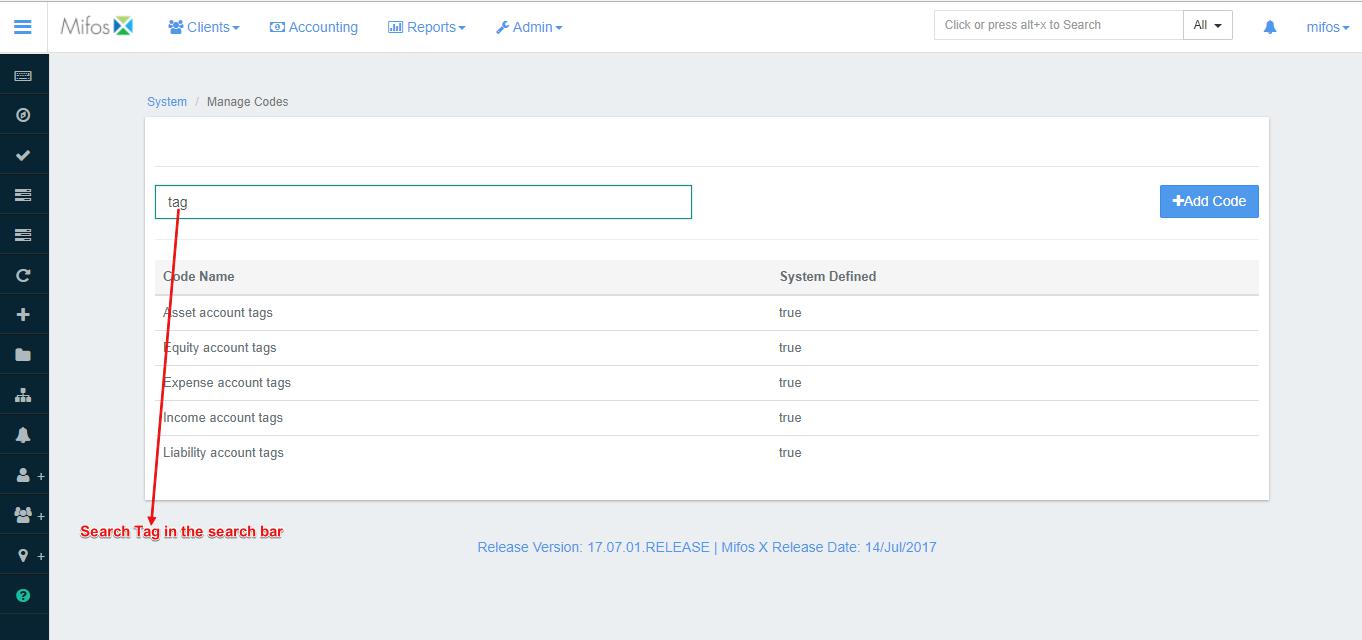 Image Modified
 - ii) Click on the required type of tag. In this example, here I am 'll be selecting "Asset account tags" and will create two types of asset tags : "Bonds" and "Jewelry" (as shown in the screenshot below):
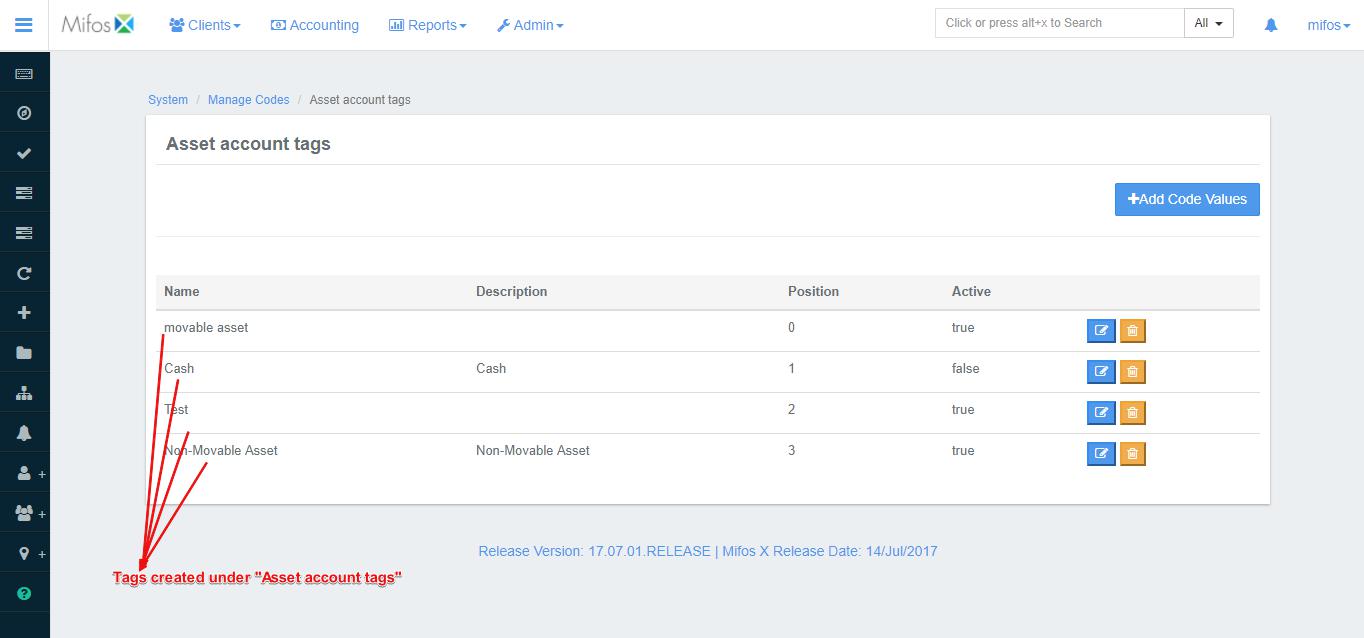 Image Modified
 - iii) Once the tags are defined come , go back to GL account creation, the GL Account Creation page and select "Account Type" as Assets under the "tags" drop down one can see -down menu. This will display the tags associated with with Assets.:
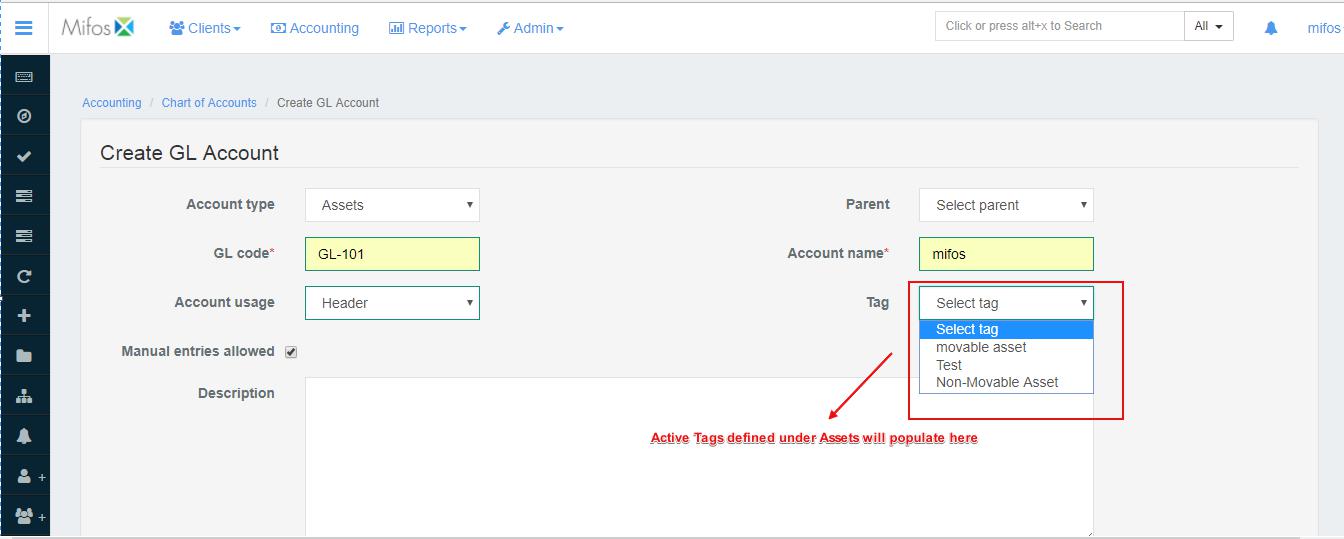 Image Modified
 - Type a Description in the text box provided.:
- When you're done with filling all the fields, click on
 Image Modified .
How to Create Sub-ledger Account?
| Note |
|---|
"The Account Usage" option should be set to Detail if this sub-ledger account is used for passing journal entries and further . If you want to create a sub-ledger under this sub-ledger use ", set the Account Usage " as Headeroption to Header instead. |
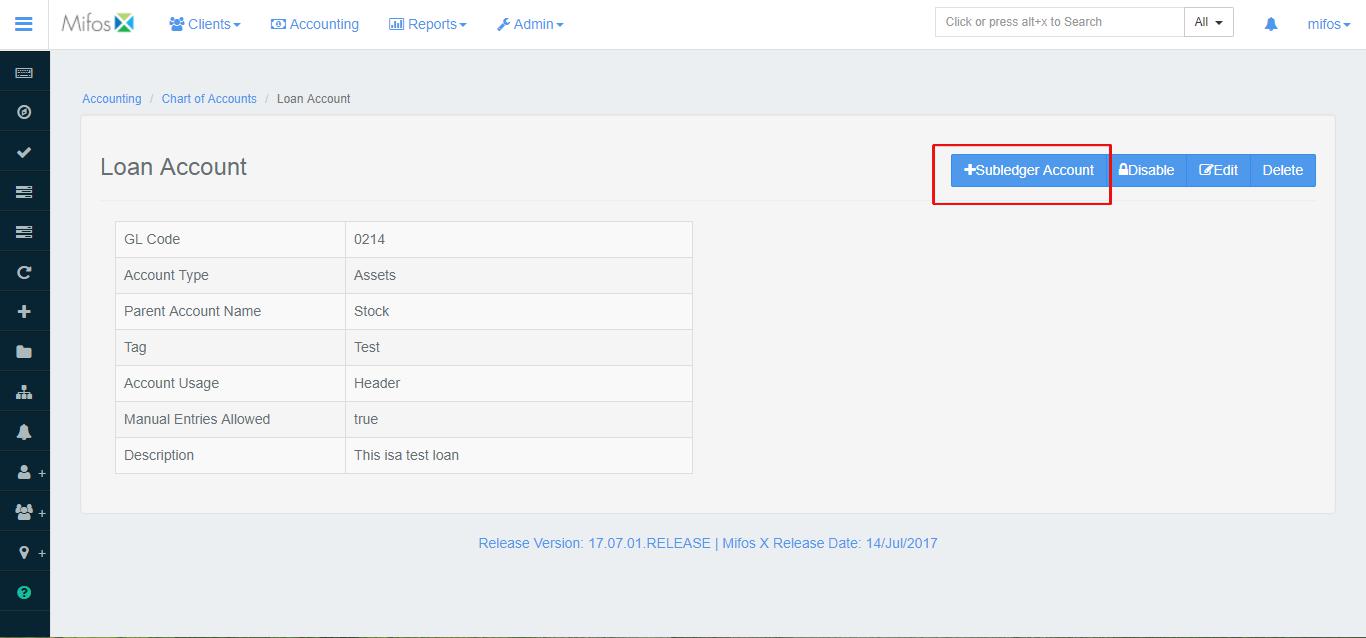
- From the Chart of Accounts page, click on the existing GL account which Account which has "Account Usage" as Header, once your are navigated to next page click on
 Image Removed set as as Header. This will redirect you to a new page. Click on
  Image Added:
- Type the Account name.
- Type Next, fill in the GL Code.
- Select Detail from the Account Usage drop-down menu.
- Check To allow Manual Entries, click on the check box , if you want to enable - Manual Entries are allowednext to it to make sure it is checked.
 Image Modified
- Next, fill in the optional information on the right side of the screen if you choose wish to do so.
- Select the Account Type from the drop-down menu.
- Select a Tag from the drop-down menu . (Documented in which has been further documented in GL account creation).
- Select a Parent from the drop-down menu.
- Type a Description in the text box provided.:
 Image Modified
 - Click
 Image Modified
Overview of General Ledger Accounts
Once you have navigated to the Chart of Accounts page, you will be presented with a chart of all the accounts being used by your organization. You may filter the results by typing any keyword in the Filter by Account/GL Code/Account type field. Alternatively, you may view this chart in a Tree View - please see the View Chart of Account (Tree View) section below to learn about this.
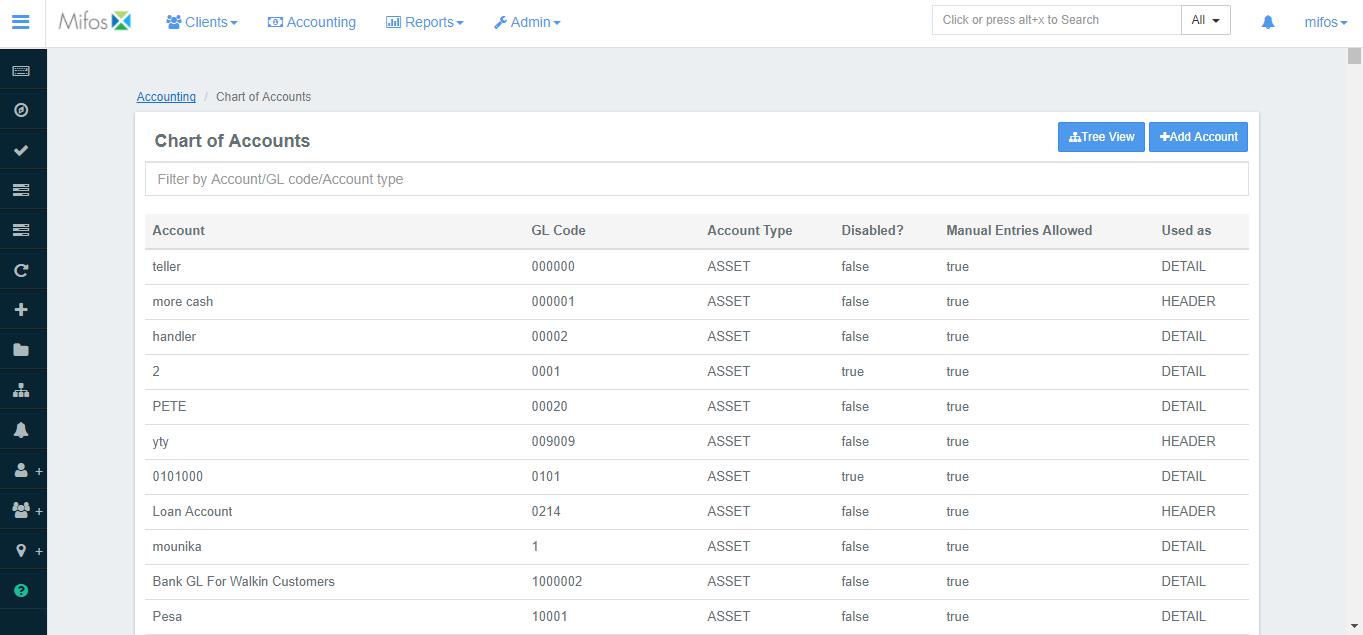 Image Modified
View Chart of Accounts (Tree View)
There is an alternative way to view your accounts - using the Tree View. From the Chart of Accounts page, click the the blue Tree View button at the top-right of the screen.
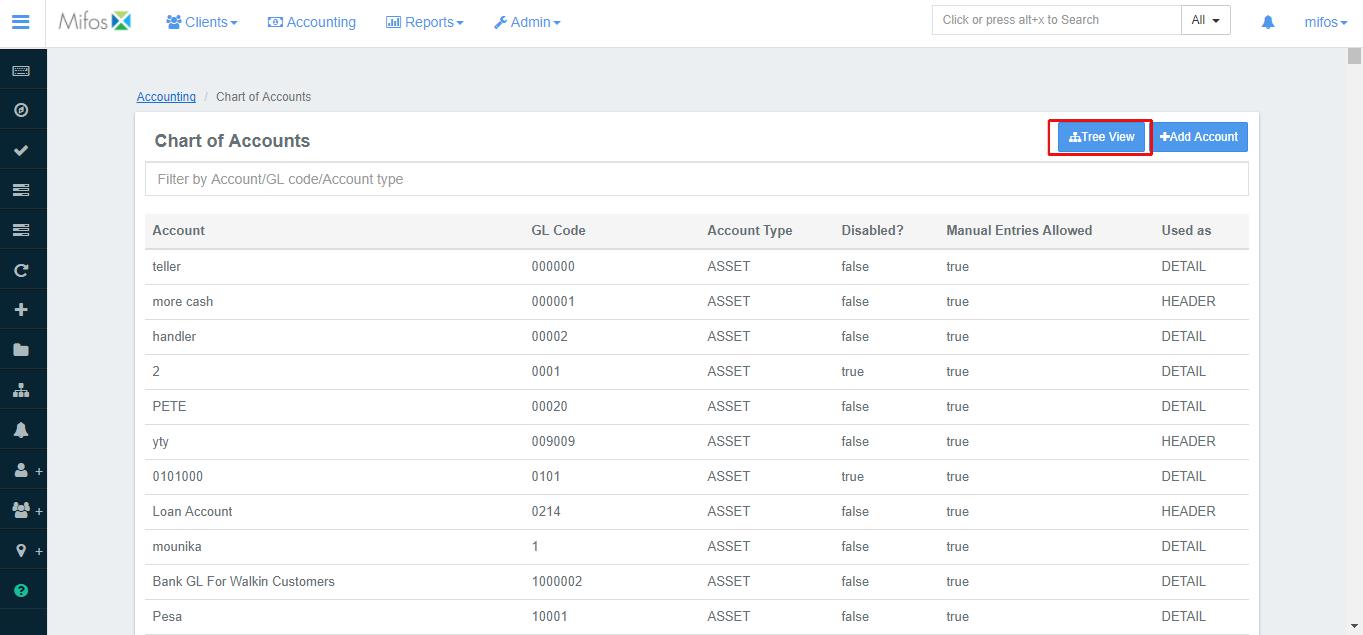
You will be taken to a new screen , stilled called chart of accounts - but it will only have (with the same title as the previous one) having only one entry, with a small '+' sign on the left:

Click on the '+' sign to expand the tree. A typical result may look like the one seen shown in the screenshot below. This is an effective way to examine the structure of your organization's accounts within the Mifos system.:
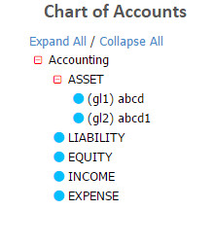 Image Modified
Edit, Disable or Delete an Existing Account
You may edit, disable or delete an existing account by accessing its detail screen. Do navigating to it's Detail page. You can do this by clicking on an account in on the chart Chart of accounts Accounts screen. Locate Search for the account you would like to edit and click on it - it will be highlighted in blue when the cursor is hovering over it:

Once you have clicked click on the desired account you will be taken to a detailed screen with more details for that account. An example of this can be found below, please has been shown below (note the three blue buttons on to the right of the screen.):
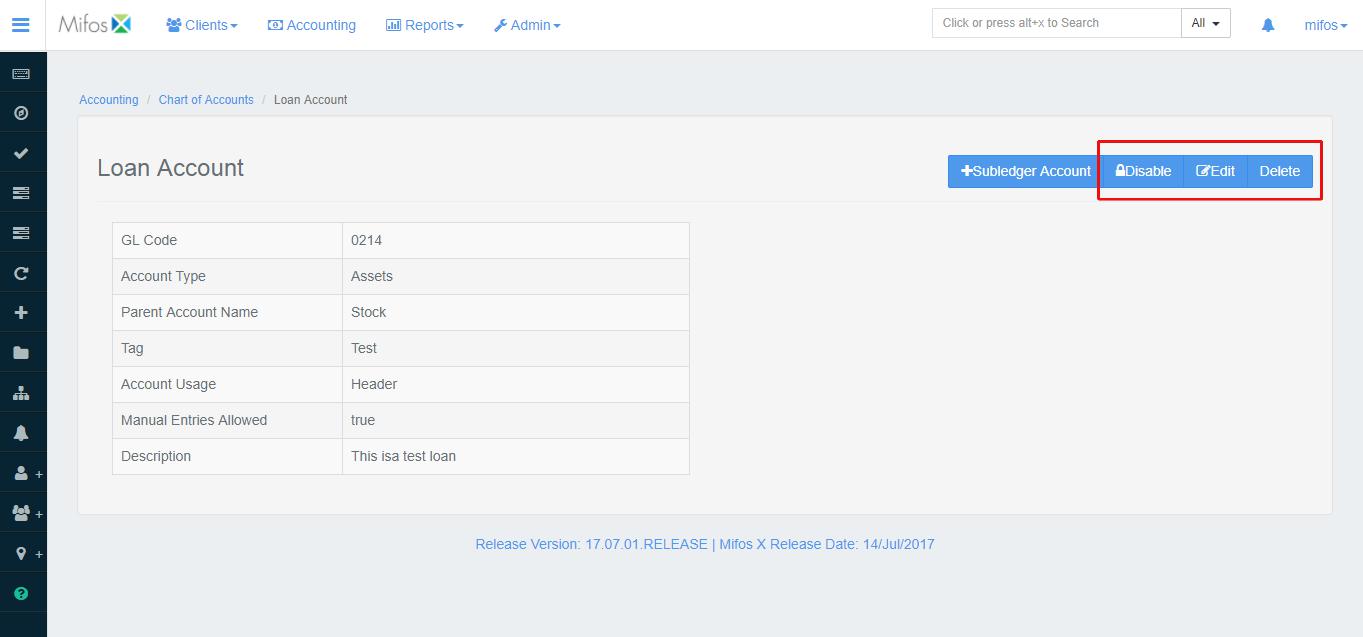
- To Disable the selected account, click the blue Disable button at the top-right of the screen. To re-enable it, click the button again.
- To Delete the selected account, click the blue Delete button at the top-right of the screen. This will launch a pop-up window - click the blue Confirm button to
- confirm the deletion of the account.
- To Edit the selected account, click the blue Edit button at the top-right of the screen. This will launch the Edit GL Account page:
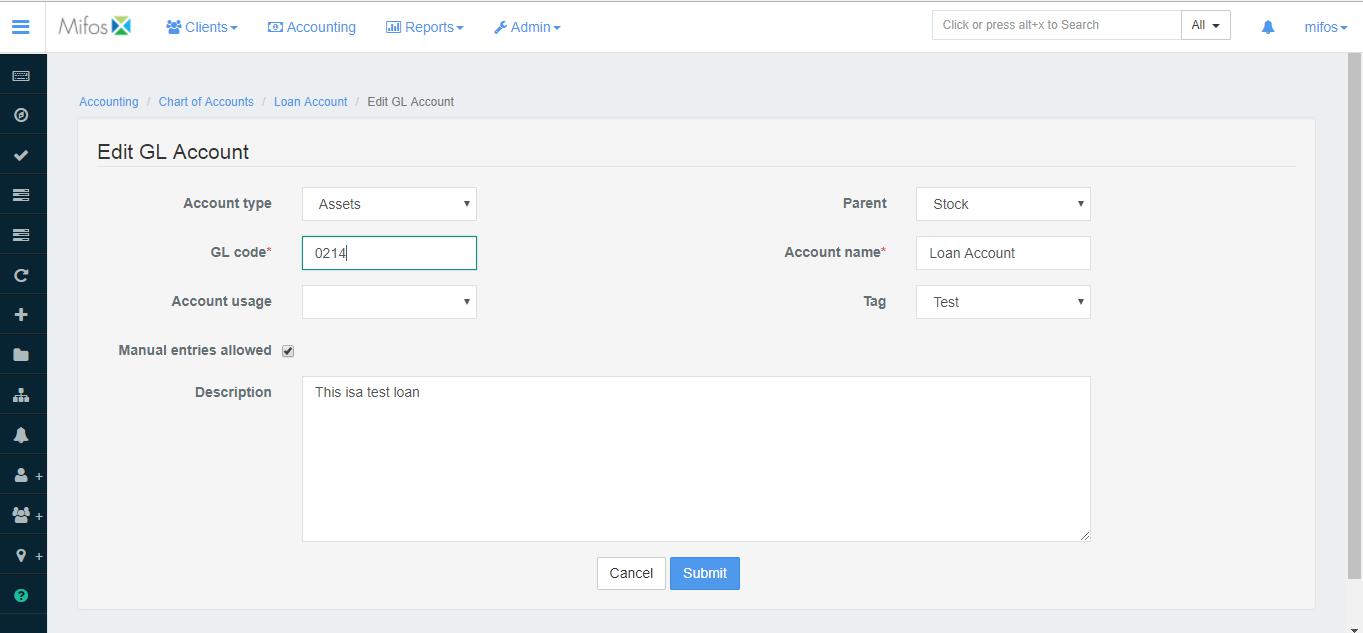
Make Once you are done making the necessary changes, then click click on  .
.
Related
articlesArticles
| Filter by label (Content by label) | ||||||||||||||||||
|---|---|---|---|---|---|---|---|---|---|---|---|---|---|---|---|---|---|---|
|
| Panel | ||||||
|---|---|---|---|---|---|---|
On this page:
|