Manual Journal Entries vs. Automated Portfolio Postings
In Mifos X, the majority of accounting entries occur automatically based on your loan your loan and savings product-level settings configured in Product Creation and Configuration. See also For more information, see Loan Integration with Accounting.
Mifos X also supports manual entries against any general ledger General Ledger (GL) account. You can manually post single journal entries or compound journal entries, the steps for which are detailed in subsequent sections.
Single
journal entriesJournal Entries
To add a credit or /debit journal entry, do the following:
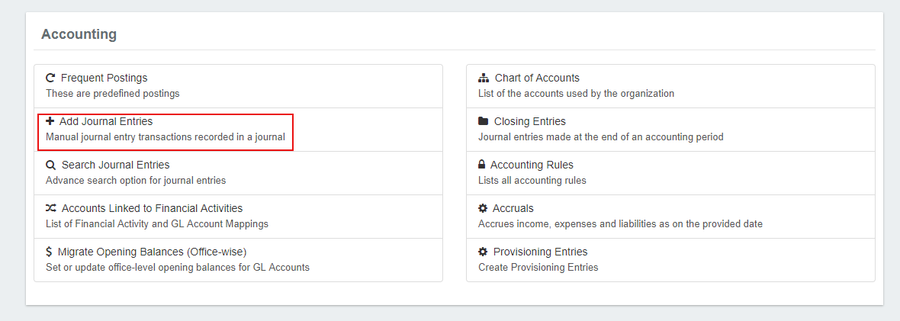
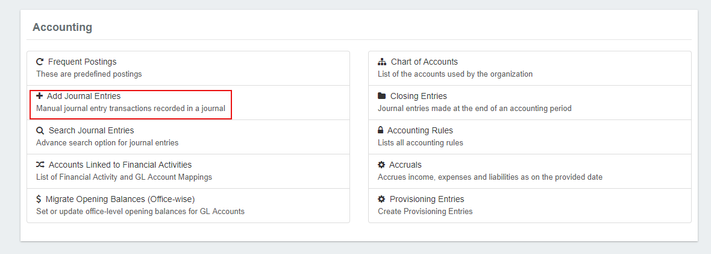
- On the Mifos toolbar, click Accounting to open the Accounting menu.

- On the Accounting menu, click Add Journal Entries to open the Add Journal Entry dialog box section.
- In the Add Journal Entry dialog form, enter your the journal entry details:
NOTE: Items Fields with a red asterisk (*) are required.- In From the Office drop-down list, select the office where you want to add the journal entry.

- In From the Currency list, select the currency of the transaction.

- Under Affected GL entries, do one of the following:
- To add a single credit entry to your general ledger (GL)
- In From the Credit list, select the credit type for the journal entry.
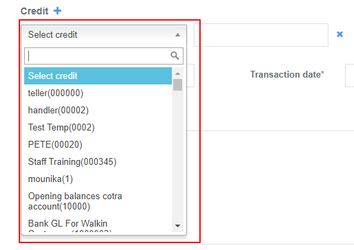
- In the Amount box, enter the amount you want wish to credit.

—OR— - In From the Credit list, select the credit type for the journal entry.
- To add a single debit entry to your general ledger (GL)
- In From the Debit list, select the debit type for the journal entry.
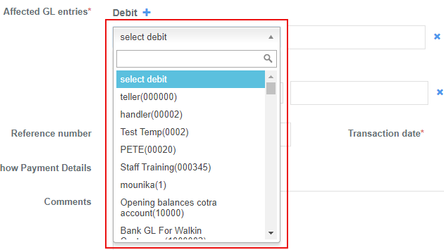
- In the Amount box, enter the amount you want wish to debit.

- In From the Debit list, select the debit type for the journal entry.
- To add a single credit entry to your general ledger (GL)
- In the Reference number box, you can enter a reference code for the journal entry.
NOTE: The Reference number box Filling the Reference number field is optional.
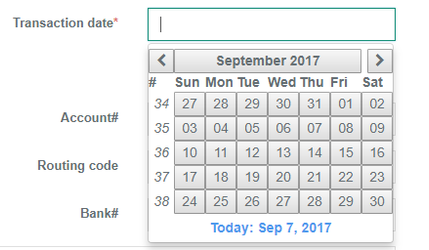
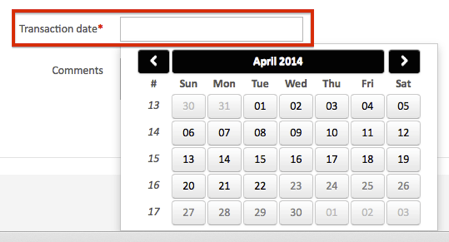
- In the Transaction date box, click in inside the box and then choose . A date picker will be displayed. Choose the date from the pop-up calendar. Use the left and right arrow keys beside the month and year to change the month.
- Under Show Payment Details, you can enter banking details:
NOTE: Payment detail boxes are optional.- To expand the Show Payment Details section, click on the plus button (+).

- In From the Payment type list, select the payment type for the journal entry.

- Enter the Account#, Check#, Routing code, Receipt#, and Bank#. To collapse the Show Payment Details section, click click on the minus button (-).
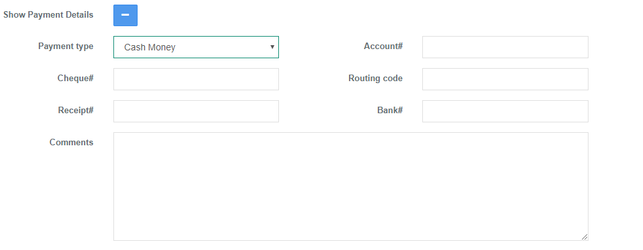
- To expand the Show Payment Details section, click on the plus button (+).
- In From the Office drop-down list, select the office where you want to add the journal entry.
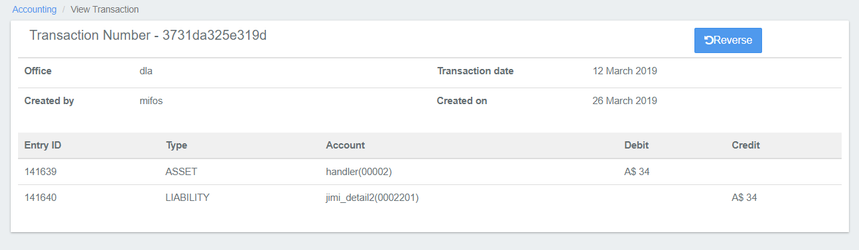
- Click on Submit to post your journal entry.
- Once you click on submit, you will be able to view a summary of the transaction.
- To reverse the transaction, click on the blue Reverse button in the top-right corner:
Compound Journal Entries
To add a journal entry with multiple credits or debits, do the following:
info- On the Mifos toolbar, click Accounting to open the Accounting menu.
- On the Accounting menu, click Add Journal Entries to open the Add Journal Entry dialog box section.
- In the Add Journal Entry dialog, enter your the journal entry details:
NOTE: Items Fields with a red asterisk (*) are required.- In From the Office list, select the office where you want to add the journal entry.

- In From the Currency list, select the currency of the transaction.
- Under Affected GL entries, add your journal entries:
- To add credit entries to your general ledger General Ledger (GL):
- In From the Credit list, select the credit type for the journal entry.
- In the Amount box, enter the amount you want wish to credit.
- Click the plus button (+) to add another credit to your journal entry.

- Repeat until you have entered all credits for the journal entry.
- In From the Credit list, select the credit type for the journal entry.
- To add debit entries to your general ledger General Ledger (GL)In
- To add credit entries to your general ledger General Ledger (GL):
- In From the Office list, select the office where you want to add the journal entry.
- From the Debit list, select the debit type for the journal entry.
- In the Amount box, enter amount you want to debit.
- Click the plus button (+) to add another debit to your journal entry.

- Repeat until you have entered all debits for the journal entry.
Tip: To remove a credit or debit, click the (x) button to the right of the entry you want to delete.
- From the Debit list, select the debit type for the journal entry.
- In the Reference number box, you can enter a reference code.
NOTE: The Reference number box is an optional field.

- Under Show Payment Details, you can enter further banking details:
NOTE: Payment details are optional.- To expand the Show Payment Details section, click the plus button (+).

- To expand the Show Payment Details section, click the plus button (+).
In - From the Payment type list, select the payment type for the journal entry.
- Enter the Account#, Check#, Routing code, Receipt#, and Bank#. To collapse Show Payment Details, click the minus button (-).
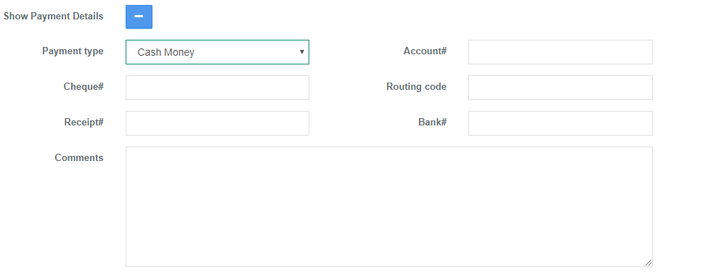
- From the Payment type list, select the payment type for the journal entry.
- In the Transaction date box, click
in - inside the box and
then - choose the date from the pop-up calendar. Use the left and right arrow keys beside the month and year to change the month.
- choose the date from the pop-up calendar. Use the left and right arrow keys beside the month and year to change the month.
- Click the 'Submit' button to post your journal entry.
| title | Key Error Messages |
|---|
- Once you click on submit, you will be able to view a summary of the transaction. To reverse the transaction, click on the blue Reverse button in the top-right corner:
Related articles
| Filter by label (Content by label) | ||||||||||||||||||
|---|---|---|---|---|---|---|---|---|---|---|---|---|---|---|---|---|---|---|
|