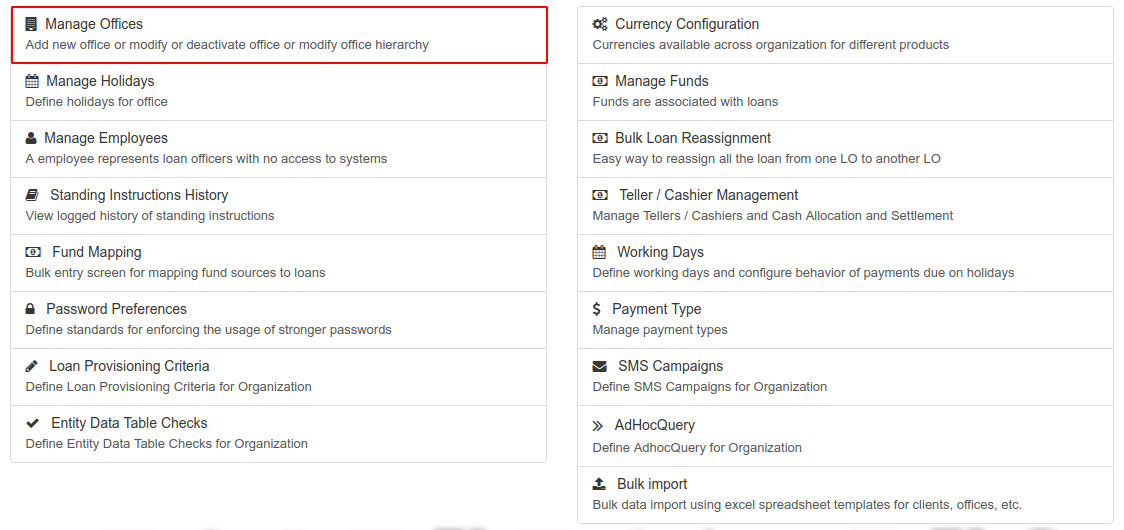
Beginning at the main screen, select Admin, then Organization from the drop down menu. This will launch the Organization menu.
Select Manage Offices to create a new office or modify current offices.
Setting up the
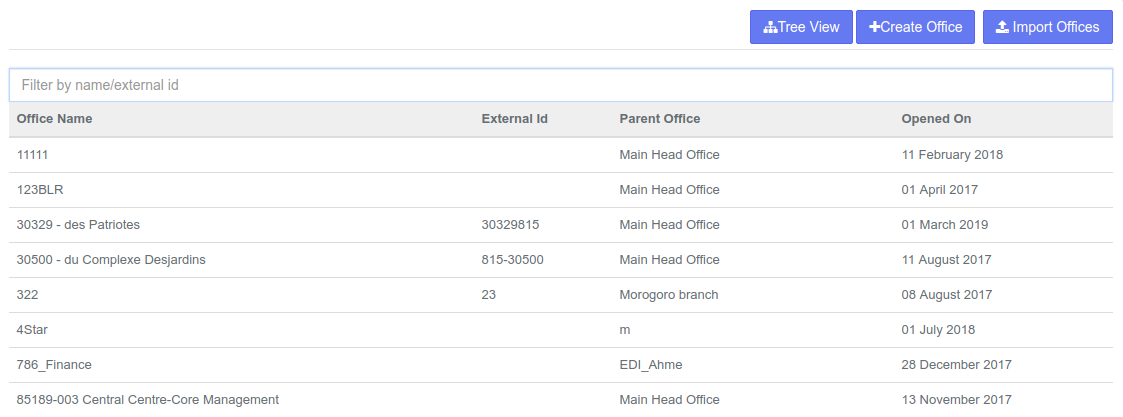
This will launch the Manage Office page that displays a list of created offices along with their external ID, parent office and day of opening.
Setting Up The Main Office
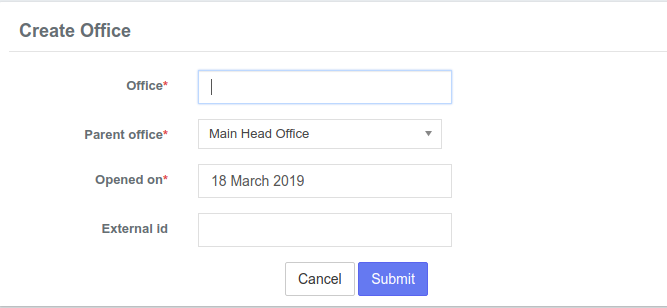
Using the information gathered in the Pre-Configuration Plan.docx, the first step is to create the Main Office of your organization.
Select the  button at the top-right of the Manage Offices page.
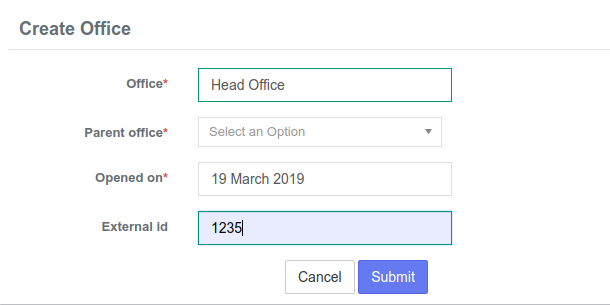
Once the page launches, you can then create an office with the following fields;
- In the Office field, enter your main office name. This may be a building name, a road name or any other naming scheme your particular organization uses.
- In Parent Office, do not enter a name.
- In the Opened on field, enter the date your organization opened this office.
- In the External ID field, enter any numeric identifier your organization may use to further identify your offices. This is an optional field provided for your unique customization. It is not required for effective Mifos X functionality.
- Review the information entered and if it is all correct, click
- the Submit button. The head office is now created.

Edit Office
From the Manage Offices screen

, select the office you want to edit from the listed offices.
Once you have selected an office, you will be taken to its detail screen
. Click the blue Edit button at the top-right of the screen:
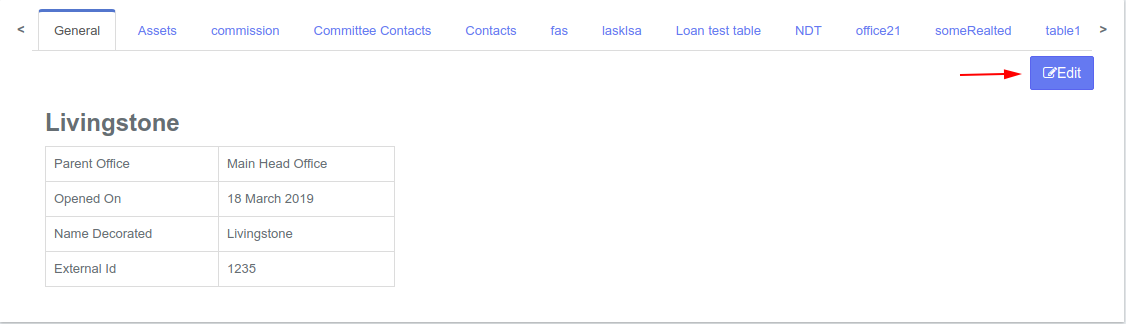

From the Edit Office screen you may change the Parent office, rename the Office, change the Opened on and give the office an External ID.

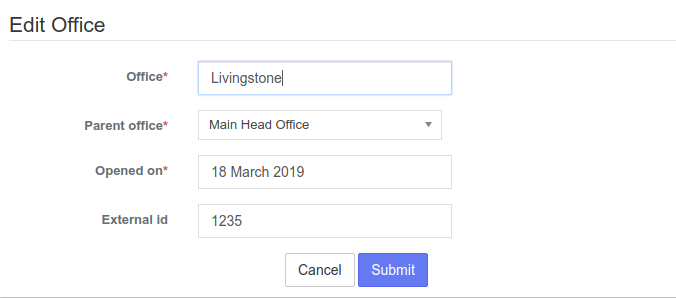
After making changes, click the Submit button to save those changes.
Creating Branch Offices
If your organization has multiple offices, return to the Admin/Organization/Manage Offices screen and select +Create Office. In this example, we use the name "Branch Office." You will enter the name that best describes your additional office name.
- In the Office field, enter your additional office name.
- In Parent Office field, the name of your Head Office will be the default. If your organization uses regional offices, multiple office names will appear in the drop down and you will select the regional office this newly created office falls under.
- In the Opened on field, enter the date your organization opened this office.
- In the External ID field, enter any numeric identifier your organization may use to further identify your offices. This is an optional field provided for your unique customization. It is not required for effective Mifos X functionality. In this example, we used a numeric identifier for this office.
- Review the information entered and if it is all correct, click on the Submit button. The additional office is now created.

After the offices are set up, the full list will appear on the Admin/Organization/Manage Offices screen.

Tree View
Your organization's offices may also be viewed in a Tree View.
From the Manage Offices screen, click the
 button at the top-right of the screen. This will launch an alternative view which allows you to view the office hierarchy for your organization:
 On this page:
On this page: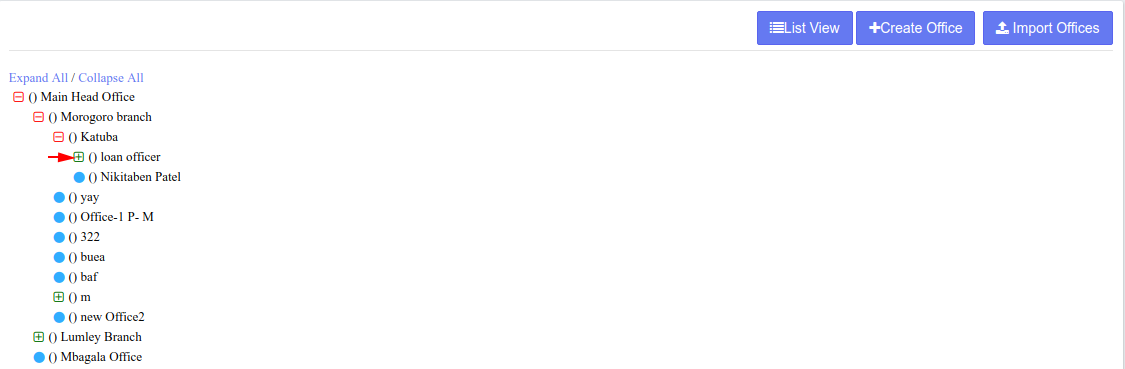 

To expand the office to expose the branches, click the  button besides the office name. To collapse, click the
  button.
To return to list view, click the  button at the top-right of the page.
Import Offices
At the top most right of the Manage Offices page, click the  button. This will launch the Bulk import/Offices page.
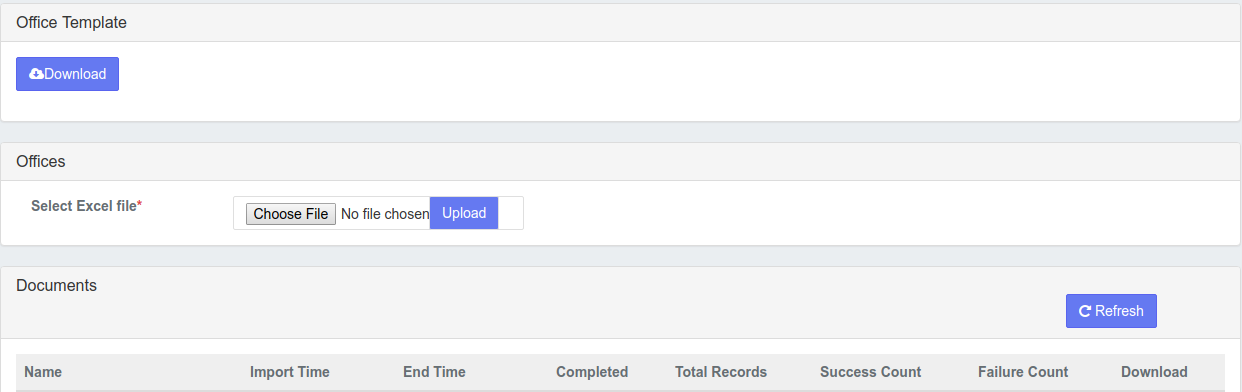
You have two options;
- You can either download an office template to your device, add the information required, save and then upload that file.
- If you have an already existing file, choose the file and upload it.
Tip: It is best to download an office Template as it will contain the fields that pre-exist in Mifos X.
After uploading the file, click the  button at the bottom of the page to confirm that the file has been uploaded.
Widget Connector url https://www.youtube.com/watch?v=wpwDt8WjvSE&list=PLAfz_RVd88FooXjldO5tdC63oMi0TSMwK&index=9
REFERENCES
| Filter by label (Content by label) | ||||||||||||||||||
|---|---|---|---|---|---|---|---|---|---|---|---|---|---|---|---|---|---|---|
|