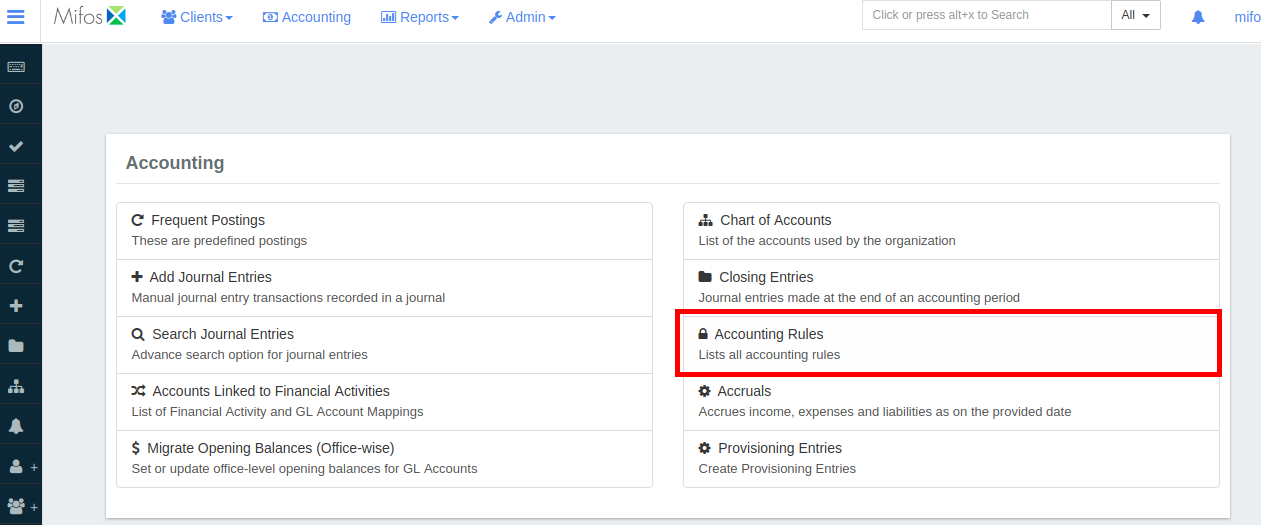
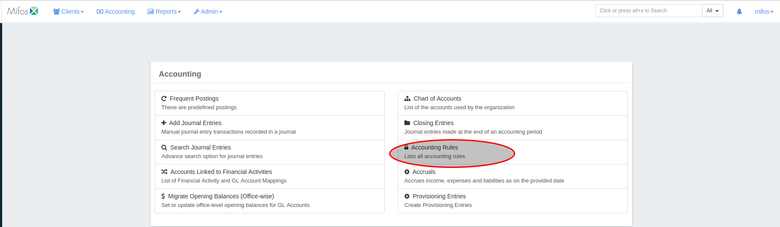
Beginning at the main screen, click on Accounting. This will launch the Accounting menu.
Select Accounting Rules

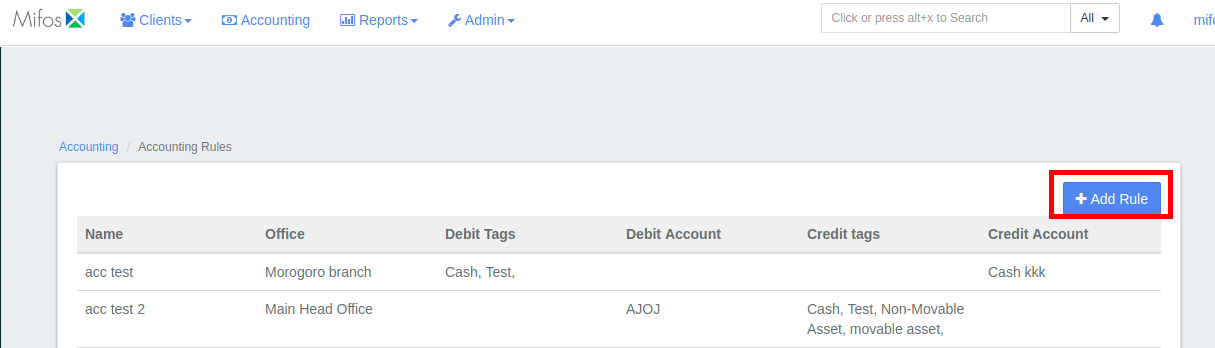
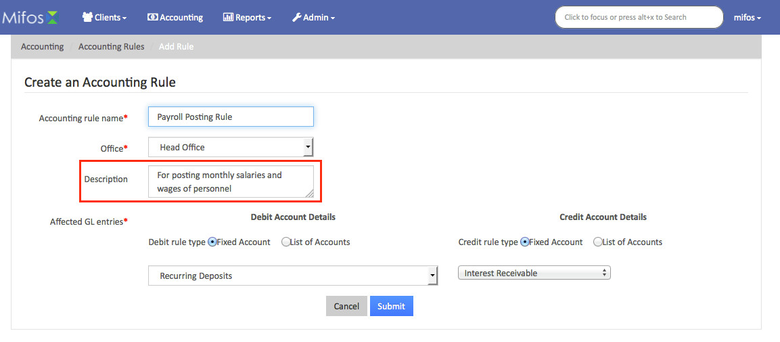
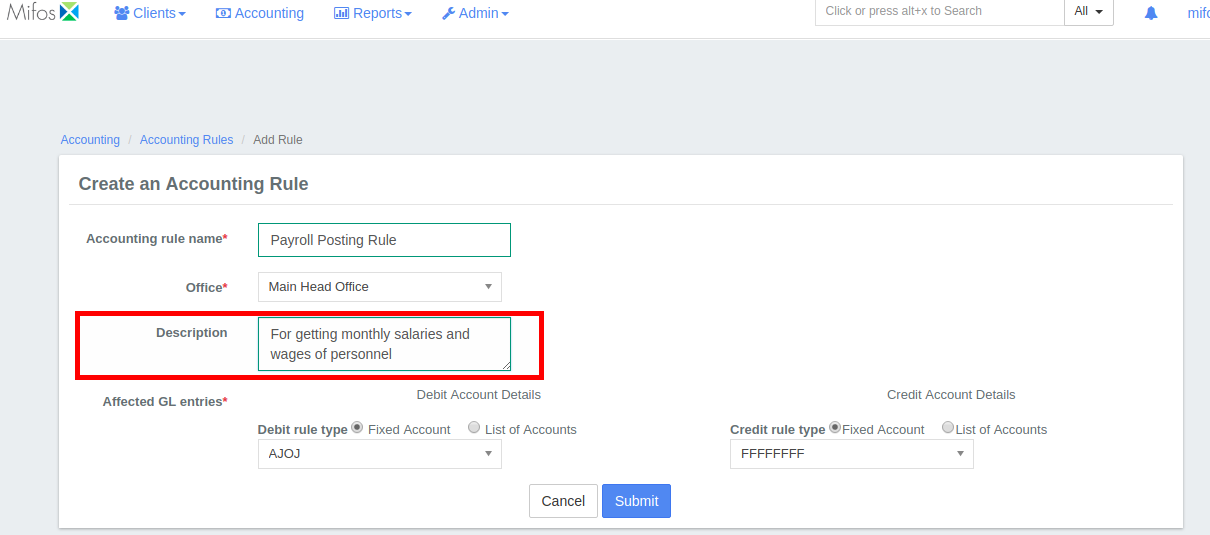
Create accounting rule
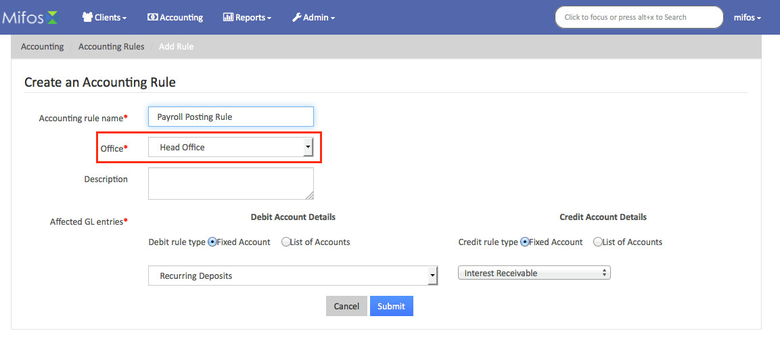
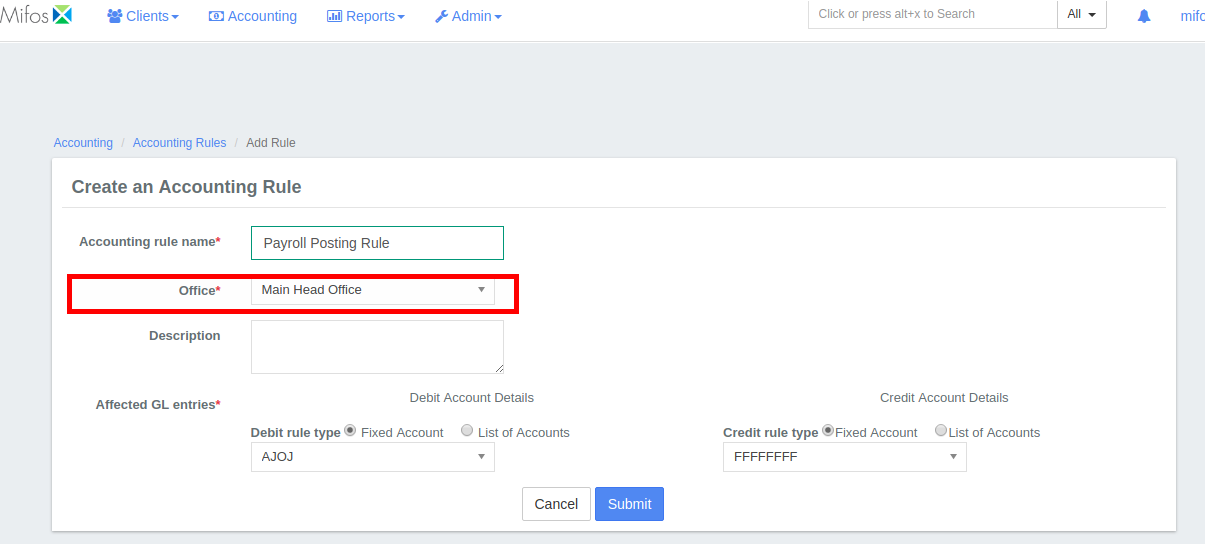
Click on +Add Rule the image page shown below opens.
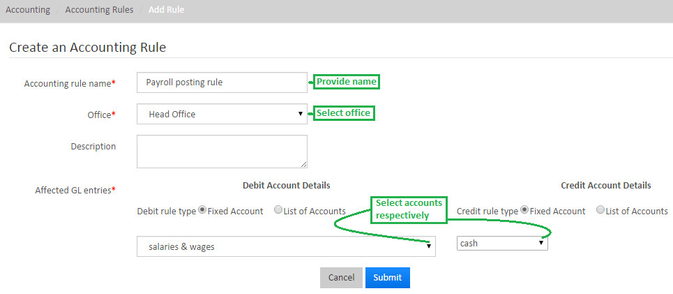

As illustrated in the image above image, you need to provide details and click on Submit button.
Multiple entries:
In case, you want to do multiple entries you need to create debit and credit Account Tags, and then assign the tags to expense and asset accounts. The tagged accounts can then be used to create an Accounting Rule.
For example: To create a payroll posting rule, create a debit Account Tag, “Payroll”, and assign it to each Expense Account you want available for payroll debits. Then , create a credit Account Tag, “Cash,” and assign it to each Asset Account you want available for credits.
To tag an account to be debited, do the following:
- Create a debit Account Tag:
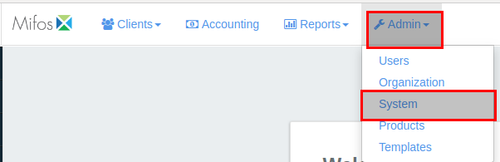
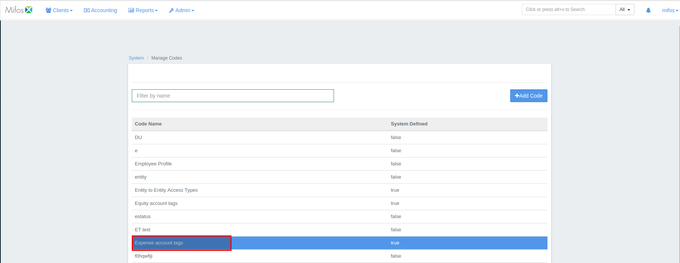
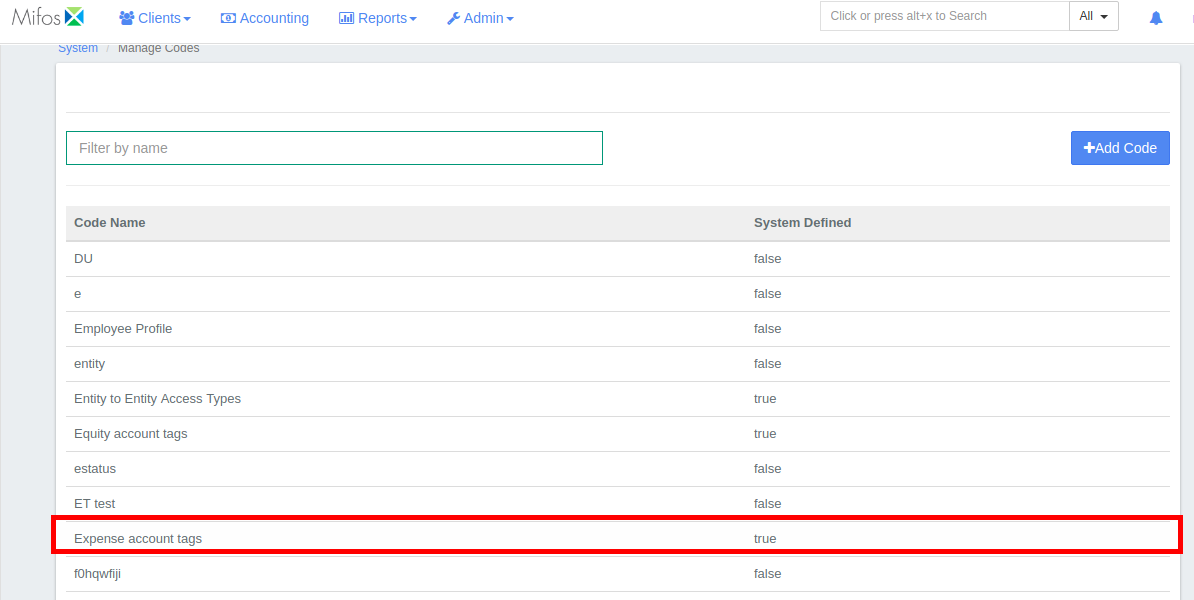
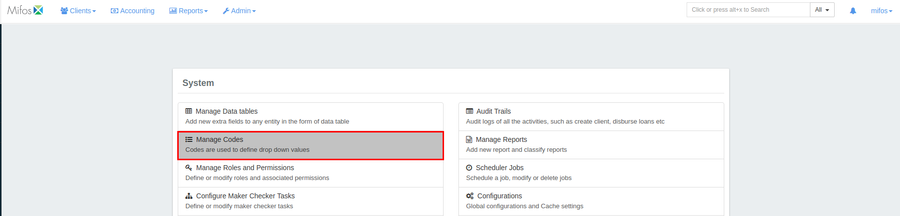
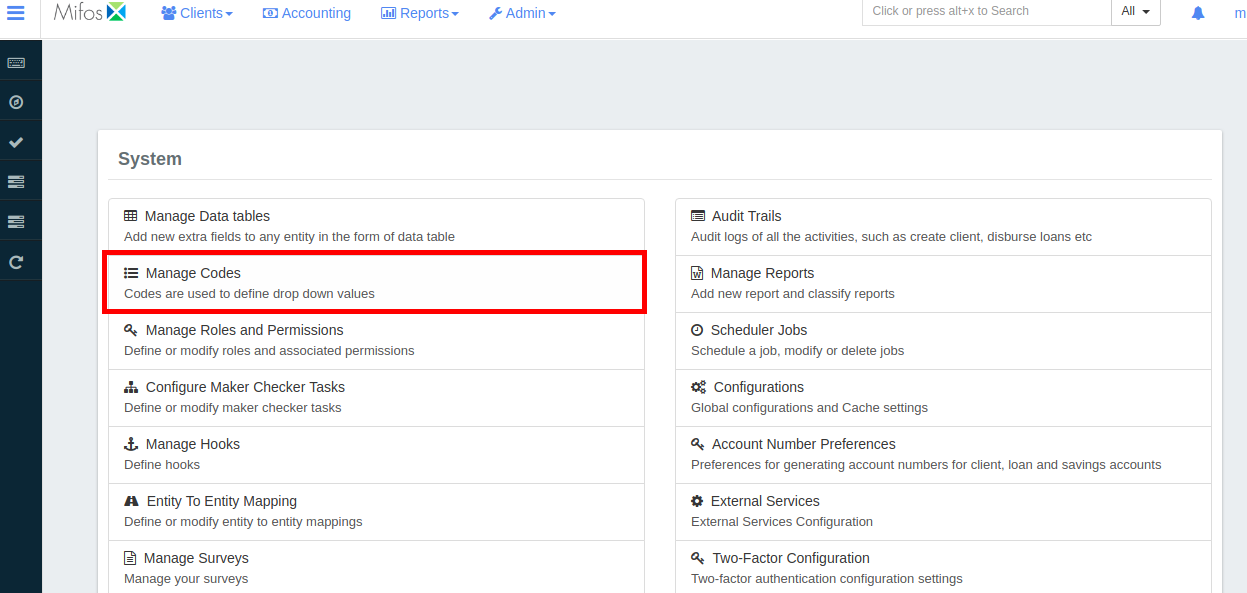
- On the Mifos toolbar, click Admin, and then click System to open the System menu.

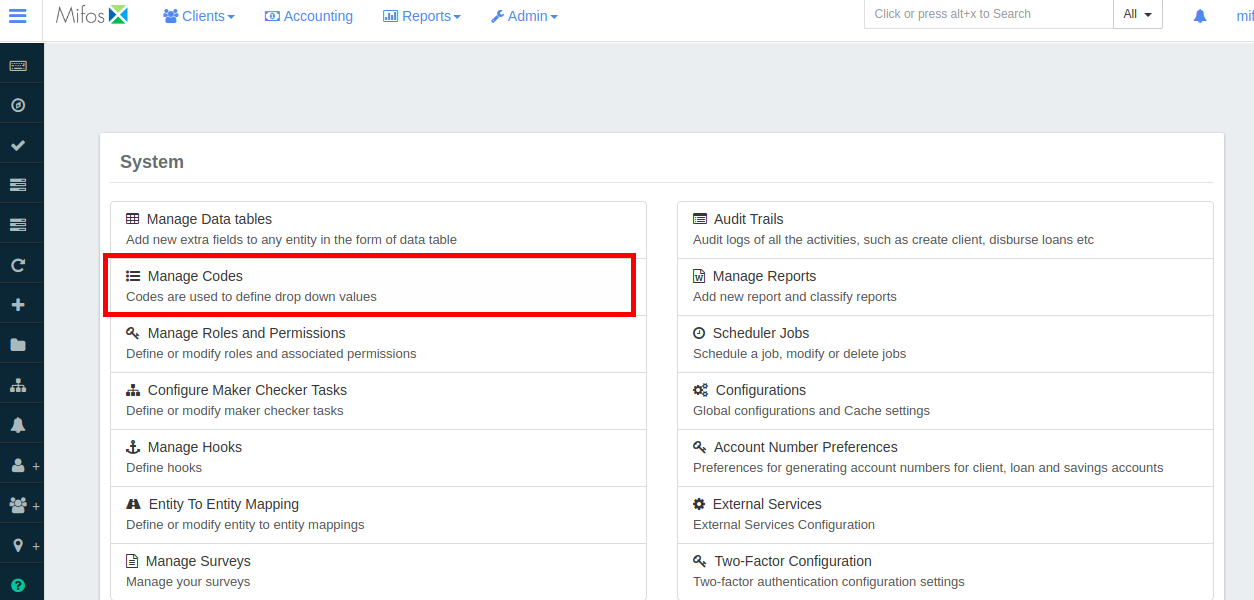
- On the System menu, click Manage Codes to open the Manage Codes dialog.

- In Code Name list, select Expense Account Tags.
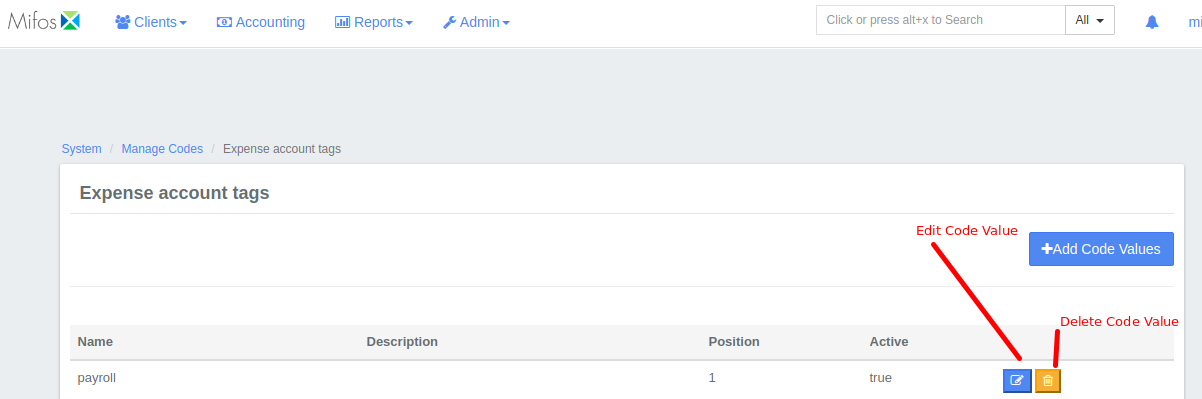
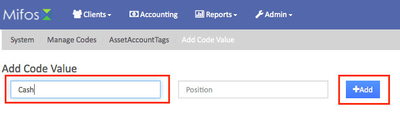
- In the Expense Account Tag dialog, click +Add Code Value.

- In the Code value box, enter a name for your debit Account Tag code value, and then click +Add in blue.

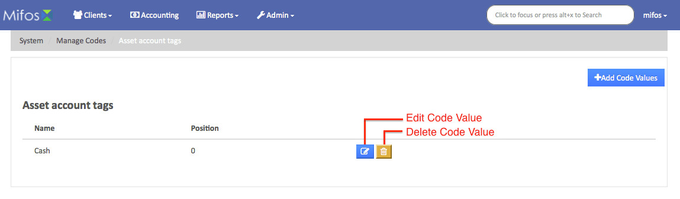
NOTE: To edit the code value, click the Edit Code Value button. To delete the code value, click the Delete Code Value button.
- On the Mifos toolbar, click Admin, and then click System to open the System menu.
Assign Expense Account Tags to accounts you want available for debits using your Accounting Rule.
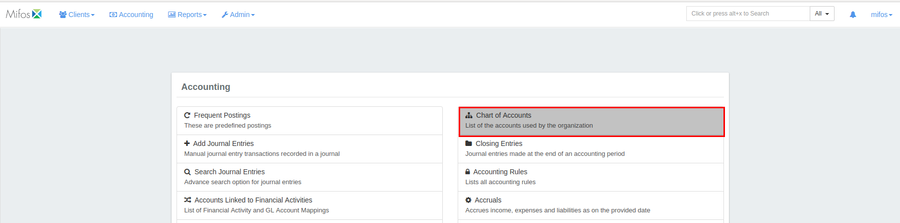
- On the Mifos toolbar, click Accounting to open the Accounting menu.

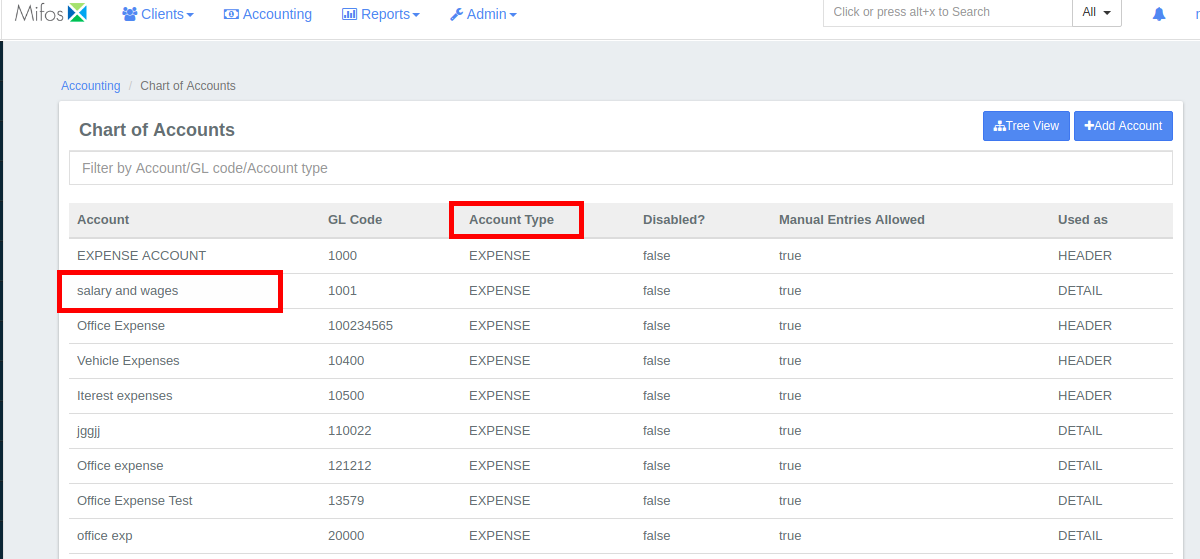
- On the Accounting menu, click Chart of Accounts.
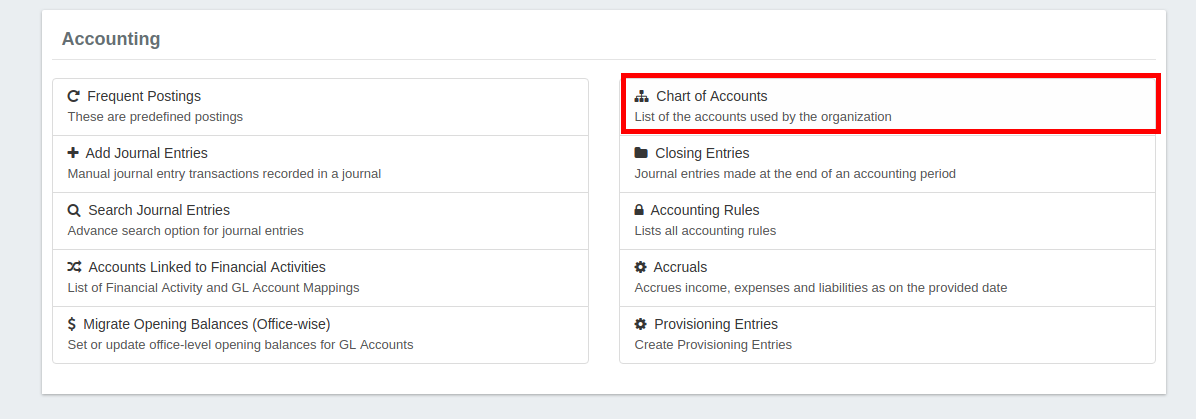
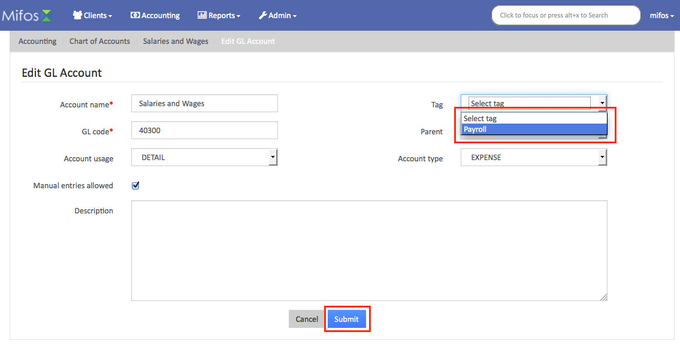
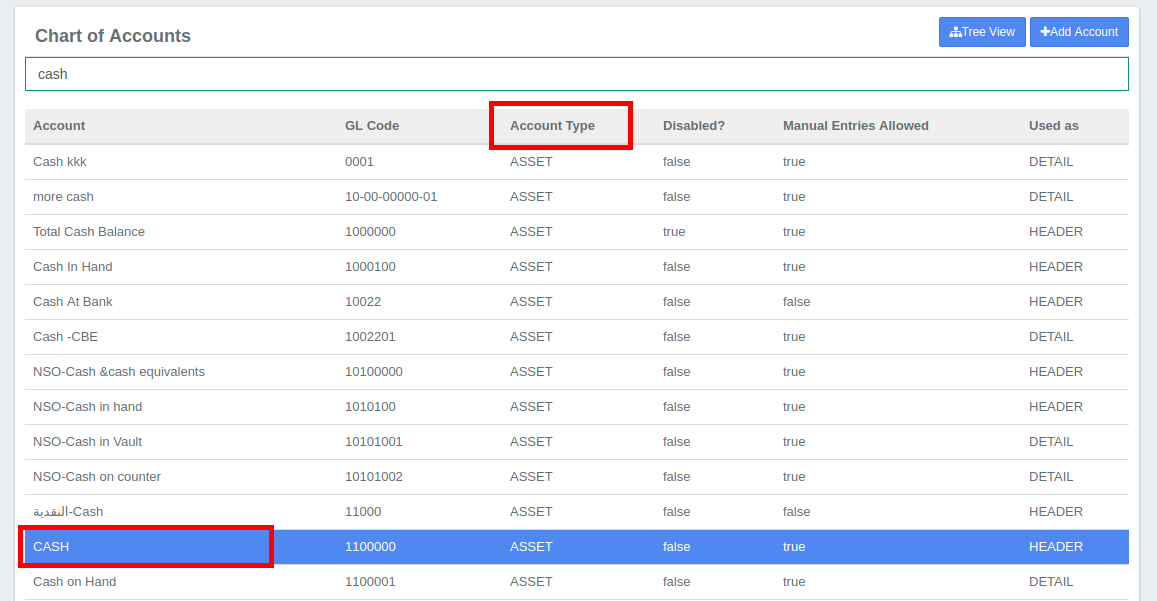
- In the Chart of Accounts list, click the account you want to tag.
NOTE: For debits, select from accounts with an Account Type EXPENSE.
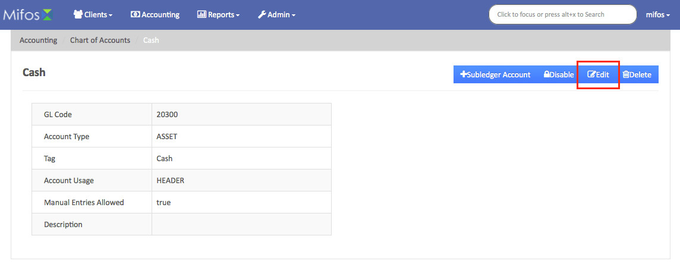
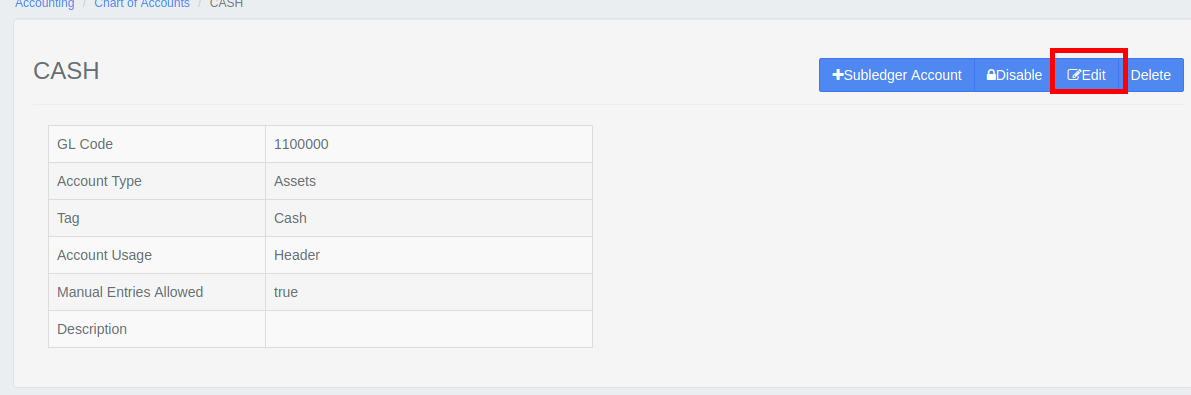
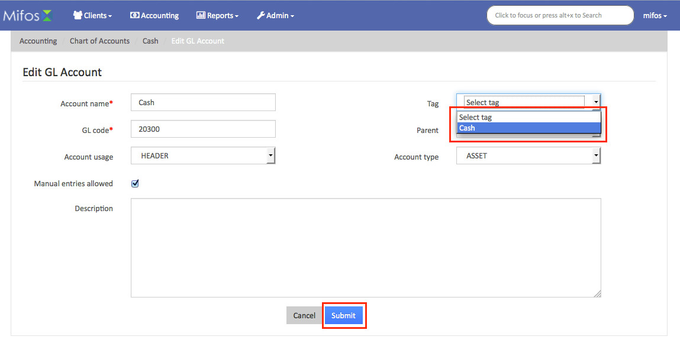
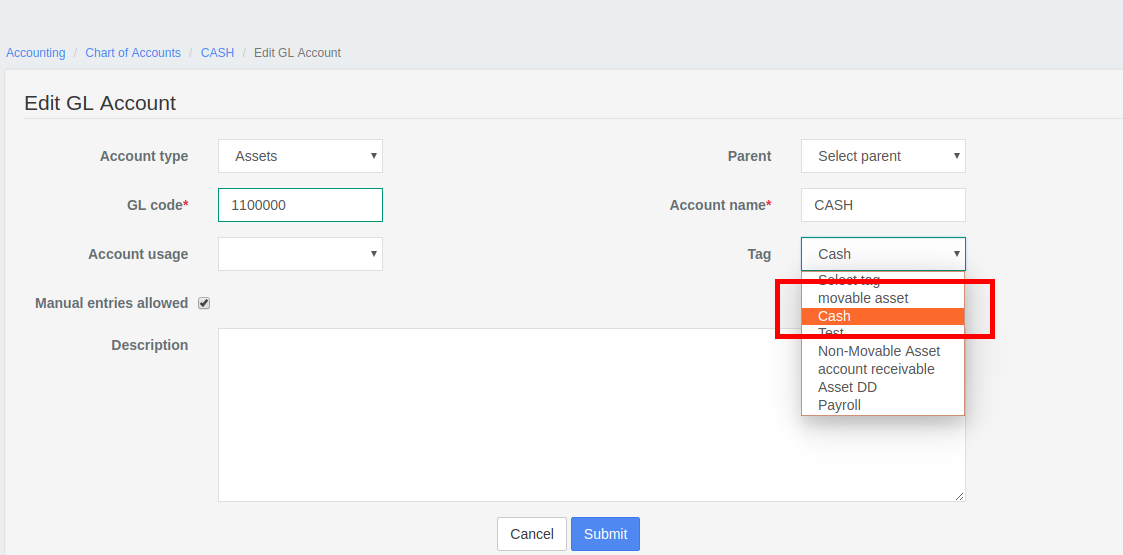
- Click Edit.
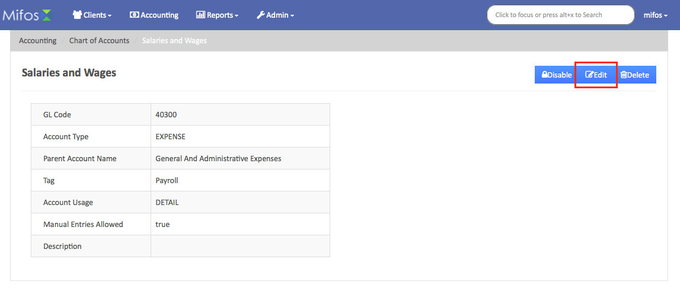
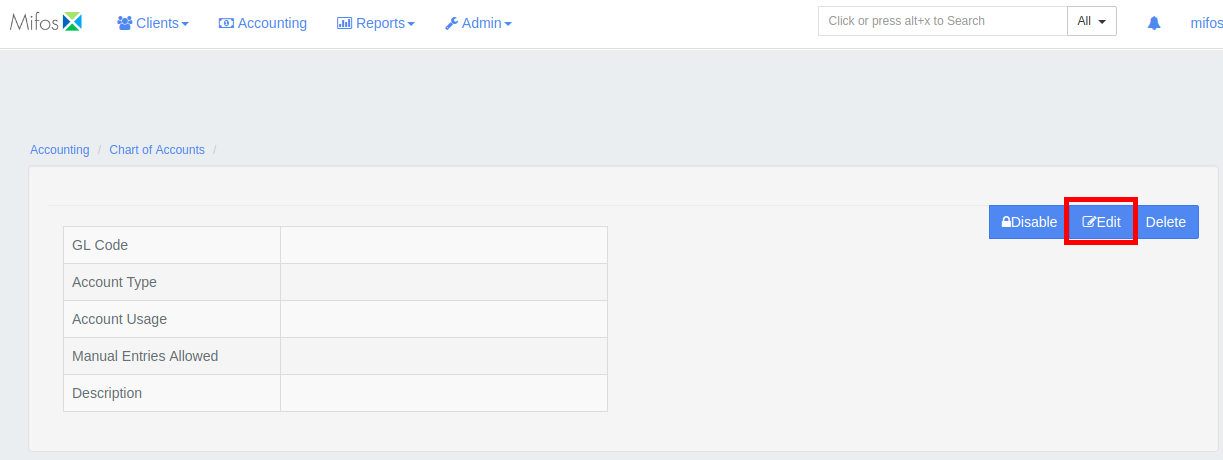
- In the Edit GL Account dialog, in the Tag list, select the expense account tag you want to assign to the account, and then click Submit.
Repeat for each Expense Account you want your Accounting Rule to make available for debits.
- On the Mifos toolbar, click Accounting to open the Accounting menu.
To tag an account to be credited, do the following:
- Create a credit Account Tag.
- On the Mifos toolbar, click Admin, and then click System on the drop down menu to open the System menu.
- On the System menu, click Manage Codes to open the Manage Codes dialog.
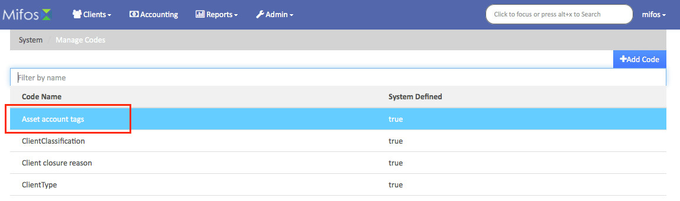
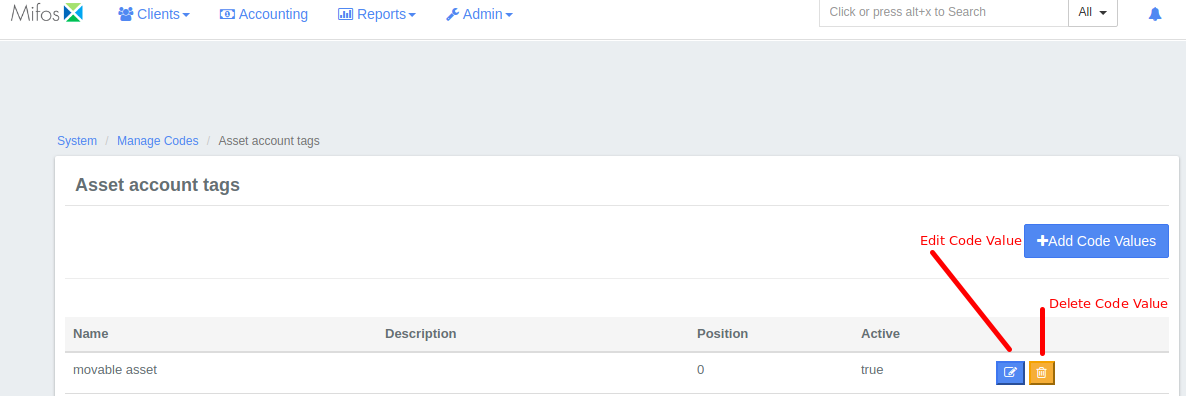
- In Code Name list, select Asset Account Tags.
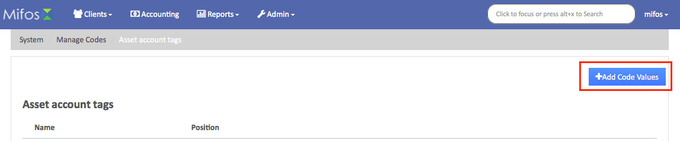
- In the Asset Account Tag dialog, click +Add Code Value at the top right corner of the window
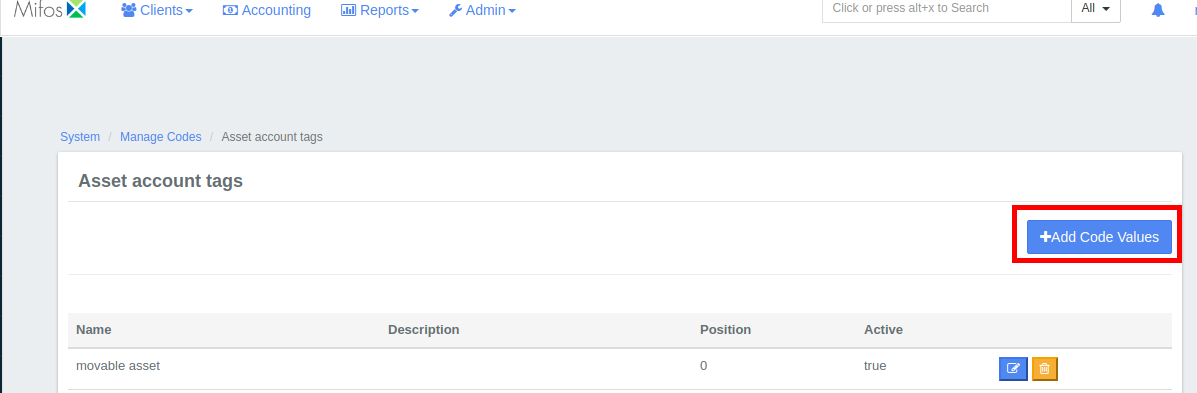
- In the Code value box, enter a name for your debit account tag code value, and then click +Add.
- NOTE: To edit the code value, click the Edit Code Value button. To delete the code value, click the Delete Code Value button.
- On the Mifos toolbar, click Admin, and then click System on the drop down menu to open the System menu.
- Assign Asset Account Tags to accounts you want available for credits using your Accounting Rule
- On the Mifos toolbar, click Accounting to open the Accounting menu.

- On the Accounting menu, click Chart of Accounts.
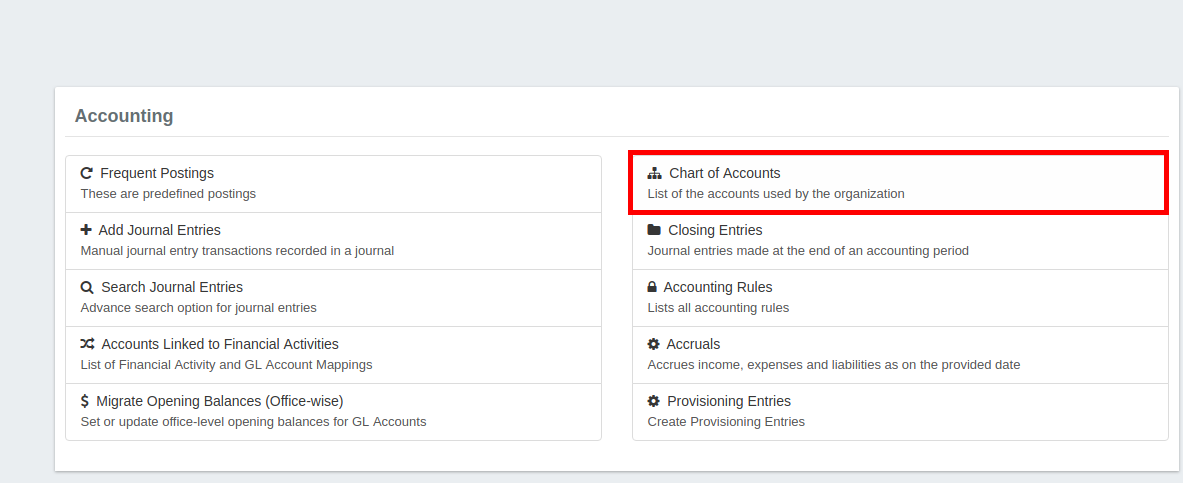
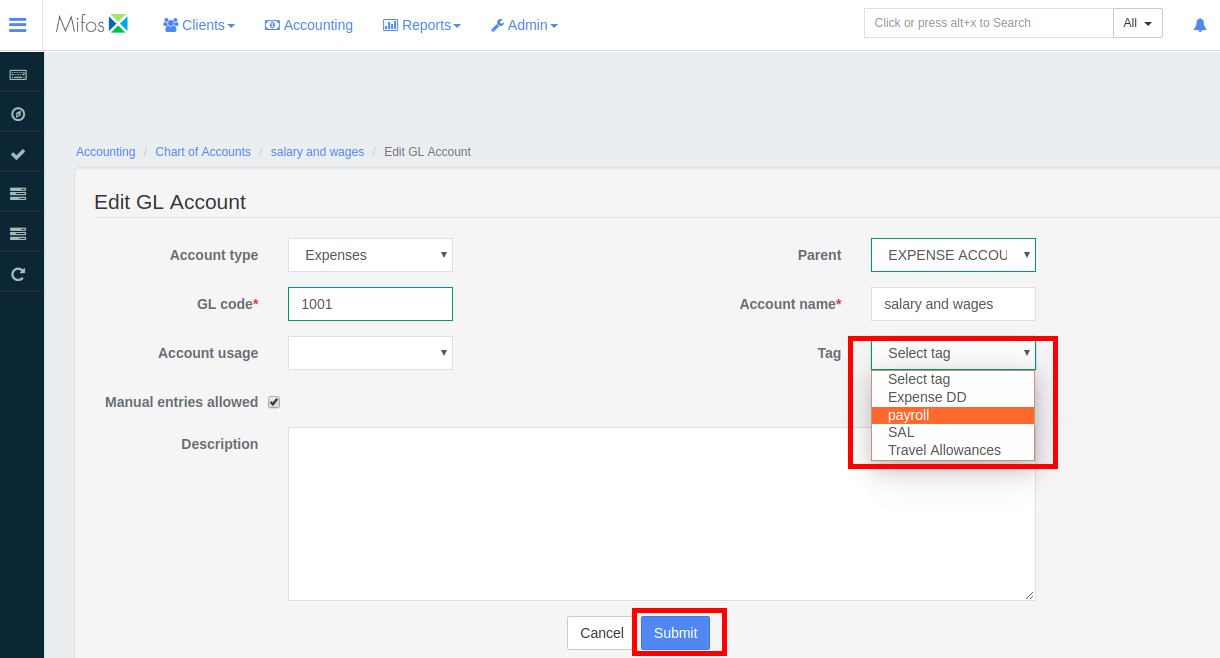
- In the Chart of Accounts list, click the account you want to tag.
NOTE: For credits, select from accounts with an Account Type ASSET.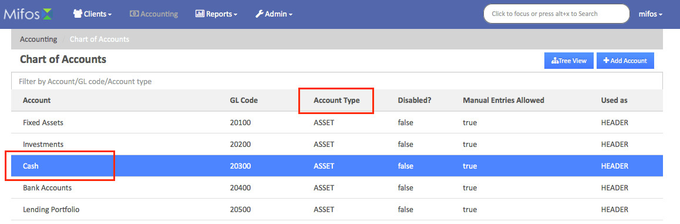
- Click Edit.
- In the Edit GL Account dialog, in the Tag list, select the asset account tag you want to assign to the account , and then click Submit.
Repeat for each Asset Account you want your Accounting Rule to make available for credits.
- On the Mifos toolbar, click Accounting to open the Accounting menu.
Go to Accounting then go to Accounting rules; by doing the following:
- On the Mifos toolbar, click Accounting to open the Accounting menu.
- On the Accounting menu, click Accounting Rules to open the Accounting Rules dialog.
- Click +Add Rule to open the Add Rule dialog.

- In the Accounting rule name box, enter a name for your new accounting rule.
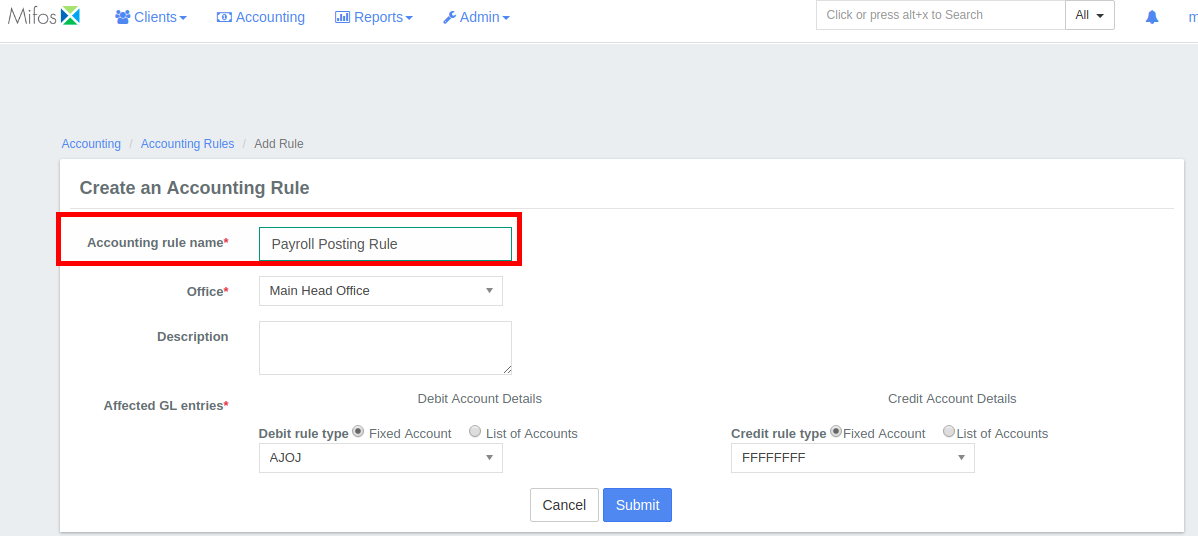
- In the Office list, select an office.
- In the Description box, enter an optional description.
Under Affected GL entries, set the Credit and Debit rules.
- To set the Debit rules:
- Under Debit Account Details, select List of Accounts.

- Select an account from the Available debit tag list, and then click the right arrow (>>) button to add the account to the Selected debit tagtag list.
NOTE: To allow multiple debit entries select Allow multiple debit entries.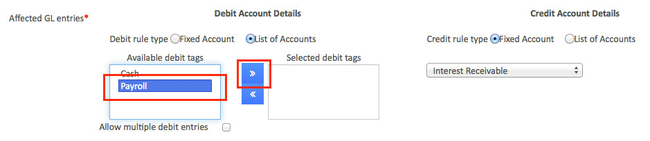
- Under Debit Account Details, select List of Accounts.
- To set the Credit rules:
- Under Credit Account Details, select List of Accounts.
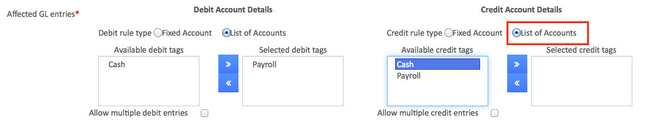
- Select an account from the Available credit tag list, and then click the right arrow (>>) button to add the account to the Selected credit tag list.
NOTE: To allow multiple debit entries select Allow multiple credit entries.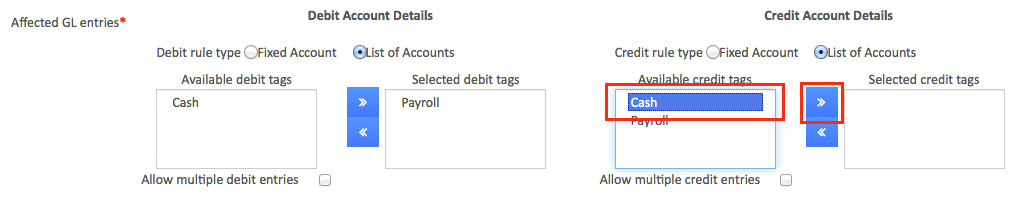
- Under Credit Account Details, select List of Accounts.
- To set the Debit rules:
Click Submit to post your new accounting rule.
View Accounting rule
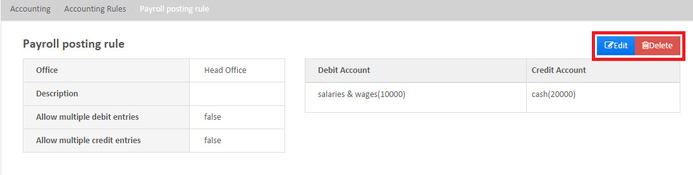
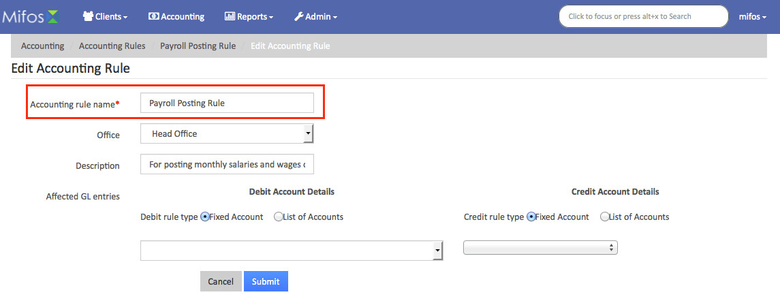
Edit or Delete Accounting rule
To Edit
Click on Edit button in blue, then modify necessary changes and click on Submit.
To Delete
Click on Delete button in red, then click on confirm.
To apply an Accounting Rule:
Go to Frequent Postings
| Warning | ||
|---|---|---|
| ||
| Info |
|---|
Related articles
| Filter by label (Content by label) | ||||||||||||||||||
|---|---|---|---|---|---|---|---|---|---|---|---|---|---|---|---|---|---|---|
|