A key feature Mifos provides is the ability to use the Android Client App offline. Aside from being able to create clients and groups offline, a field officer can track certain clients on the go and make both loan payment and savings account transactions. Once the user is back online, the user can sync all actions that were completed offline.
If you do not know how to login/logout of the app, please see the Login/Logout page.
| Panel | ||||||||
|---|---|---|---|---|---|---|---|---|
On this page:
|
How To Toggle Offline Mode
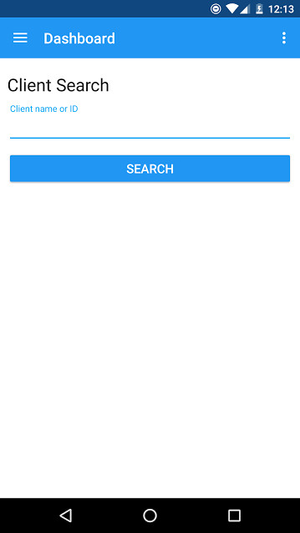
When you first login to the app, you will be taken to the client search page, which looks like the following screen:
In order to turn Offline Mode on or off, do the following:
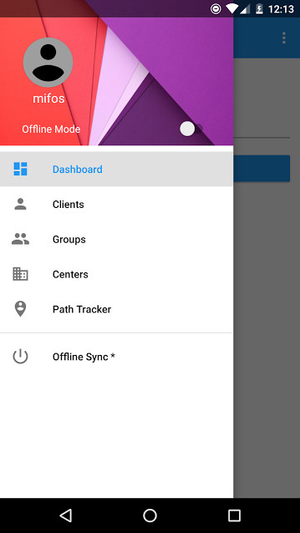
- Tap the menu (three lines) in the top left corner. This will expand the user dashboard, which should look like the following screen:
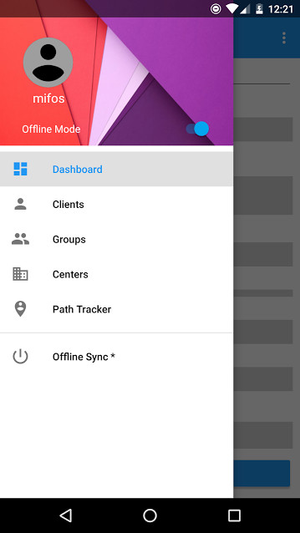
- Below the user icon and name, you will see the Offline Mode option and the toggle next to it. Tap that to turn it on. The toggle will slide and turn blue. It should look like the following screen.
How To Navigate to Offline Sync
- With Offline Mode enabled, Ttp Tap the menu (three lines) in the top left corner. This will expand the user dashboard, which should look like the following screen:
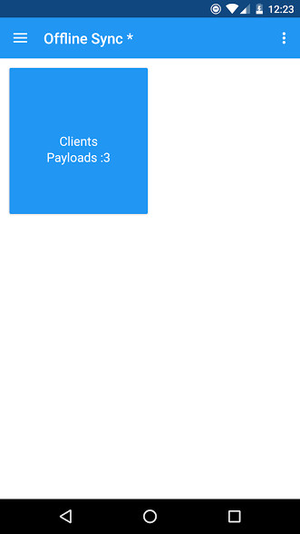
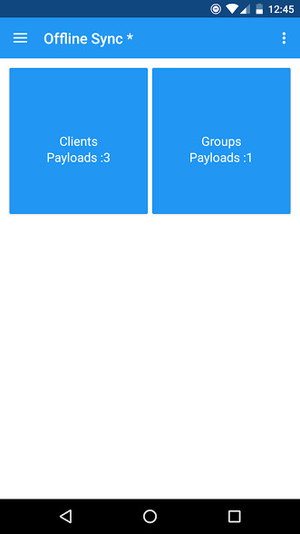
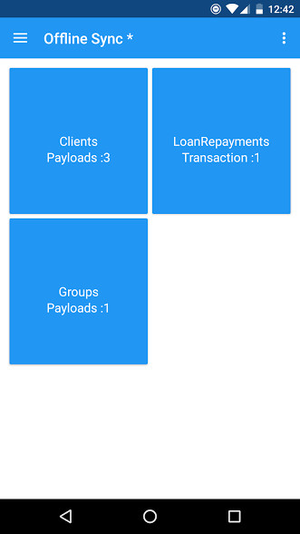
- Tap Offline Sync at the bottom of the user dashboard. A sample screen is shown below:
How To Create a New Client Offline and Sync
Once you are back at the client search screen, do the following:
- Tap the menu (three dots) in the upper right hand corner. It should look the following screen:
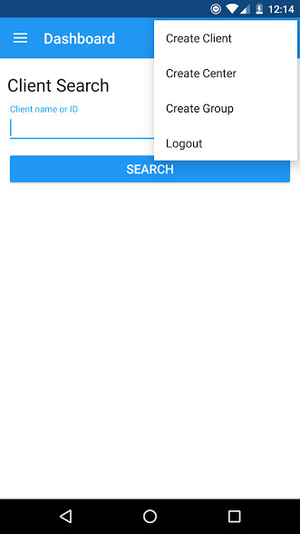
- Tap Create Client. It should look the following screen:
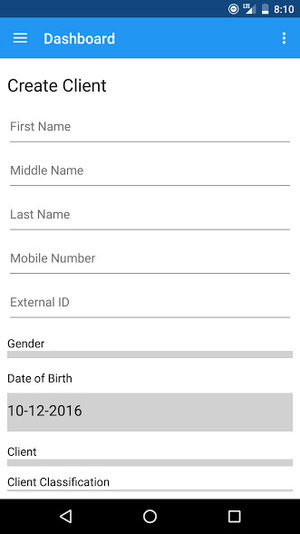
Enter the client information. It should like like the following screen:
Field Name (attribute) Description Example Validations (if applicable) First Name The First Name of the Client John This should not be nullNULL. Middle Name The Middle Name of the Client Apple This is optional. Last Name The Last Name of a the Client Doe This should not be nullNULL. Mobile The Mobile Number of a the Client 1234567890 This should not be nullNULL. External ID The External ID of a the Client 123456 This should not be nullNULL. Gender The Gender of a the Client Male / Female / Unspecified This should not be nullNULL. Date of Birth The Date of Birth of the Client MM-DD-YYYY This should not be nullNULL. Client Type of Client Individual / Business This should not be nullNULL. Office The Office of the Client Head Office This should not be nullNULL. Staff The Staff of the Client DOE, JANE This should not be nullNULL. 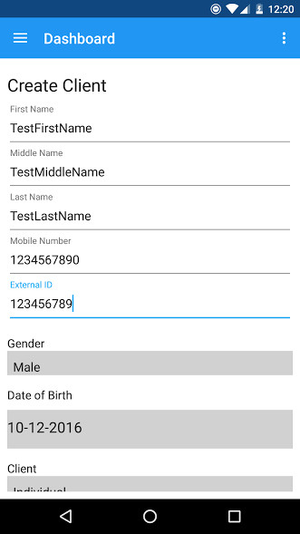
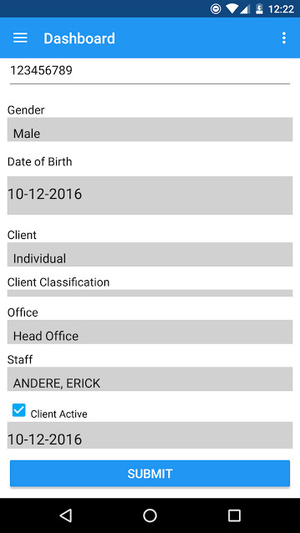
- Scroll down to the bottom. Tap Client Active. It should look like the following screen:
- Enable Offline Mode. (see How To Toggle Offline Mode)
- Go to the Offline Sync screen. (see How To Navigate to Offline Sync)
- Tap the Client Payloads option. It should look like the following screen.:
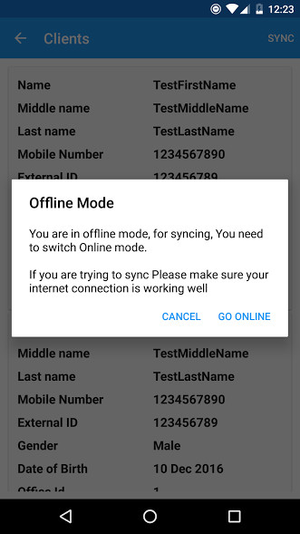
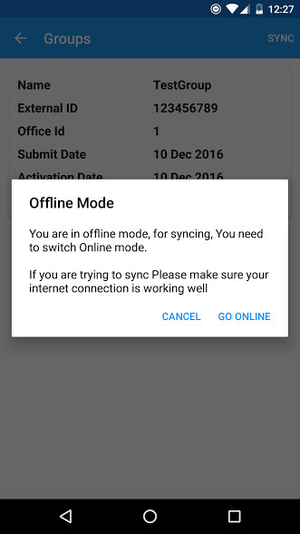
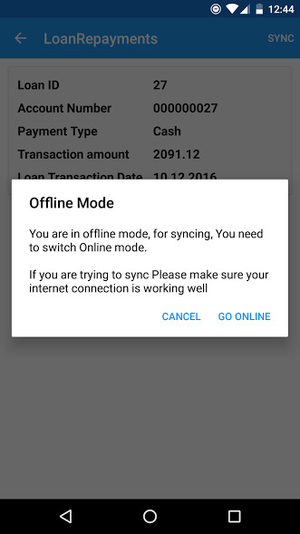
- Tap the Sync in the upper right-hand corner. Then tap Go Online. It should look like the following screen:
- It will sync automatically.
How To Create a New Group Offline and Sync
Once you are back at the client search screen, do the following:
- Tap the menu (three dots) in the upper right hand corner. It should look the following screen:
- Tap Create Group. It should look like the following screen:
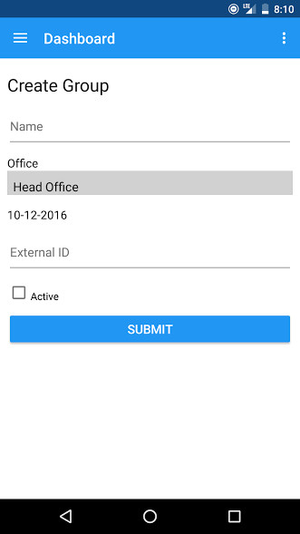
Enter the group information. It should looke like like the following screen:
Field Name (attribute) Description Example Validations (if applicable) Group Name The Name of the Group Mifos This should not be nullNULL. Office The Office of the Group Head Office This should not be nullNULL. External ID The External ID of the Group 123456 This should not be nullNULL. 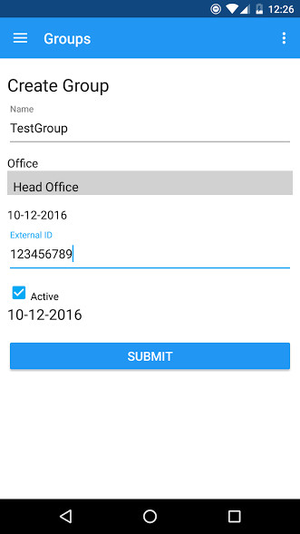
- Scroll down to the bottom. Tap Group Active. (Shown above)
- Enable Offline Mode. (see How To Toggle Offline Mode)
- Go to the Offline Sync screen. (see How To Navigate to Offline Sync)
- Tap the Group Payloads option. It should look like the following screen.
- Tap the Sync in the upper right-hand corner. Then tap Go Online. It should look like the following screen:
- It will sync automatically.
Field Officer: How To Track Clients
Once you are back at the client search screen, do the following:
- Tap the menu (three lines) in the top left-hand corner. This will expand the user dashboard, which should look like the following screen:
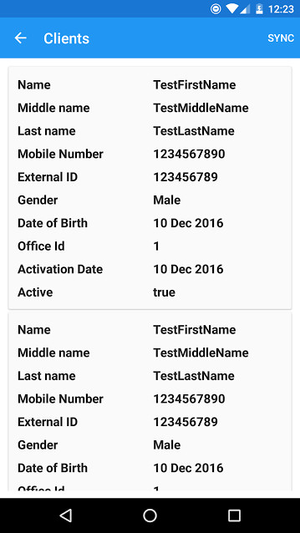
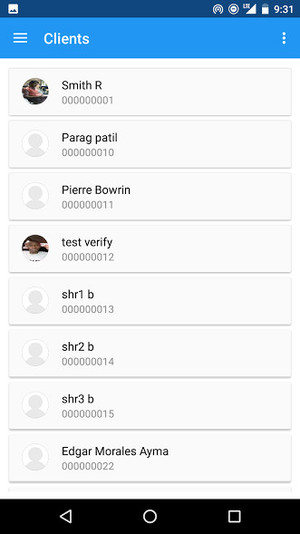
- Tap on Clients in the menu. This will bring up a list of clients (200 by default), which should look like the following screen:
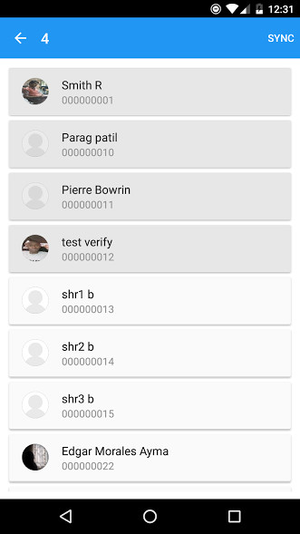
- Select a user to track by tapping and holding the user until it turns gray.
- If needed, select more desired users to track by tapping them. Multiple users selected should look like the following screen:
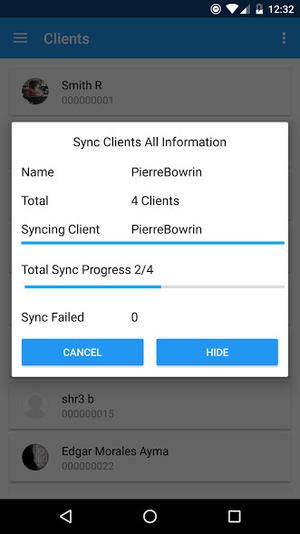
- Once all desired users to track are selected, sync them by tapping the Sync in the top right-hand corner. A sample sync progress dialog is shown below:
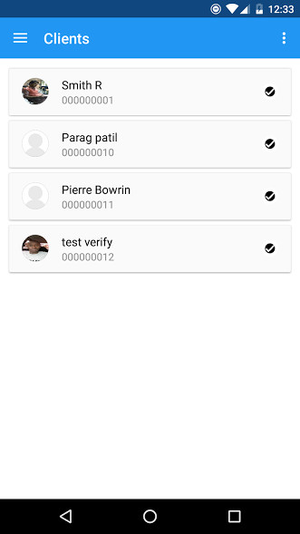
- Once the sync is finished, you can enable offline mode and view the clients by repeating steps 1-2. Synced clients will display with a check next to them. A sample offline client list is shown below:
- Tap on any client to view his or her details.
How To Make a Loan Payment Transaction Offline and Sync
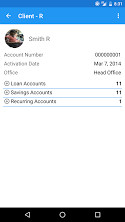
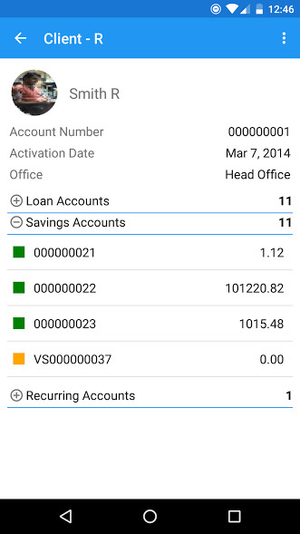
- View a user. A sample user is shown below:
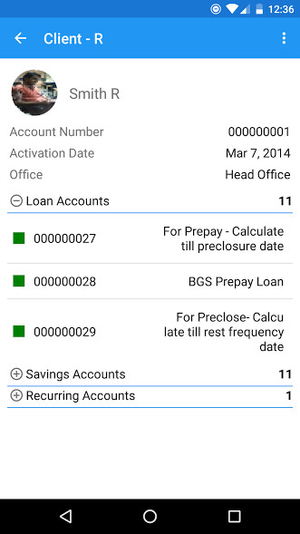
- Tap and expand the Loan Accounts for that user. It should look like the following:
- Tap any Loan Account. It should look like the following:
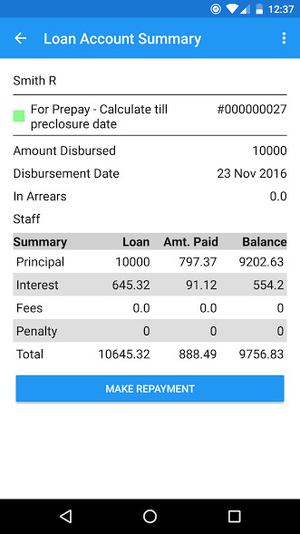
- Tap Make Repayment. It will take you to the following screen:
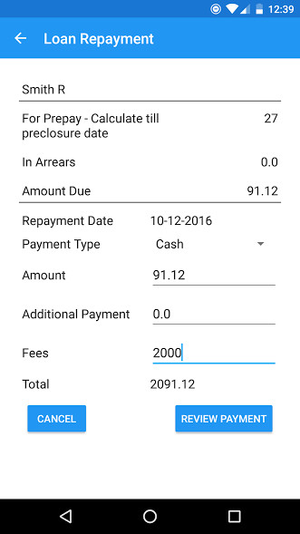
Select all options. (See above screen for an example)
Field Name (attribute) Description Example Validations (if applicable) Amount The Amount of the loan to pay back 100.00 This should not be nullNULL. Additional Payment The Additional amount of the loan to pay back 50.00 This is optional. Fees The Fees of the loan 25.00 This should not be nullNULL. - Tap Review Payment.
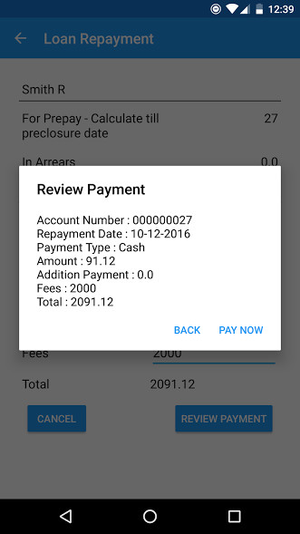
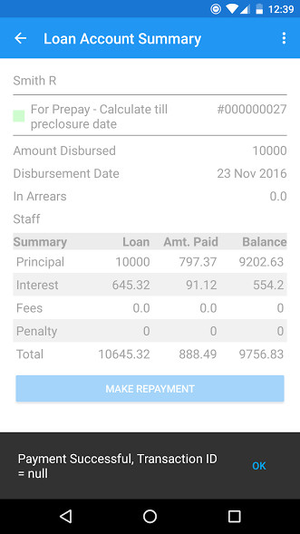
- Tap Pay Now. A message indicating the transaction has been saved locally and will be shown. It should look like the following screen:
- Navigate to Offline Sync.
- The LoanRepaymentTransaction Loan Repayment Transaction should show. A sample screen is shown below:
- Tap the Sync in the upper right-hand corner. Then tap Go Online. It should look like the following screen:
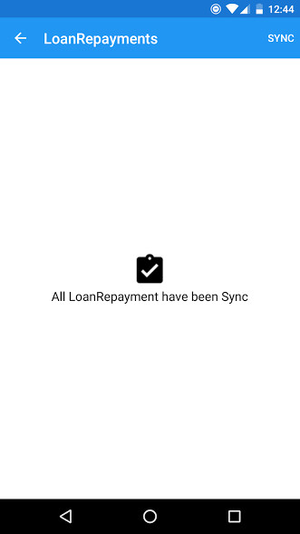
- If it syncs correctly, it will display the following screen with a message indicating there is no longer anything to sync.
How To Make a Savings Account Transaction Offline and Sync
- View a user. A sample user is shown below:
- Tap and expand the Savings Accounts for that user. It should look like the following:
- Tap any Savings Account. It should look like the following:
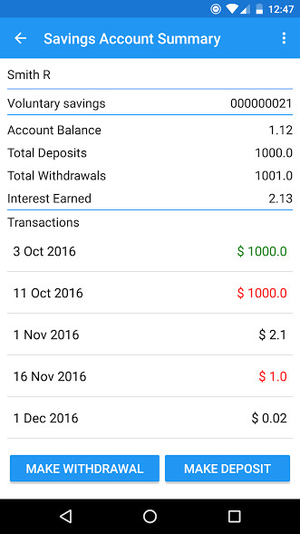
- Tap Make Deposit or Make Withdrawal. (Make Deposit will be used to demonstrate.) It will take you to the following screen:
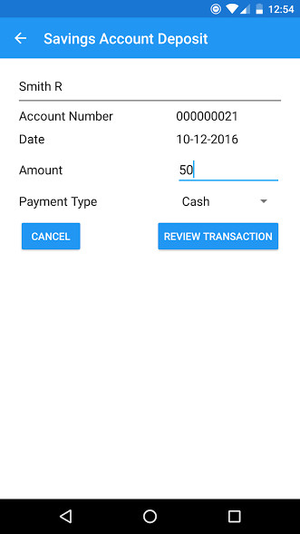
Select all options. (See above screen for an example)
Field Name (attribute) Description Example Validations (if applicable) Amount The Amount to withdraw or deposit from the account 100.00 This should not be nullNULL. Payment Type The Payment Type used to withdraw or deposit the money Cash This should not be nullNULL. - Tap Process Transaction. A message indicating the transaction has been saved locally will be shown.
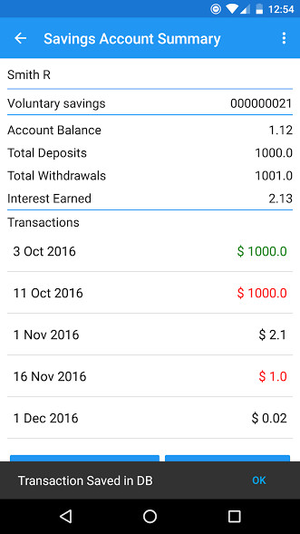
- Navigate to Offline Sync.
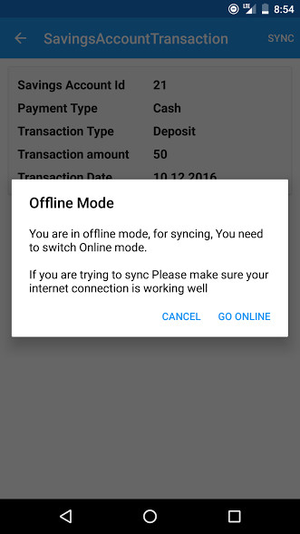
- The Savings Account Transaction should show. It should look like the following screen:
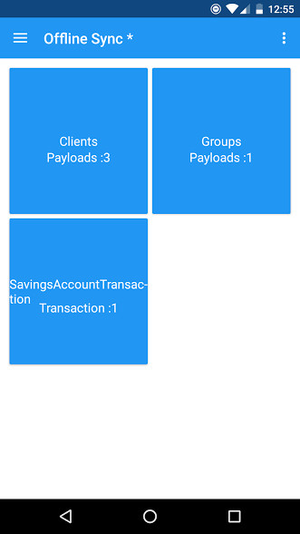
- Tap the Sync in the upper right-hand corner. Then tap Go Online. It should look like the following screen:
- If it syncs correctly, it will display the following screen with a message indicating there is no longer anything to sync.

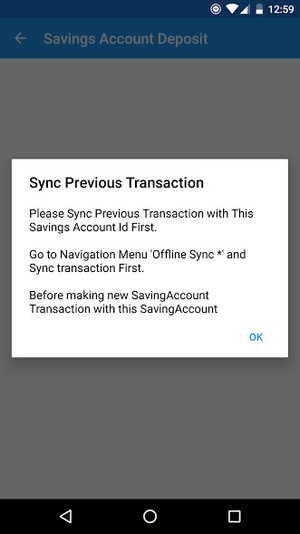
- (WARNING): If you try to make multiple withdrawals/deposits in same savings account, you will receive an error, which looks like the following screen:
- (NOTE): However, if you make a withdrawal/deposit in different accounts, they will sync successfully.