Create a Client
- Click on "Clients" tab on top left, next to Mifos icon on home page. It opens the news page containing list of all the clients.
- There is a "+Create Client" tab on top right corner, Click on it to see the following page.
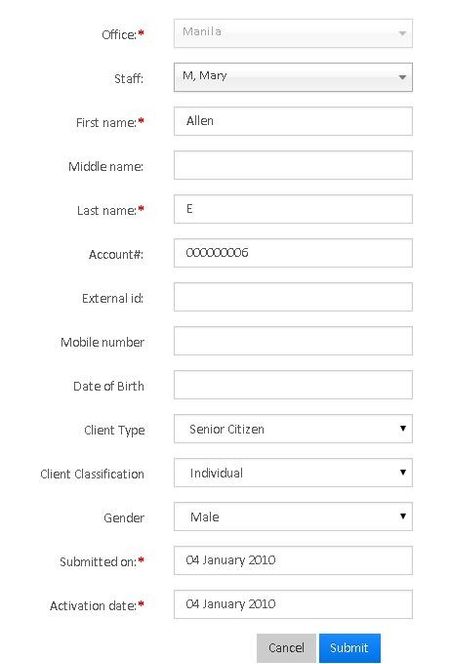
Field Name (attribute) Description Office Select the office to which Client belongs First Name Provide Client's First Name (Mandatory Field) Last Name Provide Client's Last Name (Mandatory Field) Mobile Number Enter the Client's Mobile Number Date of Birth Enter the Client's Date of Birth using Date Picker Client Type From the drop down, select the client type. This may be individual, business, child, senior citizen. Your organization creates Client Type during Initial Configuration. External Id Give the unique ID which is useful for searching options and whenever client is transferred from one branch to another. Client Classification here you can select indiviidual, married, widow. etc. Staff Assign a staff for the client based on the office Gender Use the drop-down menu to select the gender of client. Active Checking it , will enable one more field, Activation Date. If Client is already activated please provide activation date. Open Saving Account Check this, to create the savings account for the client while client is being created. After checking this, one more field will appear, "select saving account", in order to select the savings product.
Activate a client
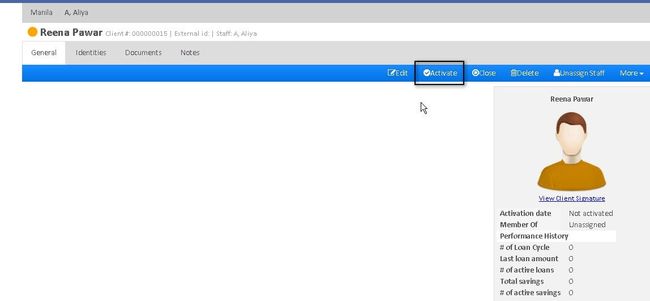
If Client is not activated, while creation then follow these steps:
- In the list of Clients, select the client and click on Activate button as shown in the image.
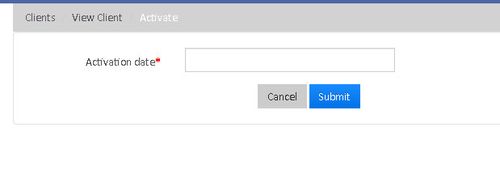
2. Refer the following image and enter the activation date and click on submit button to activate the client.
Edit an existing client
In order to edit the Client,
- Click on Client to view the client
Then Click on Edit button to see the following window:
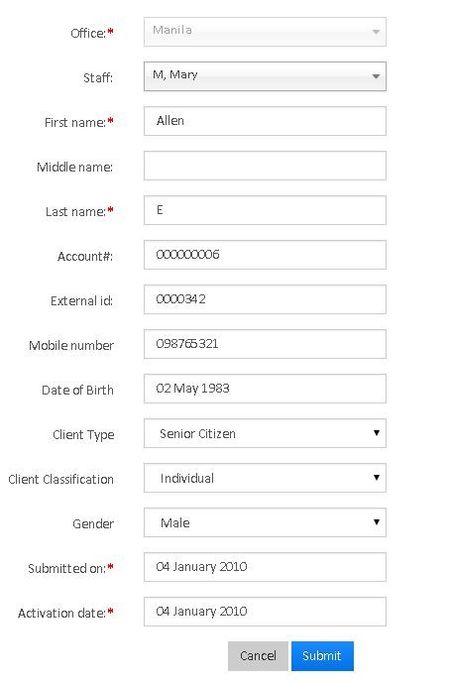
3) Enter the details and click on Submit button.
Assign staff to a client
To assign a staff for the client,
- Click on Client to view the client
- Then click on "Assign Staff" tab.
Select the staff from drop-down list
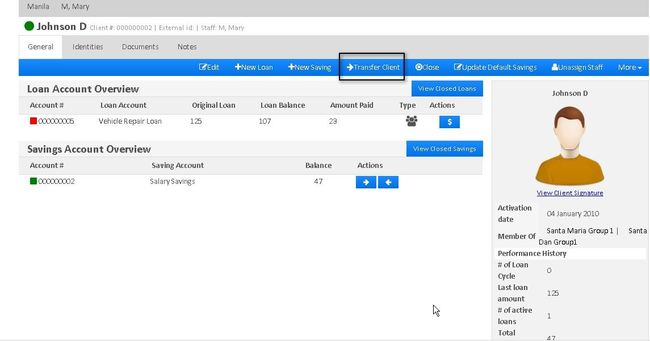
Transfer a client
1. Open the list of clients by clicking on "Clients" tab.
2. Click on the client to view his profile
3. Click on the "Transfer Client" tab
4. Select the office to where Client is transferred and then click on Submit button.

5. A new window will open where you have to click on "Accept Transfer" tab to finish the client transfer.

Close a client
Follow these steps in order to Close a Client
- Go to the Client's profile.
- Click on "Close" tab
- A new window will open. Provide "Closure Date" and "Closure Reason".
- Click on "Submit" button to close the Client.
Re-activate client
Follow these steps in order to "Re-activate" a Client
- Go to the Client's profile
- Click on "Re-activate" button.
| Info |
|---|
Related articles
| Filter by label (Content by label) | ||||||||||||||||||
|---|---|---|---|---|---|---|---|---|---|---|---|---|---|---|---|---|---|---|
|