To make a repayment using the collection sheet (and productive collection sheet)
The collection sheet is a way to create bulk transactions for repayment of loans(For more information, please Click Here). You can use collection sheet in two ways.
- Using it as Productive Collection Sheet where you have to provide three parameters, namely Office, Meeting Date and Staff & later you can chose respective centers before submission.
- Using it as just 'Collection Sheet' where you can provide Office, Meeting Date, Staff and Center. Providing 'Group Name' is optional here.
Using Productive Collection Sheet:
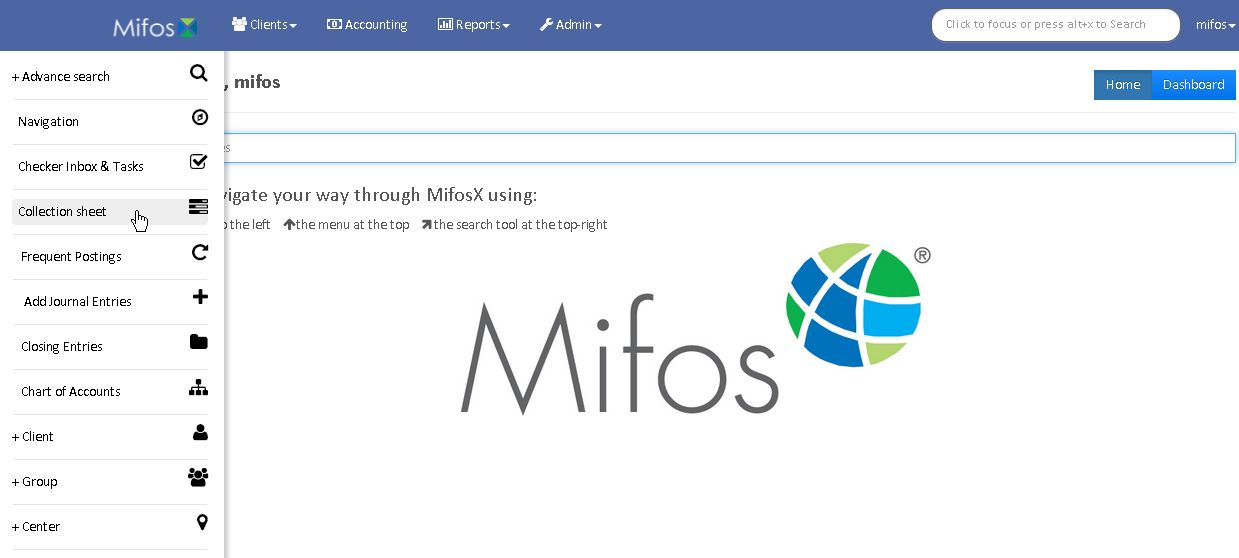
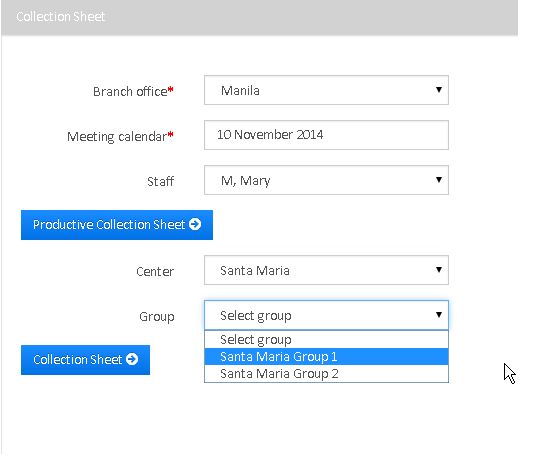
- Go to the left panel and click on 'Collection Sheet'.
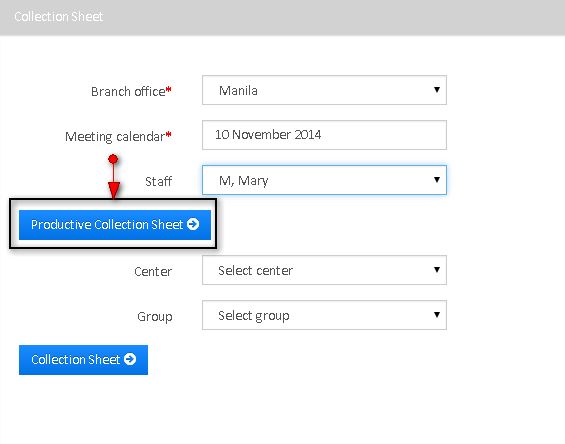
- The following window appears and provide office name, meeting date and staff.
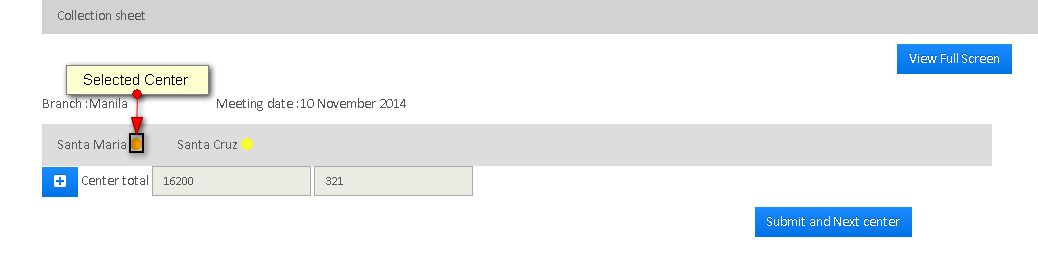
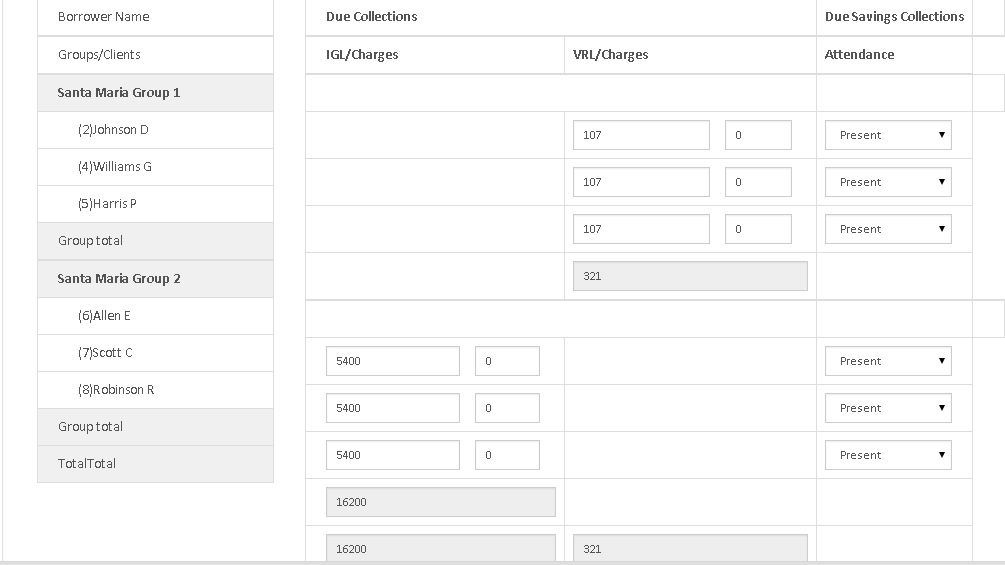
- Click on 'Productive Collection Sheet' to see the following window where you can select the center. (The selected center is shown with Amber color). It also shows Branch Office Name, Meeting Date and center total collection for the given meeting date in terms of loan product. Here, 16200 is the collection for one loan product and 321 is the collection for other loan product.
- Click on
 button to see the details of the collection group-wise and client-wise for the selected center as shown below or you can simply click on 'Submit and Next center' button.
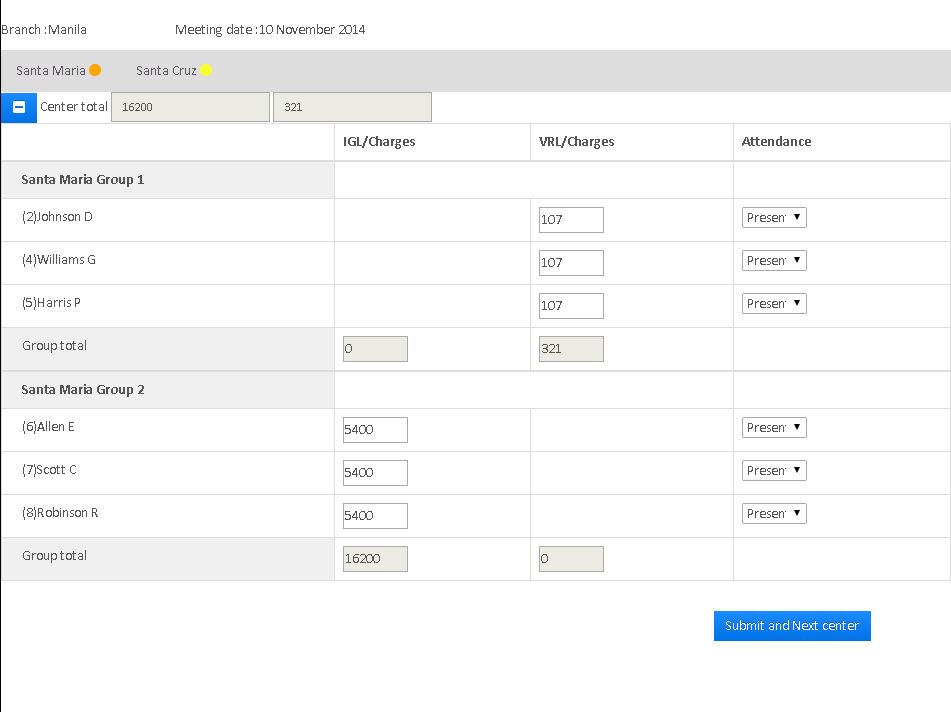
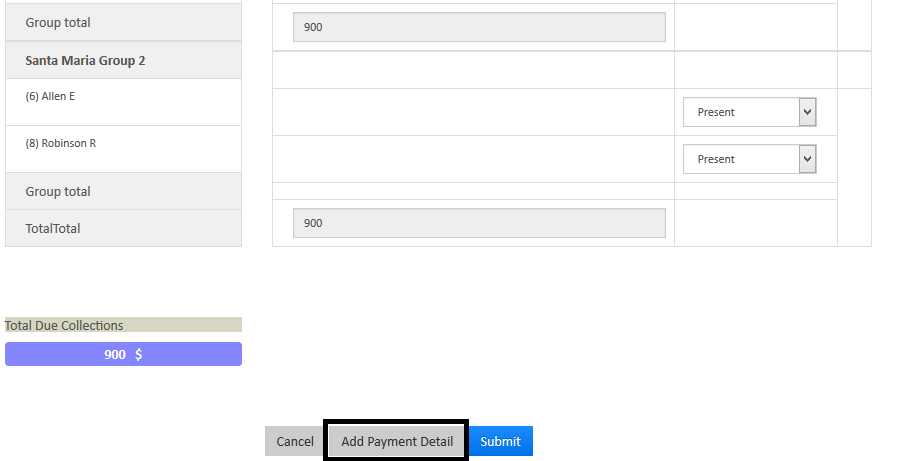
- As you can see, there are two groups and each group with their three clients. IGL is the loan product(short name) for the group 'Santa Maria Group 2' and VRL is the loan product for the group 'Santa Maria Group 1'. You can see 'Due' for each client as well as the due for each group and you can also see Attendance where using drop-down menu, you can select whether the client is present, Absent, Leave, Late and Approved.
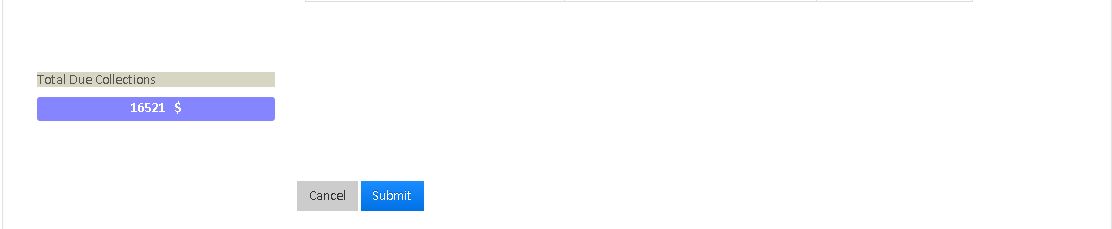
- Once you verify all the details are correct, you just click on 'Submit' button.
Using Collection Sheet:
- Go to the left panel and click on 'Collection Sheet' to see the following window.
- Provide all the details (Selecting Group is optional, if you select the group, the collection sheet for that group is shown only, otherwise the collection sheet for all the groups for the selected center will be shown) and click on 'Collection Sheet' button to see the following window.
- Just like previous one, verify the details and click on 'Submit' button. If everything goes fine, You will get the message "Collection Sheet Saved Successfully".
Capturing payment details for collection sheet:
Step 1) Define payment types in Admin >> Organization >> Payment type, as shown in the below screen shot.
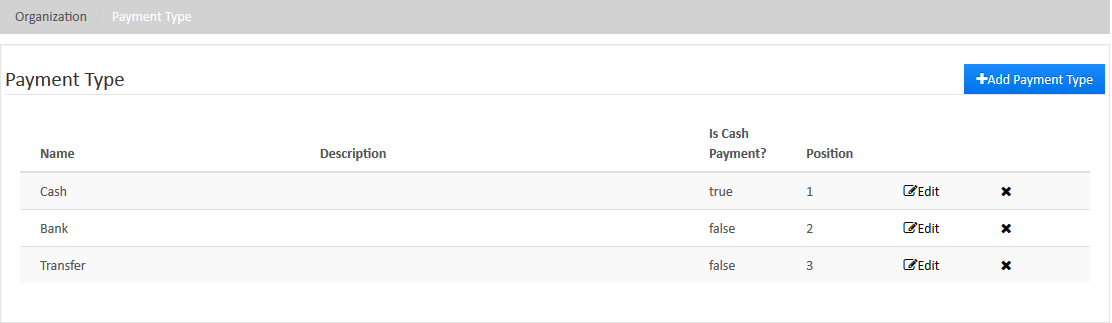

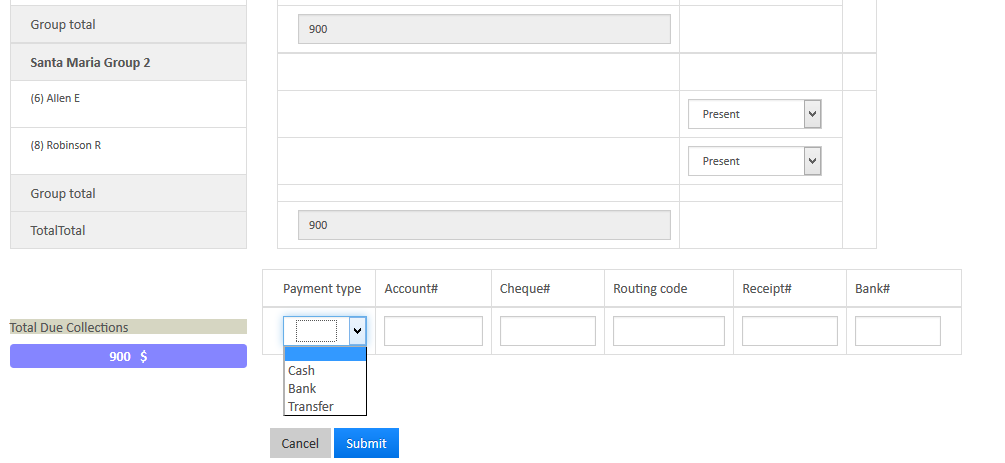
Note: As of now for Productive collection sheet "Add payment type" is not available in present version.
To make a repayment using cash or similar payment type
Locate the loan account by navigating to it through the client who holds the loan account.
- Select Make Repayment from the action bar.
- Accept the default Transaction date or select a different date from the calendar pop-up.
- Accept the default Transaction amount or type a different repayment amount.
- Select Payment type from the list.
- Click + to add payment details (optional).
- Account#
- Check#
- Routing code
- Receipt#
- Bank#
- Type relevant notes.
- Click Submit.
The loan account repayment will be recorded and the repayment schedule and loan summary will be updated with the payment information.
To make loan repayments from a saving account (one time transfer)
Locate the saving account from which the loan repayment will be made (the originating account).
| Note |
|---|
The saving account from which the transfer originates need not belong to the same client that the loan account belongs to. The client who owns the originating account must request/authorize the transfer. The originating and destination accounts must be in the same currency. |
- Click the saving account name in the list to view the saving account information.
- Click More and Transfer Funds from the action bar.
- Select the group and account (the destination loan account to be repaid) to transfer funds to:
- Office: Select the office where the destination loan account is located.
- Client: Select the client who holds the destination loan account.
- Account type: Select the loan product type upon which the destination loan account is based.
- Account: Select the destination loan account.
- Amount: Type the transfer amount.
- Select the Transaction date from the calendar pop-up.
- Type any notes in Description
- Click Submit.
To make loan repayments from a saving account (standing instruction transfer)
Standing instructions can be set up to transfer funds from a saving account to a loan account. The transfer will take place based on the scheduled defined in the standing instruction. For a loan repayment, the standing instruction schedule can be set to match the loan repayment schedule.
| Note |
|---|
The saving account from which the transfer originates need not belong to the same client that the loan account belongs to. The client who owns the originating account must request/authorize the standing instruction. The originating and destination accounts must be in the same currency. |
| Note |
|---|
Need to describe what happens when a standing instruction cannot be completed because of a shortage of funds in the originating account. There seems to be an outstanding issue in JIRA regarding re-attempts to satisfy the standing instruction. |
Locate the client or group whose savings account will be the origination of the funds for the transfer.
- Click More and Create standing instructions to create new standing instructions.
- Complete the fields on the Create Standing Instruction form. See Standing Instruction form fields.
- Click Submit.
The standing instruction will be created and will be in effect from the Validity from date until the To date, inclusive; or until the standing instruction is Disabled.
| Warning | ||
|---|---|---|
| ||
|
| Info |
|---|
Related articles
| Filter by label (Content by label) | ||||||||||||||||||
|---|---|---|---|---|---|---|---|---|---|---|---|---|---|---|---|---|---|---|
|