With each release of the Mifos X platform, we update and publish Mifos X as a publicly available AMI. Use AWS Wizard to launch the latest AMI found at this link: https://github.com/openMF/mifosx/blob/develop/INSTALL.md#2-amazon-public-ami and then follow these instructions to complete your setup.
Installation of Mifos Platform using Amazon Public AMI

Deploying Mifos X in the Cloud is easy with Amazon Web Services and the public Amazon Machine Image we make available with every release. Follow these steps to deploy Mifos X on your own EC2 instance in the cloud.
| Panel | ||||||||
|---|---|---|---|---|---|---|---|---|
On this page:
|
Step 1
-
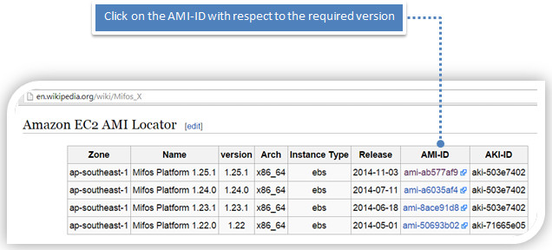
Getting AMI-ID
Using available AMI-ID from Mifos X Wikipedia: http://en.wikipedia.org/wiki/Mifos_Xwith respect to the available versions.
-
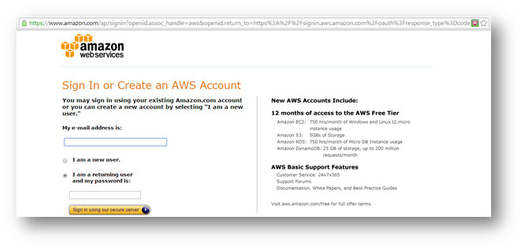
Login to Amazon AWS
Provide your Amazon AWS credentials and login. If you are a new user, create the user first, go back to the Mifos X Wikipedia page & then click on AMI-ID.
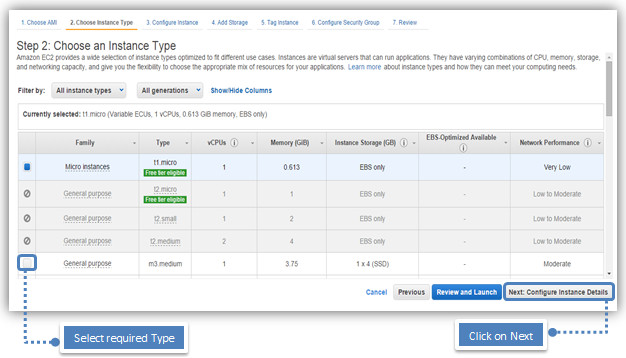
Step 2
You are automatically brought to Step 2 on the wizard, by default a 'Micro instances’ is selected, you may need to select a 'General Purpose' family with type ‘m1.small’ as the t1.micro's memory is right on the edge of what’s needed to support MySQL, Tomcat 7 + Mifos Platform.
Steps 3 to 5
Use default settings for steps 3 to 5 until you reach step 6 configure security group.
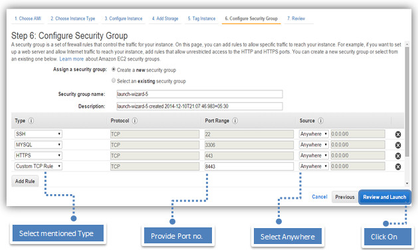
Steps 6
If your first time using AWS you should use –Create a new security group option and add the following 'rules' to the security group:
SSH (PORT 22), MYSQL (3306), HTTPS (443), Custom TCP Rule (8443) all with a 'Source' value of 'Anywhere'
Steps 7
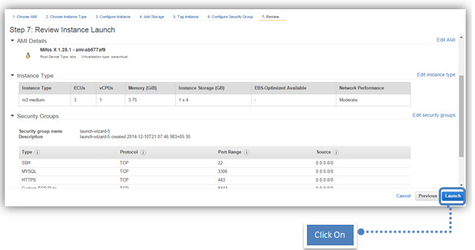
-
Creating a new key pair
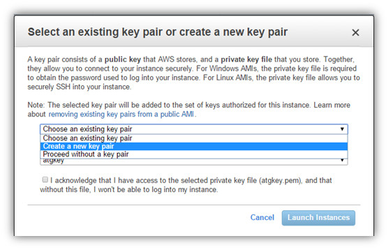
-
Providing key pair name & Downloading key pair
You will be asked to use a 'Key pair' which you will need to SSH onto the new instance, if this is your first time create a new key pair, be sure to download it and store in place as you will need it later, otherwise use an existing key pair.

Then Click on Launch Instances.
-
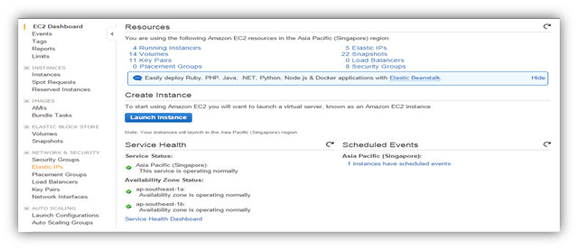
Elastic IPs
>> Click on Elastic IPs
-
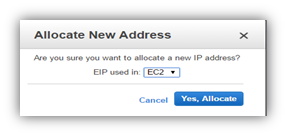
Allocating New IP Address
>> Click on Allocate New Address

>> Click on Yes, Allocate
-
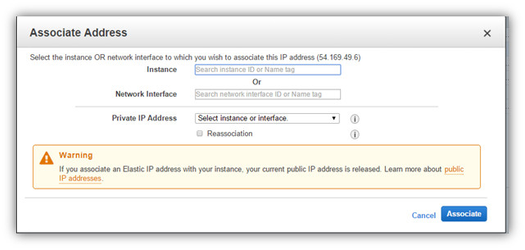
Associating Address
>> Click on Associate Address

-
Selecting the instance & Associating Address
>> Provide Instance Id & Click on Associate
-
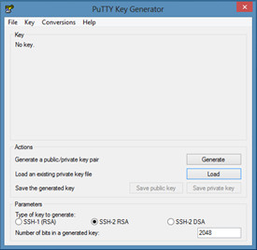
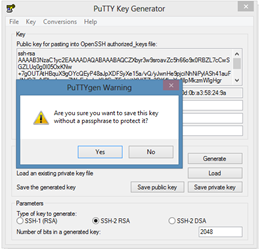
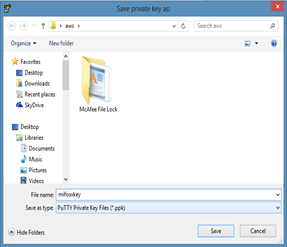
Using Putty key Generator
Using Putty key Generator to generate private key. Follow the flow as mentioned in the below images.
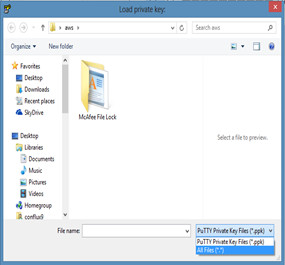
1) Click on Load to select Downloaded mifosxkey.pem 2) Select All Files to display .pem (Public) key.
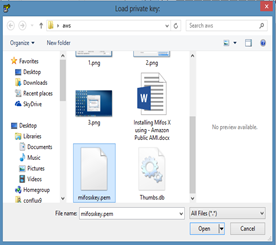
3) Select mifoskey.pem & open 4) Click on OK button
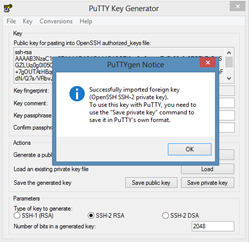
5) Click on Yes button to save 6) Provide destination path & name then
Click on save to save .ppk (Private) key
-
Using Putty
Use putty to run & verify, that the server & key are working using .ppk (Private) key.
When the instance starts, the following should be available at:
- Platform application should be available @ https://[public DNS]:8443/mifosng-provider/api/v1/offices?tenantIdentifier=default&pretty=true
- Community app should be available @ https://[public DNS]:8443/community-app
- API docs should be available @ https://[public DNS]:8443/api-docs/apiLive.htm
Reference link: https://github.com/openMF/mifosx/blob/master/INSTALL.md

| Filter by label (Content by label) | ||||||||||||||||
|---|---|---|---|---|---|---|---|---|---|---|---|---|---|---|---|---|
|