OPTIONAL: Apply Project preferences to IDEA
Go to File -> Settings -> Plugins(on the left pane) -> Install JetBrains Plugin -> Eclipse Code Formatter. See full documentation ->https://github.com/krasa/EclipseCodeFormatter#instructions
If the above plugin is not listed, it can be downloaded manually from https://plugins.jetbrains.com/plugin/6546 and installed from disk.
Go to File -> Settings -> Eclipse Code Formatter -> Select the "Use Eclipse Code Formatter" option and import the "Eclipse Java Formatter Config File" from MifosX Eclipse Preferences (Use ctrl + alt + l to format your code)
Run/Debug Mifos X
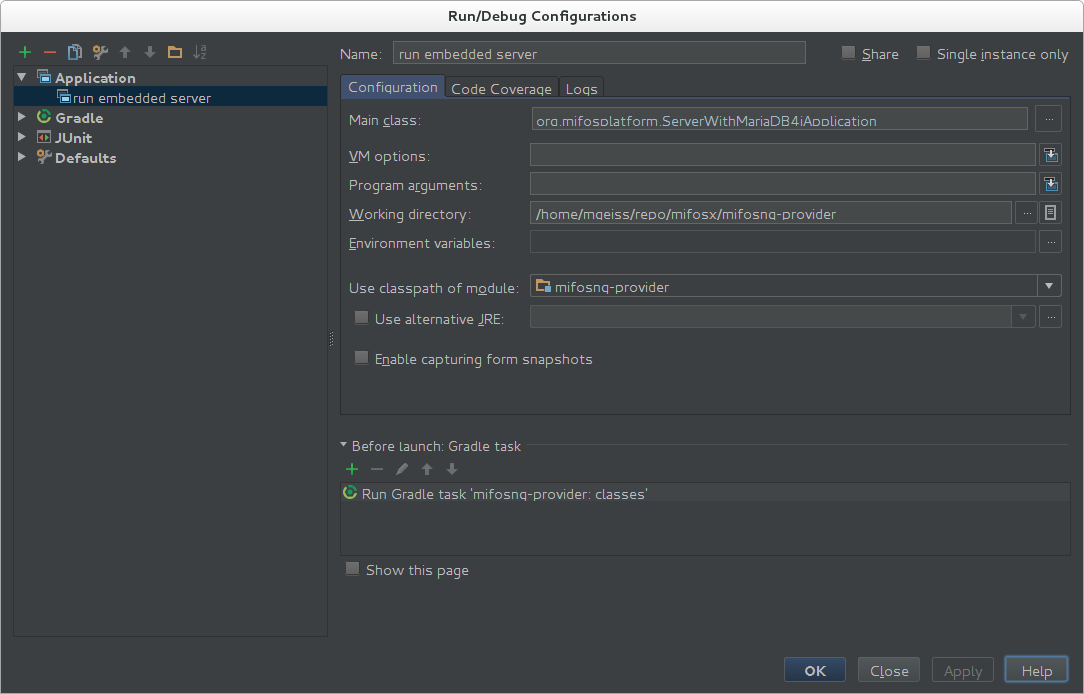
Run/Debug as Java application ServerWithMariaDB4jApplication to launch Mifos X with an embedded database (Separate installation of MySQL is not required) OR if you have installed MySQL in the previous step, run/debug ServerApplication as a Java application.
gradle.properties
The easiest way to run your IDE in developement mode is to add a gradle.properties right at the root mifosng-provider folder. The content should be:
env=dev
releaseVersion=SNAPSHOT
Run Configuration
Create a new Run/Debug Configuration:
Remove 'Make' form 'Before Launch' by selecting the value and push '-'
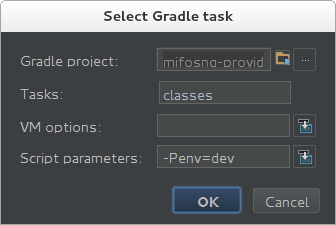
Add a new 'Before Launch' entry '+' and select 'Gradle task'.
'-Penv=dev' is doing the trick by setting a Gradle project property that will include all needed classes and libraries to run in a development environment.
Idea Shortcuts
https://www.catalysts.cc/en/wissenswertes/intellij-idea-and-eclipse-shortcuts/
http://www.jetbrains.com/idea/webhelp/keyboard-shortcuts-you-cannot-miss.html

