You could also follow video guide link here:-
I. Downloading and Installing Pentaho Report Designer
1. To download Pentaho Report Designer Tool please click on the following link,
Note: Compatible pentaho report designer version is - 3.9.1
2. It will be the zipped file with size around 170 MB.
3. Download it and unzip it in the required directory.
II. Starting Pentaho Report Designer
1. Go into the unzipped 'Pentaho Report Designer' folder and double click on 'report-designer.bat' file(for Windows).

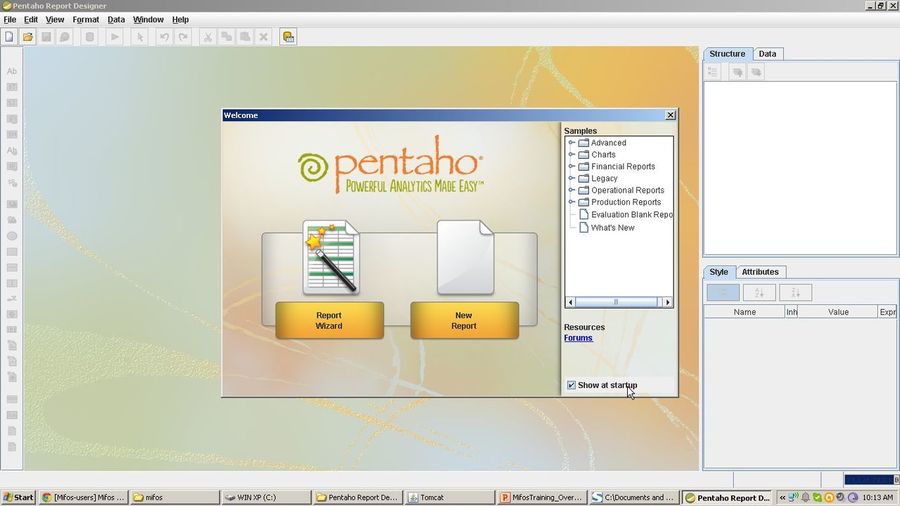
2. Once Pentaho Report Designer tool starts, you will be welcomed with the following window.
III. Creating Your First Pentaho Report
1. Go to the 'File' Menu and click on 'New' button.
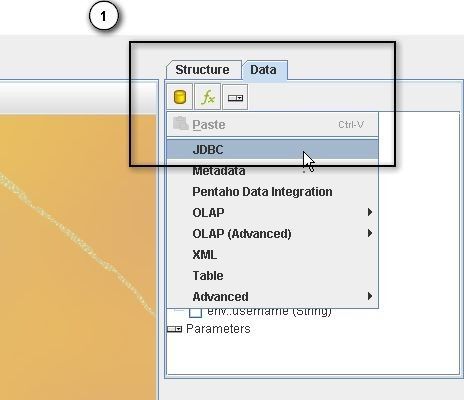
2. Go to the 'Data' tab, click on 'Add Data Source' and then click on JDBC.
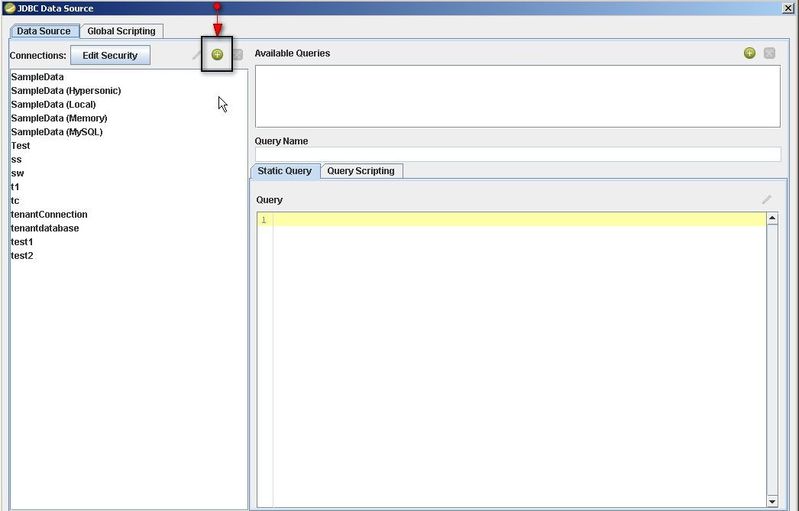
3. Once you click on JDBC, following window will open, where you need to click on '+' (Create New Connection) button.
4. Once you click on 'Create New Connection' the following window will appear. Here, you have to provide all the setting information as given in the following table and then click on 'Test' button to generate the Message Box where it shows the confirmation of connection. Once Connection is established click on 'Ok' button.
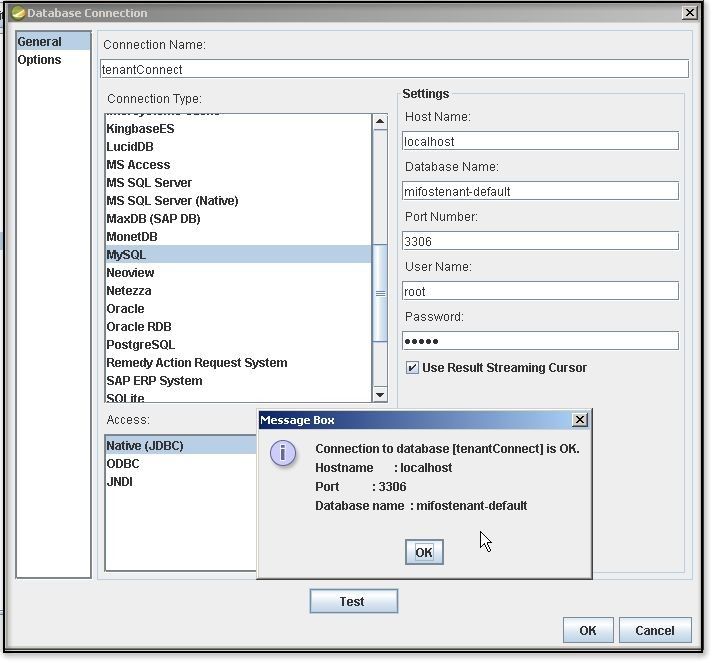
| Sl.No | Field Name | Description |
|---|---|---|
| 1 | Connection Name | Provide the appropriate connection name |
| 2 | Host Name | This is the name of server to which designer tool connects to. In this case, we are connecting to 'localhost'. |
| 3 | Database Name | Provide the database name to which designer tool needs to connect. In MifosX, we generally connect to the database 'mifostenant-default' |
| 4 | Connection Type | In the left column, please select the appropriate connection type(in this case, mysql) . Once you select 'mysql' the Port Number automatically selected as 3306. |
| 5 | User Name | Provide the mysql username( in this case it is 'root') |
| 6 | Password | Provide the mysql password. |
5. As shown in the following window click on '+' button to add the sql query.
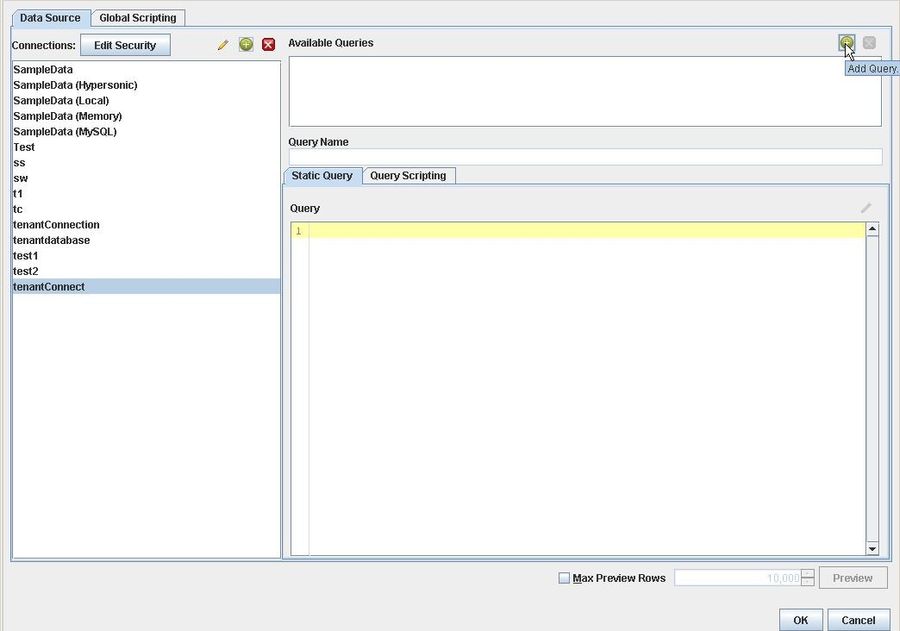
6. Here, Provide the Sql Query Name and write the appropriate Sql Query and then click on 'Preview' button to confirm the Sql query executed successfully. Then click on 'Ok' button.

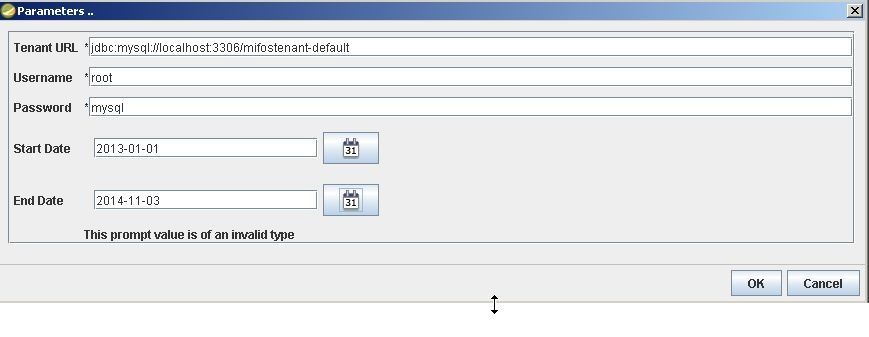
7. Once you create executable Sql Query, you may have to add parameters if required. In order to embed Pentaho Report to MifosX, At least you have to create 3 parameters which are passed to MifosX, namely
- tenantUrl
- username
- password.
To add parameters, under the 'Data' tab, scroll down to see 'parameters' and then right click on 'parameters' and then click on 'Add parameter' to see the following window.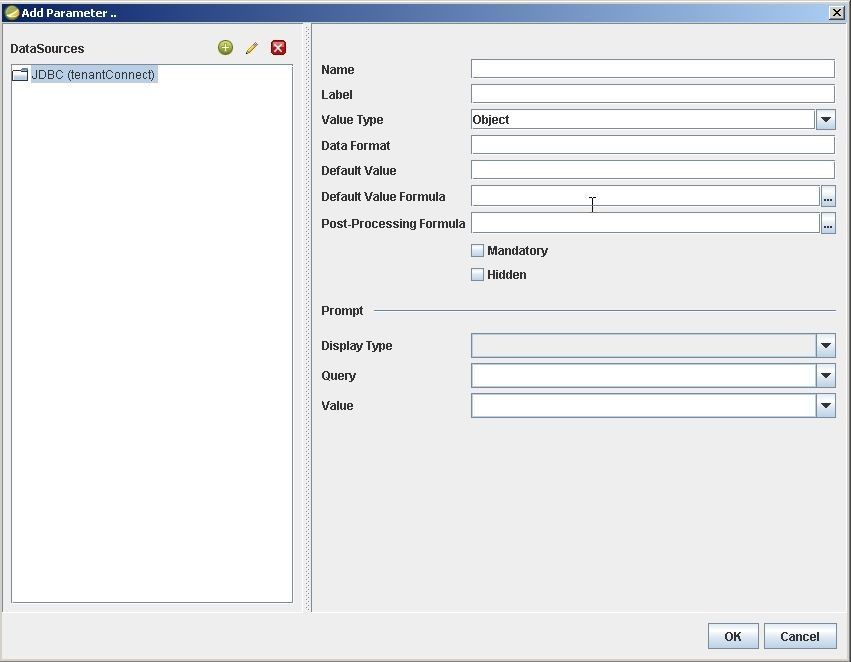
| Sl.No | Parameter Name | Parameter Fields |
|---|---|---|
| 1 | tenantUrl | Name:tenantUrl Label:Tenant Db Value type: String Default Value: jdbc:mysql://localhost:3306/mifostenant-default Check mandatory |
| 2 | username | Name:username Default Value: root |
| 3 | password | Name:password Default Value: mysql Check Mandatory Field |
Basically these three parameters are required to embed Pentaho Report in MifosX. Similarly, you can define more parameters as per requirement of the report.
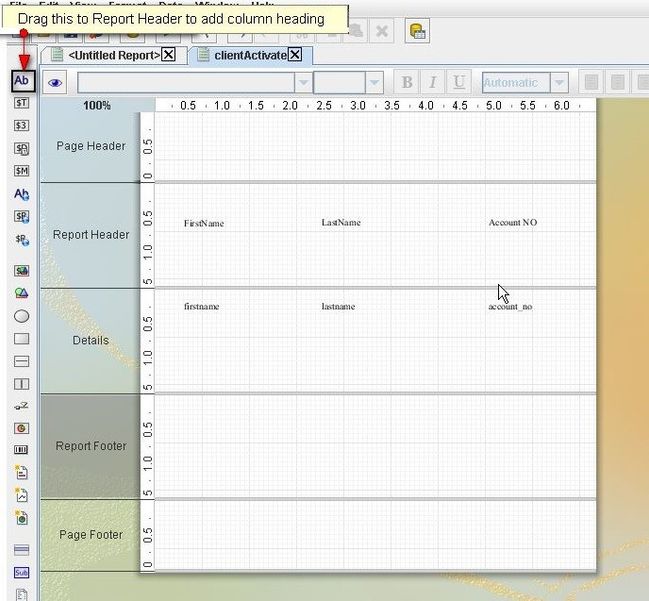
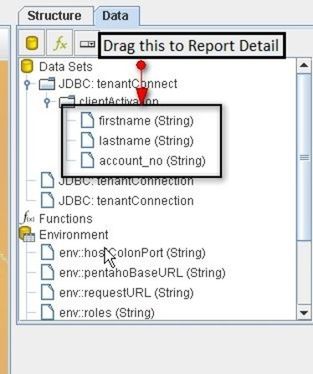
8. Once you add the parameters, you need to check whether the report is working fine in the pentaho environment. First, You need to add the Report fields into 'Details' section of the pentaho environment. In our example, the fields 'firstname', 'lastname' and 'account_no' of the clients are added. In order to add them you need to drag each field in 'Details' section of the pentaho environment as shown in following two screenshots.
9. Next you need to click on 'Run' button and choose appropriate format for the report.
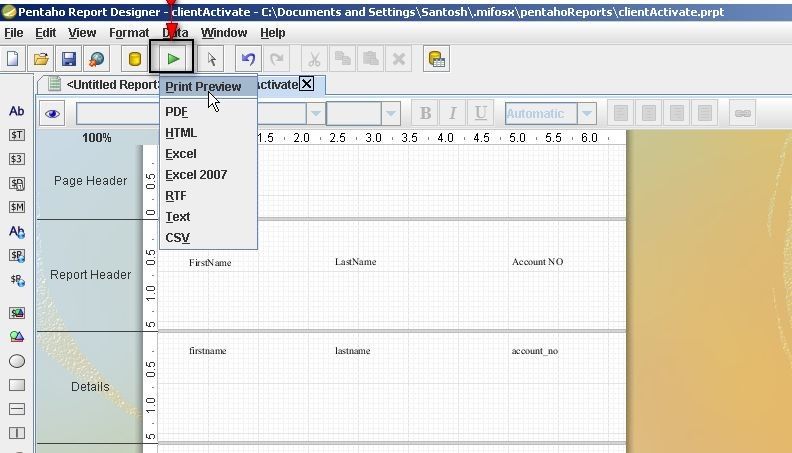
10. Once you 'Run' the report by choosing appropriate format, the following window should open where you enter the parameters and generate the report. (In this case, PDF is selected)
11. If you click on 'Ok' button and PDF is generated, it means Pentaho Report is created successfully.
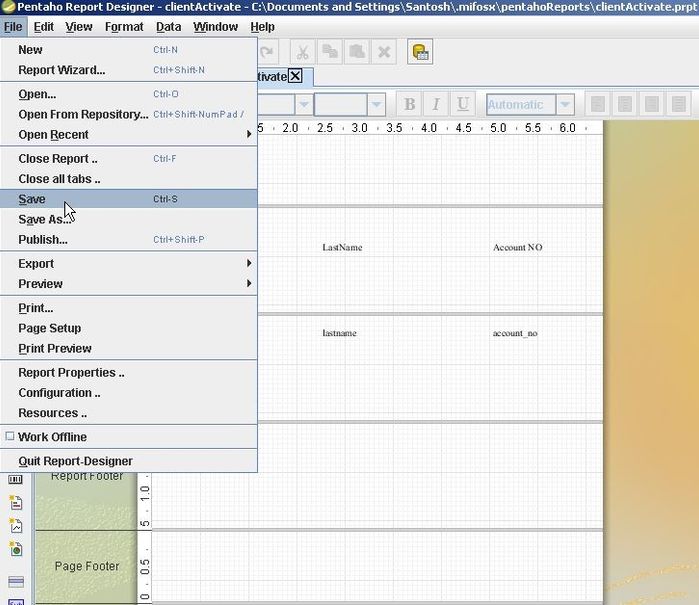
12. You need to save the report with '.prpt' extension. In order to do it, Just go to the 'File' menu and click on 'Save' button.
IV. Embedding Pentaho Report in MifosX
1. Create a '.mifosx' folder (use DOS to create the folder) in your home directory and then create a sub folder 'pentahoReports' in '.mifosx' folder.
2. Please copy the pentaho report file( with *.prpt extension) which you have created earlier using 'Penntaho Report Designer Tool' in "home/.mifosx/pentahoReports" folder.
3. Go to Community-app and then go to Admin >> System >> Manage Reports and click '+Create Report' to see the following window.

4. Ensure 'Report Name' should be the same as the pentaho report file name (that is in this example, Activated Clients.prpt).
5. Select Report Type as 'Pentaho' from drop-down list.
6. Ensure to check the box for "Use report(UI)".
7. Select the required parameters which are passed to pentaho. (in this case, startDate, endDate)
8. Click on 'Submit' button to create the report.
V. Generating created Pentaho Report
Go to Community-app and then go to 'Reports' tab and then by selecting the report section>>then the required report you could generate the report.
In this example: Reports>>clients>>Activated clients.