Overview
Online Banking App (a.k.a web self service app) which enables the end user to interact with their own data such as view/transact on the loans they hold, add beneficiaries, check charges etc. Data which is visible to self service user is the subset of what the Staff can see. Not all the data is accessible to the user (such as account notes, internal approval cycles).
.png?version=1&modificationDate=1533904738018&cacheVersion=1&api=v2&width=832&height=400)
- The numbering below represents the numbering in the image above:-
- This shows your name (self service user).
- This shows the Side navigation bar. You can use this to access most of the features of the Online Banking App.
- This is kind of a more option. When you click it you will see the options Pocket, Profile and Logout.
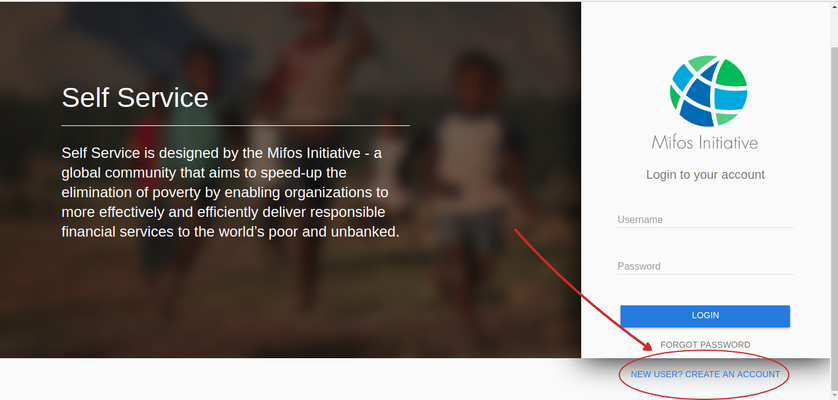
Register
- To Register yourself as a Self-Service user follow these steps:-
- Click on the New User? Create Account button at the bottom of the page. You may need to scroll down to see this option.
- To Register yourself as a Self-Service user follow these steps:-
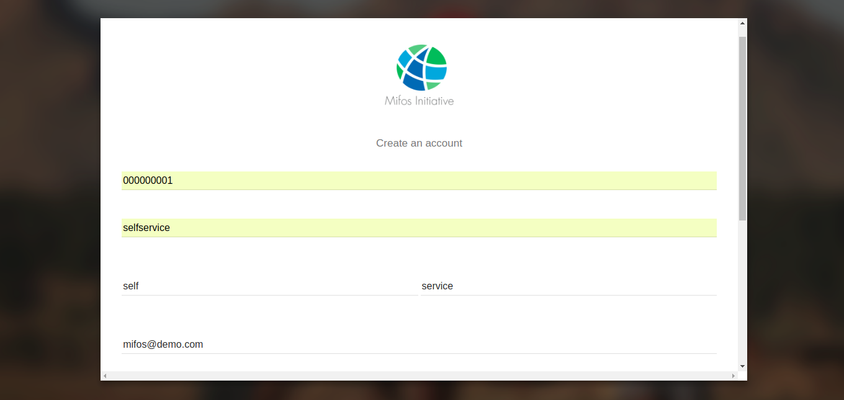
2. Fill the details on the page and then accept the terms and conditions. After that you will see the Create my account button getting highlighted. Click the button and then you will receive an email which will provide you the Request ID and Authentication Token, which is necessary to complete the last step.

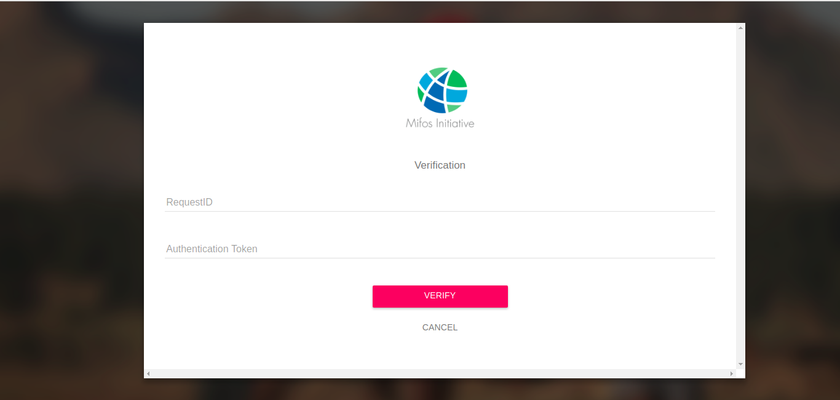
3. This is the last step. Just enter the Request ID and Authentication Token that you have received through email (when you completed the 2nd step). After entering the details, click Verify and Voila! you have successfully registered yourself as a self-service user.
LOGIN
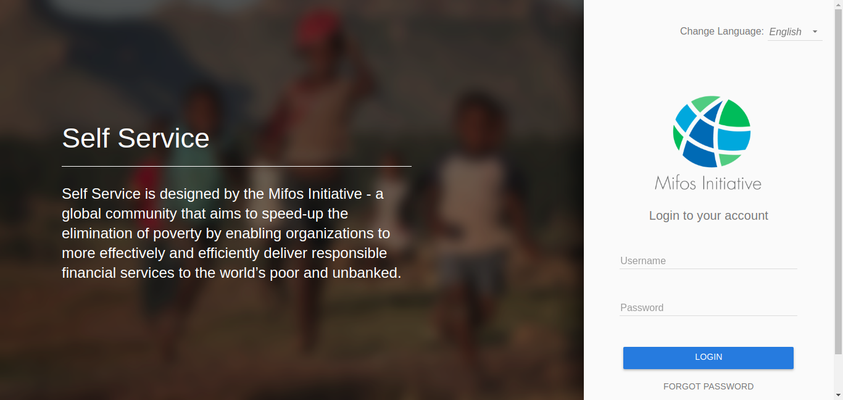
- If you are a self-service user then just enter your Username and Password and click Login.
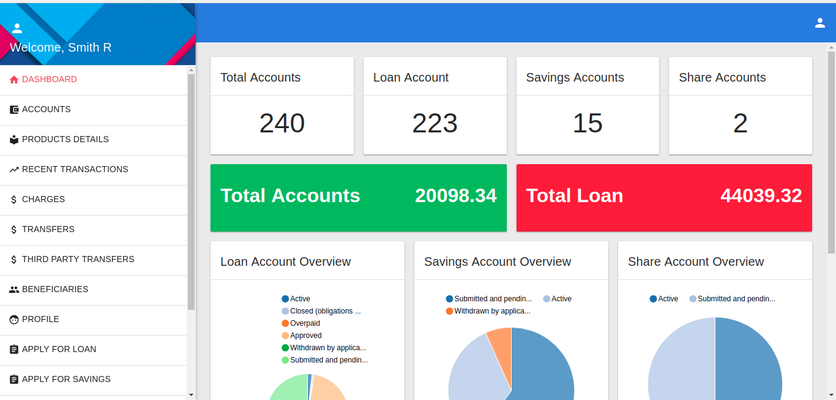
Dashboard
The first page you see when you Login is your Dashboard. It shows a summary of your accounts (Loan, Savings and Shares). You can see the graphs showing the overview of your accounts.
You can also generate a transaction graph which can be used to track your transactions.
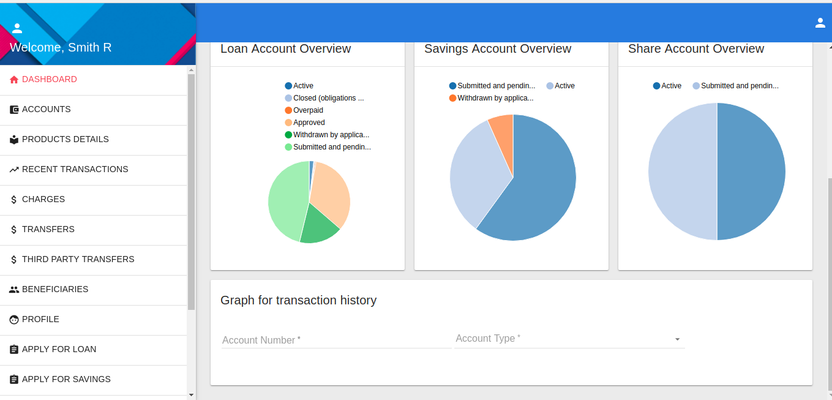
Transaction Graph
- To create the transaction graph follow these steps:-
- Enter your Account Number and Account Type (Loan, Savings and Shares).
- When you will enter the above details, then a new input field will show up which shows the transaction type (repayment, disburse etc for Loan account and withdrawal etc for savings account).
- After you select the transaction type click on Generate graph. Scroll down to see the generated graph. Hover over the graph to see the details of the transaction. In the graph the x-axis represents the date of the transaction and y-axis represents the amount.
- To create the transaction graph follow these steps:-
The GIF below shows the procedure to generate transaction graph.
![]()
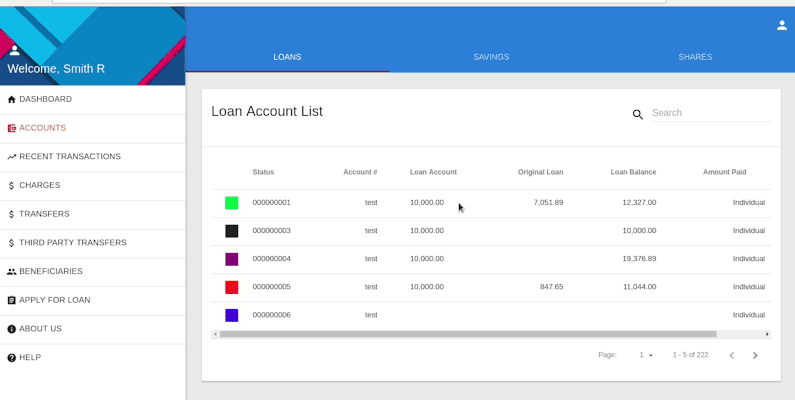
Accounts
View Account details
- Click on Accounts, present in the side navigation bar.
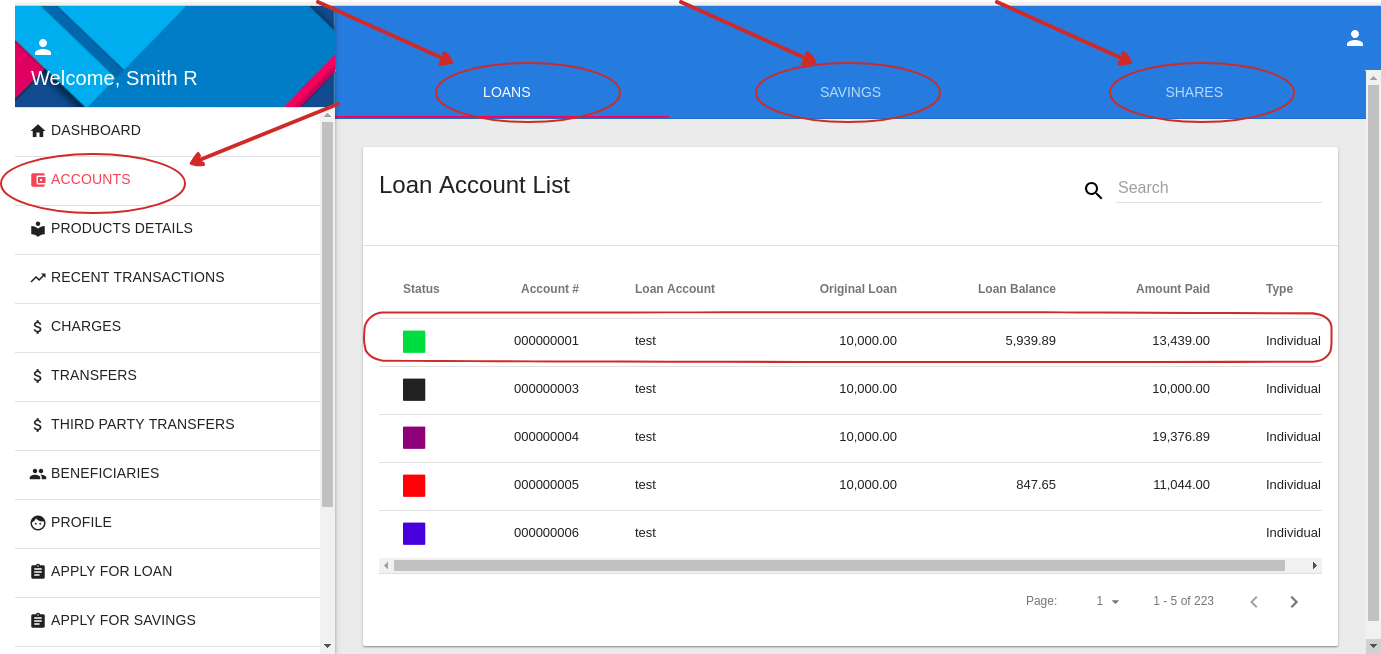
You will see a list of your accounts. You can switch between the different types of accounts (Loan, Savings and Shares) by clicking on the tab bar of the list.
When you click on one of the accounts then the details of that account becomes visible.
.png?version=1&modificationDate=1533830066200&cacheVersion=1&api=v2&width=840&height=400)
You can switch between the tabs Account Details, Repayment schedule and Transactions to get the details about your account, repayment schedules and transactions respectively.
The three vertical dots is the more option. Click on it to Create Guarantors and View Guarantors. There are two buttons in the account summary card - Add to Pocket (to add the account to pocket) and Make Payment (to redirect you to the payment options).
Add Guarantors
- To add Guarantors who are an existing client to loan account application, follow these steps:-
- When viewing a loan account , click more (three vertical dots) and select Create Guarantors.
- To add Guarantors who are an existing client to loan account application, follow these steps:-
.png?version=1&modificationDate=1533830457553&cacheVersion=1&api=v2&width=840&height=400)
2. Check the Existing User box.
3. Fill the entries as per your selection whether the user already exists or not. Entry fields are different for both the cases.
4. After filling entries click on Create Guarantor button at the end of the form.
The Guarantor will be added to the loan account application.
View Guarantors
- To view Guarantors click on the more option (three vertical lines) and then select View Guarantor(s).
Edit/View/Delete Guarantors
- When viewing a guarantor, the last column for each guarantor has the option for editing, viewing and deleting Guarantors.
Make Payment
- While viewing an account, click on the make payment button at the end of the summary card to make payment. Once you click on make payment button, you will be redirected to transfers.
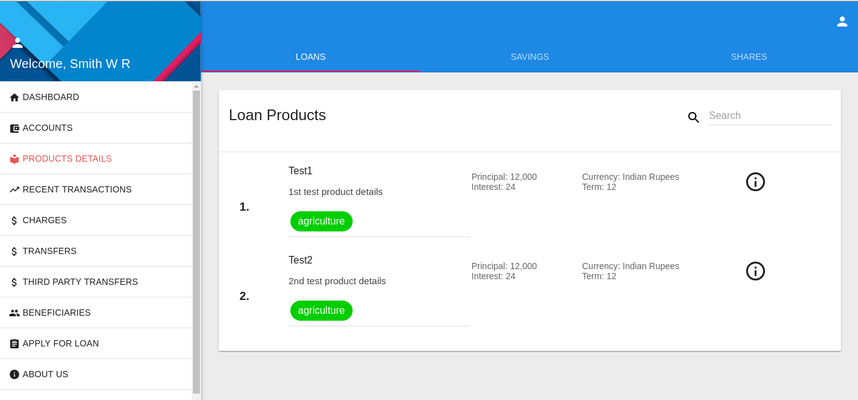
Product Details
- This lets you know about the details of the product beforehand so, that you can select proper product.
- To view this page click on the Product Details from the side navigation bar.
- Click on the info icon to check out more details about the product.
- You can switch between the different types of products ( Loan, Savings and Shares ) from the tab.
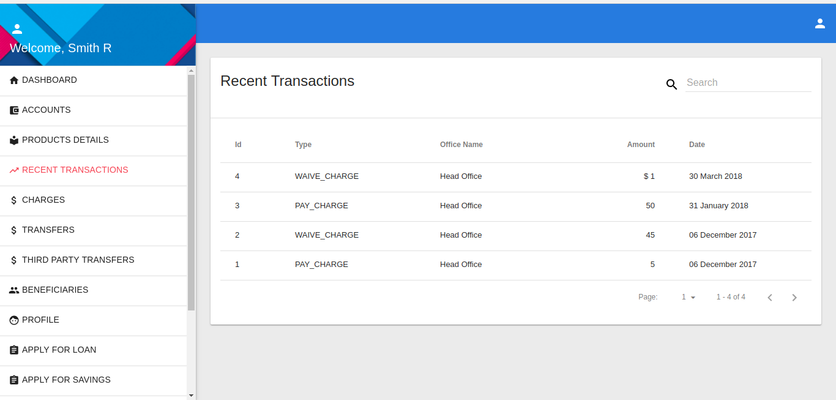
Recent Transactions
- To see your recent transactions click on the Recent Transactions form the side navigation bar.
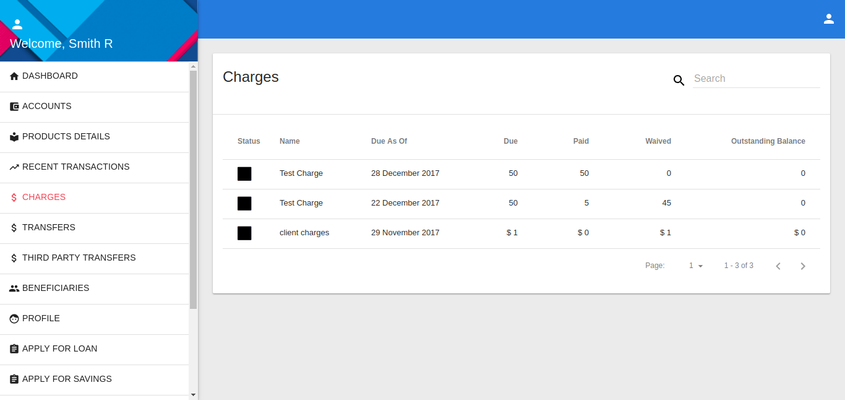
Charges
- To check your charges click on Charges from the side navigation bar.
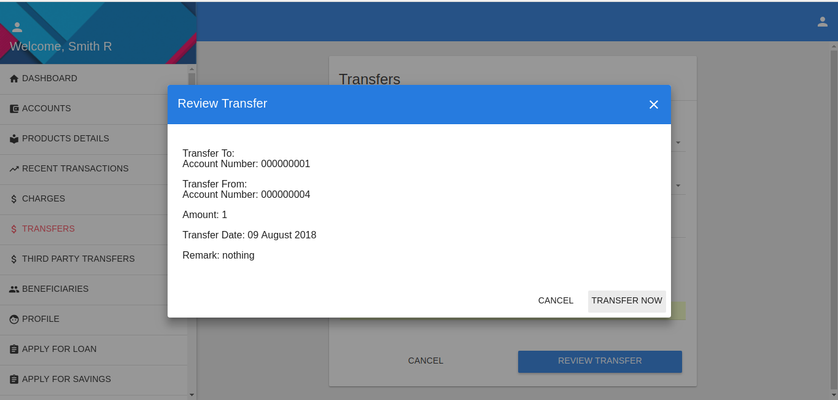
Transfers
- To transfer funds select Transfers from the side navigationigation bar. After that fill the input fields.

- After filling up the input fields click on the Review Transfer button, then a dialogue box will appear where you can review the transfer. If you are sure that the details are correct for the transfer then click on the Transfer Now to confirm the transfer.
Third Party Transfers
- For Third Party Transfers click on the Third Part Transfers from the side navigation bar. Fill the input fields and then click on the Review Transfer.
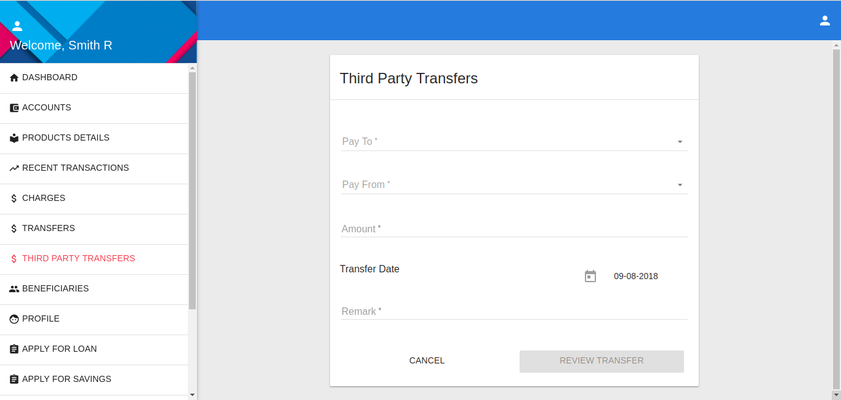
- When clicked on the Review Transfer button, a dialogue box will open so, that you can review the transfer. Click on Transfer Now if you are sure of the details.
Right now, MIFOS has only Mifos transfer gateway as the the Third Party Transfer.
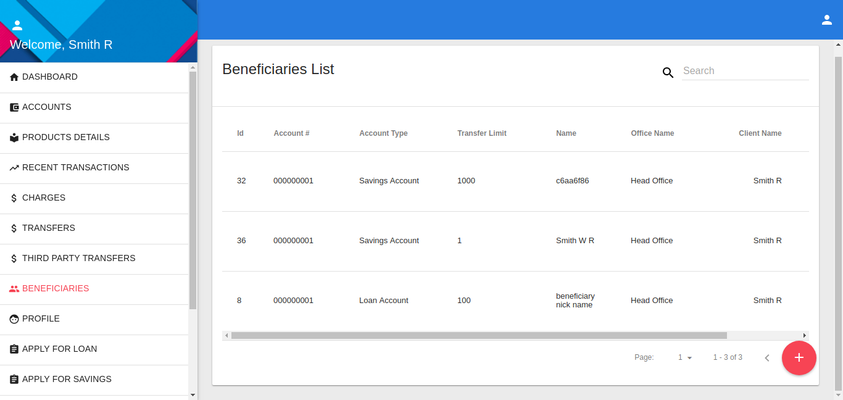
Beneficiaries
View Beneficiaries
- To view Beneficiaries click on the Beneficiaries from the side navigation bar.
Add Beneficiaries
- To add new Beneficiaries click on the ' + ' button in red color.
.png?version=1&modificationDate=1533835502457&cacheVersion=1&api=v2&width=843&height=400)
Edit Beneficiaries
- To Edit Beneficiaries click on the Pencil icon from the list of Beneficiaries ( you may have to scroll right to see these options in the list ).
.png?version=1&modificationDate=1533835925679&cacheVersion=1&api=v2&width=838&height=400)
Delete Beneficiaries
- To Delete Beneficiaries click on the Trash icon from the list of the Beneficiaries ( you may have to scroll right to see the options ).
.png?version=1&modificationDate=1533836073777&cacheVersion=1&api=v2&width=838&height=400)
Profile
View Profile
- To view your profile click on the Profile from the side bar navigation or from the right corner ( click on the icon and then select Profile ).
.png?version=1&modificationDate=1533836637301&cacheVersion=1&api=v2&width=851&height=400)
.png?version=1&modificationDate=1533836658069&cacheVersion=1&api=v2&width=831&height=400)
Edit Profile
- To edit the profile click on the Pencil icon at the bottom of the view profile page.
.png?version=1&modificationDate=1533837224929&cacheVersion=1&api=v2&width=821&height=400)
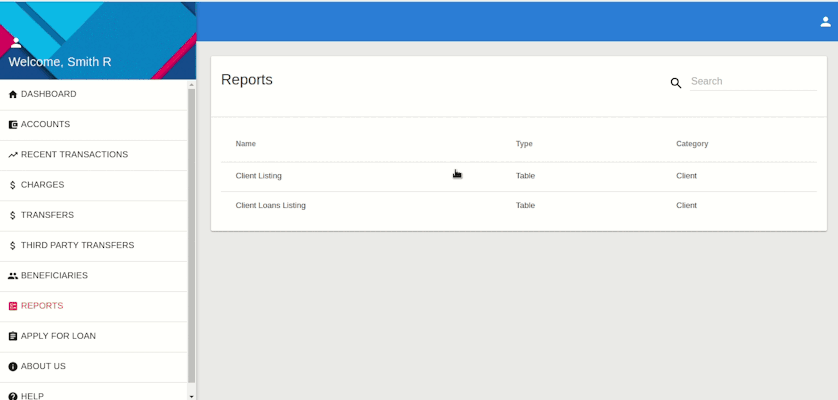
Reports
- To view reports follows these steps:
- Click on the Reports from the side navigation bar.
- Then select the report which you want to view.
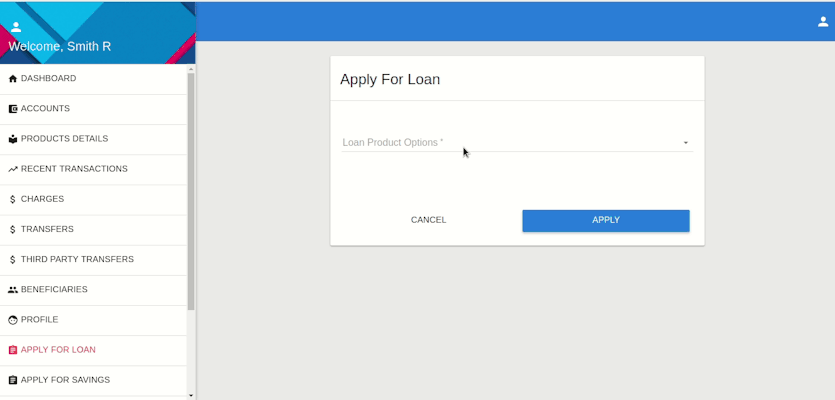
Apply for Loan
- To apply for loan, click on Apply for Loan from the side navigation bar.
- Then select the Loan Product Option.
- After selecting the Loan product other input entries will open, fill the entries and click on Apply.
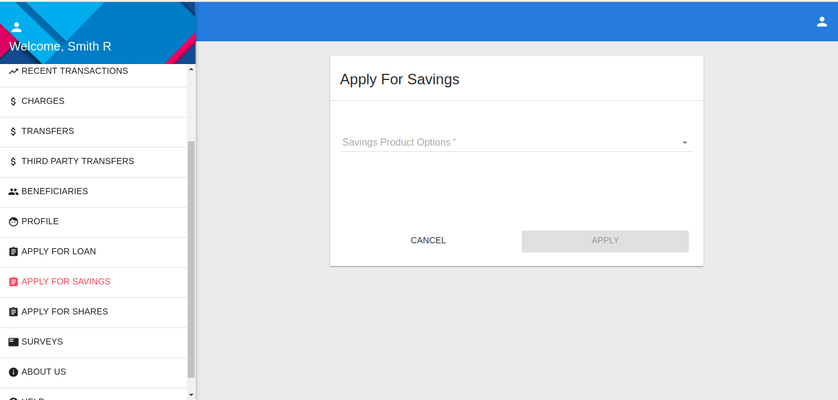
Apply for Savings
- It is similar as Apply for Loan , just click on the Apply for Savings from the side navigation bar.
- Then select the Savings Product.
- Then fill the input fields that appear and then click Apply.
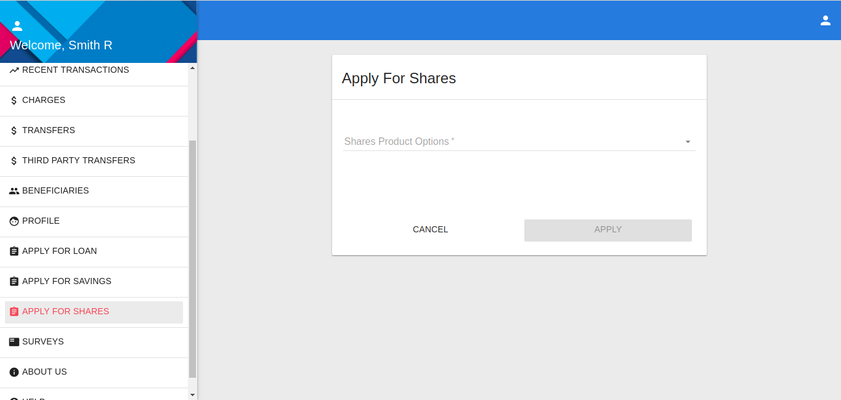
Apply for Sharings
- To create share account, click on Apply for Shares from the side navigation bar.
- Select the Shares Product.
- Then fill the input entries that appear and then click on Apply.
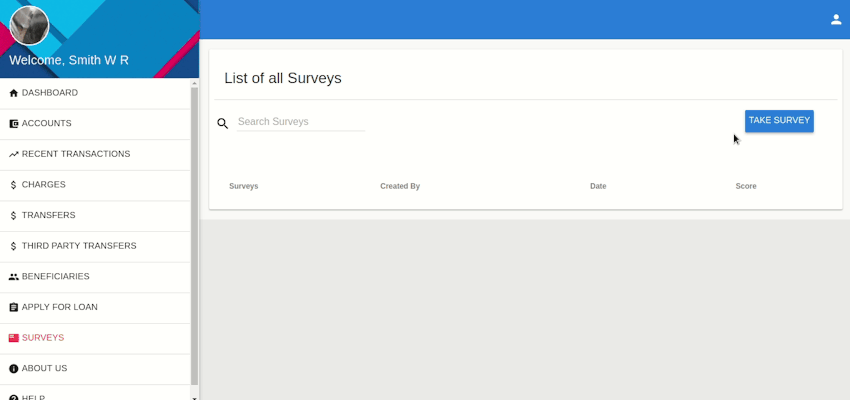
Surveys
- To take a survey follow these steps:
- Select Surveys from the side navigation bar.
- Then click on Take Survey .
- Then Select Survey which you want to take from the options and the survey questions will start.
- You can click Next and Previous buttons to navigate between the questions.
- Once you are done with the survey ( you can leave questions also ) then click Submit.
- After clicking a Preview will be there, showing all your questions and your responses. It shows You haven't answered for the questions you haven't given any responses to.
- If you think your response is not correct or you want to fill the left questions you can select previous and go to the question to change the response.
- Once, you are sure of your answers then click on the Submit to submit the survey.
- You can view the survey from the list of survey appeared on the page when you click the surveys from the side navigation bar.
Add/Remove accounts to Pocket
- To add any account to Pocket click on the Add to Pocket button at the end of the account summary card. Once, you click on the Add to Pocket, the account will get added to Pocket.
- To remove the account from Pocket click on the Remove from Pocket button in the card summary. This button only appears for the accounts which have been added to Pocket.
View Accounts in Pocket
- To view accounts saved in pocket, click on the icon on the right top corner and then select Pocket. Refer the GIF in Add accounts to Pocket.
.png?version=2&modificationDate=1533905191438&cacheVersion=1&api=v2&width=836&height=400)
.png?version=1&modificationDate=1533905322815&cacheVersion=1&api=v2&width=842&height=400)
About Us
- This page shows the details of the organisation. To check this page click on the About Us from the side navigation bar.
Help
- This page shows the FAQs . To check this page click on the Help from the side navigation bar.
Logout
- For logging out from the app click on the icon at the right top corner, then click on the Logout.
.png?version=1&modificationDate=1533905359578&cacheVersion=1&api=v2&width=842&height=400)