Tranche loan process
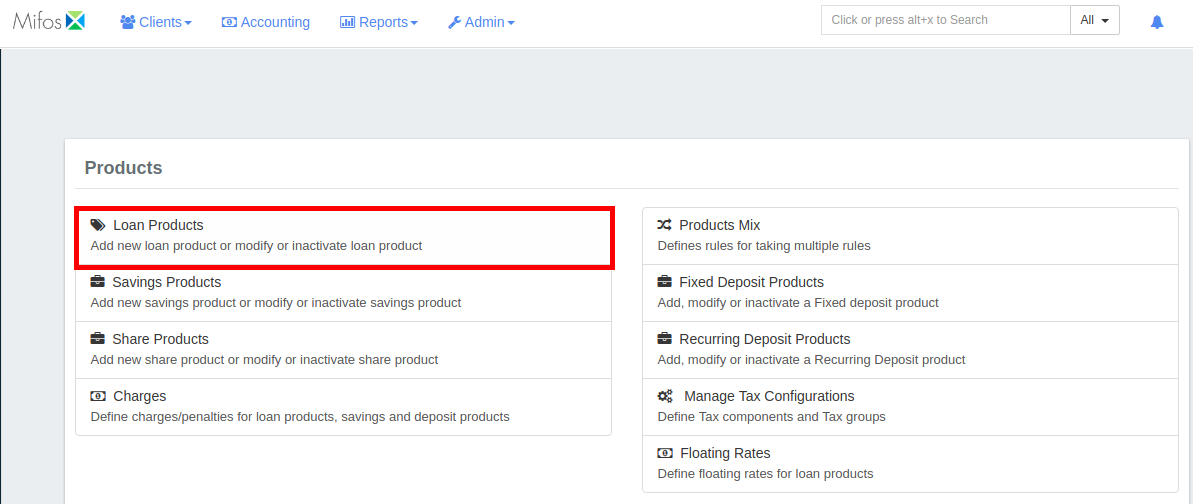
Beginning at the main screen, select Admin, then Products from the drop-down menu. This will launch the Products menu.
Select Loan Products.
Create Loan Product
Provide all the required input for the Loan Product Fields, also refer link:- Loan Products.
Go to:- Loan Tranche Details.
Create Loan account
Provide all the required input for the Loan Account Fields, also refer link:- How to Create a Loan Account Application
Go to:- Loan Tranche Details
1 - Maximum allowed outstanding balance: Provide the maximum allowed amount.
2 - +: Click on plus button to define the parameters. Here 3, 4 and 5 rows get added. On clicking on the plus button again 6, 7 and 8 rows get created.
3 - Date: Provide the tranche disbursement date. Example: Here the 1st expected tranche disbursement date is on 01 January 2015.
4 - Principal: Provide principal amount. Example: Here the 1st tranche loan amount is 20,000.
5 - X: Click on x (remove) button to remove the row.
6,7 and 8: Is the 2nd tranche details in the example.
Then click on Submit button
Approve loan account
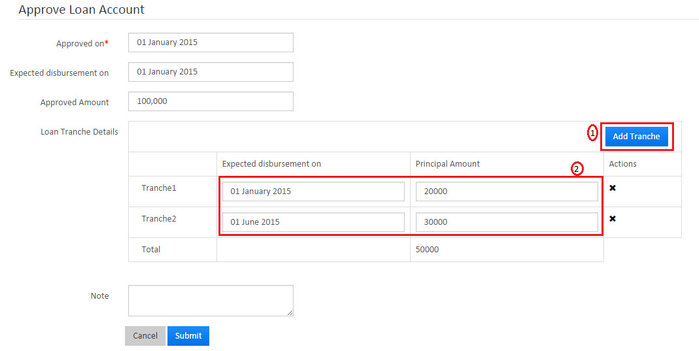
1 - Add tranche: You could also add new tranche at the approve loan account page with not exceeding set limits.
2 - Edit tranche: You could also edit/remove tranche at the approve loan account page with not exceeding set limits.
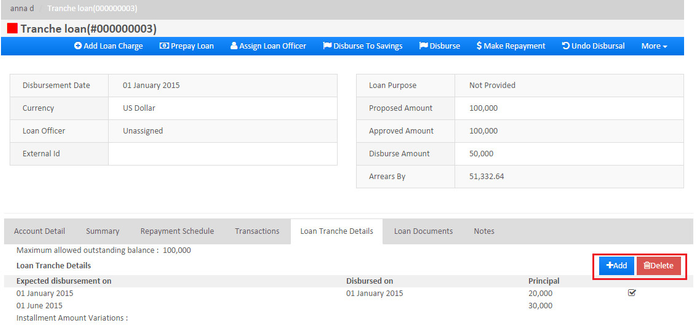
Loan in active status
You could Add new tranche or Delete existing tranche at the loan in active status.
Key Error Messages
Related articles


