...
USE THIS TEMPLATE TO CREATE SLIDES: Code In Format.pptxCode In Format.pptx
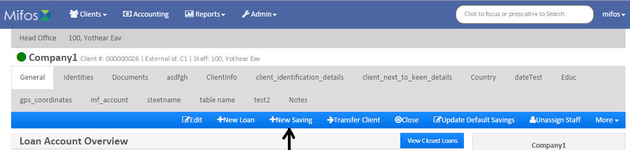
After the client has been approved and the client account created in the system, an account may be opened.
...
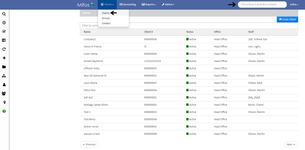
- Select the account from the Client list OR use the search bar and key in the client’s name.
- On the “General” tab, select +New Savings from the blue navigation bar.
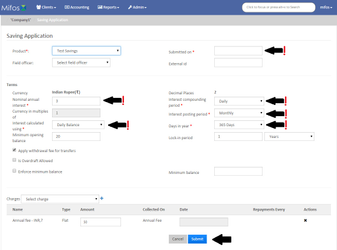
- From the drop down menu, select the type of account that is being opened.

- Complete the fields on screen. Most of these will be pre-filled based on the organization’s product set up parameters. Press Submit.
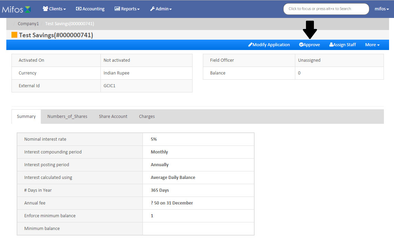
- Review the information on screen. If it is all correct, click on “Approve” in the blue navigation bar. (NOTE – VERIFY YOUR ORGANIZATION’S PROCEDURES AND ADJUST THIS PROCEDURE ACCORDINGLY.)
- Enter the Approved On date. This will generally be the same date, however, the approval may be on a date prior, so verify the date and enter the correct date.
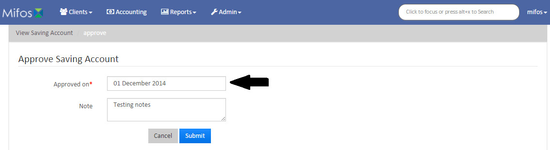
- If there are any notes for the account, enter them in the “Note” field.
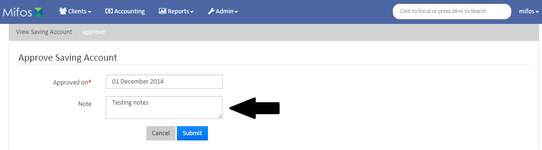
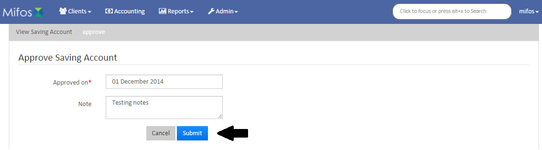
- Review the information on screen and if it is correct, press “Submit.”
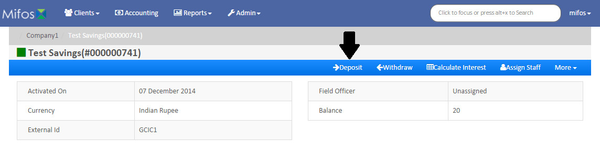
- The system will return to the “General” screen. Click on the account OR click on the blue arrow in the “Actions” to make a deposit.
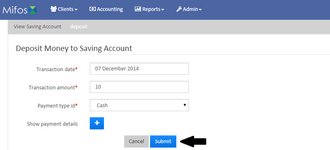
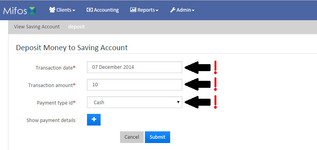
- Enter the transaction date, the transaction amount and, using the drop down menu, select the payment type.
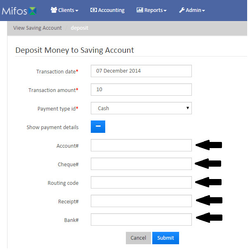
- If your organization uses the “Show Payment Details”, enter the Account#, Cheque#, Routing code, Receipt and Bank#.
- Review the information on the screen and if it is correct, press “Submit.”