This section assumes that the Mifos Community App has been successfully downloaded and installed on the local device. Once that is accomplished the next step is to customize Mifos for your organization’s needs and approach. This can be done using drop-down menus found along the top of the home screen. Follow these steps to log-in to the system:
- Type username: Type your <Username>
- Type password: Type your <Password>
- Click Sign In.
Tip: Need help downloading and/or installing the Mifos Community App? Please see the Installation section of this manualAdministration is a drop-down menu that can be accessed from anywhere within the Mifos system. It is a home to several options which allow you to customize the Mifos experience to the needs of your organization.
Tip: When beginning to use Mifos X, please refer to the Initial System Setup and General Navigation sections of this manual for guidance.
To access the Administration menu and the options within, click on the Admin button on the top of the screen:

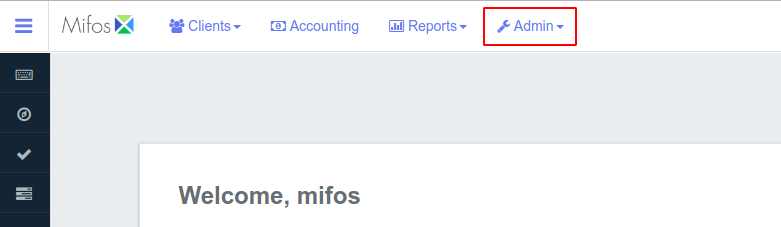
This will open a drop-down menu below , which allows you to select one of the five Administration options by clicking on your choice. Under this menu there are links to , you can find the following menu options:
On this page:
| Child pages (Children Display) | ||
|---|---|---|
|
:
Manage Data Tables
Add new extra fields to any entity in the form of data table.
> Admin >System >Manage Data tables
a) View additional tables
- No info available until data tables have been created
Data Table1. Click the blue Create Data tablebutton at the top-right of the screen.- a. Data table Name
- b. Application table name – drop down
- c. Multi-row – button
- d. Add Columns
- e. Select Column type – drop down, dependant on Adding Columns
- Used to define in the system for: Client, Group, Center, Loan, Office, Savings Accounts
- Build examples/screenshots of this is done – Process
c) Register Data Table
- Click Save to complete the creation process
Audit Trails
Audit logs of all the activities, such as create client, disburse loans etc.
>Admin >System >Audit Trails
Manage Reports
Add new report and classify reports
>Admin >System >Manage Reports
a) View Reports
- Standard reports provided by Mifos
- List
b) Add Report
- 1. Click the blue Create Report button at the top-right of the screen.
- 2. Fill in the following data:
i. Report Details
- Report name
- Report type
- Report sub-type
- Report category
- Description
ii. SQL
iii. Report parameters
- Select allowed parameters from the drop down menu and click the blue Add button
iv. Click Submit
Scheduler Jobs
Schedule a job, modify or delete jobs
>Admin >System >Scheduler Jobs
- Description
- Processes
Configurations
Global configurations and cache settings
>Admin >System >Configurations
- Description
- Processes
General Ledger Setup
Associated Workflows
Available Actions
1. Overview of General Ledger Accounts
- How to Create a General Ledger Account
- Account Types
- List
- Account Usage
- Detail
- Header
- Account Tags
- List
- Account Types
2. Setup Chart of Accounts
>Accounting >Chart of Accounts
- Add Account
- Tree View
3. Create your Header Accounts
4. Create your Detail Accounts
5. Edit existing General Ledger Chart of Accounts
6. Import a Chart of Accounts
Templates (User Created Documents)
>Admin >Templates
a) View templates
- A list of current templates displayed
- Click on each template to see it’s details
- Once selected you may edit or delete the template
b) Create template
- 1. Click the blue Create Template button at the top-right of the screen
- 2. Select the Entity from the drop down menu – Client or Loan
- 3. Select the Type from the drop down menu – only Document available
- 4. Name the Template in the field provided
- 5. Fill in the Template details and styles in the provided space
- 6. Click Submit