How to Setup the Code Base
Step 1: Clone the Message-gateway source code into your local machine from the GitHub.
On Windows:
$ git clone https://github.com/openMF/message-gateway.git
On Ubuntu:
$ sudo git clone https://github.com/openMF/message-gateway.git
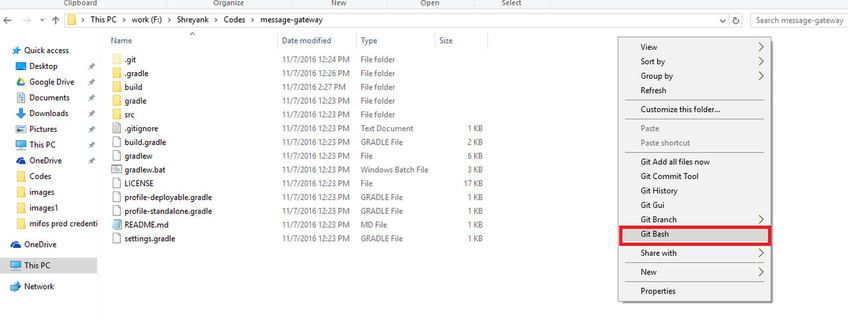
Step 2: Open the source code directory (i.e cloned in your local). Now Git bash it.
On Windows:
On Ubuntu:
Now move to message-gateway directory by entering the following command:
$ cd message-gateway
How to build the Code Base
Step 1: Next we need to generate the .war file. This can be achieved by using command mentioned below:
On Windows:
$ gradlew clean build -Pprofile=deployable
On Ubuntu:
~/message-gateway$ sudo chmod 777 gradlew


~/message-gateway$ sudo ./gradlew clean build -Pprofile=deployable
Step 2: Now create a database as `messagegateway`
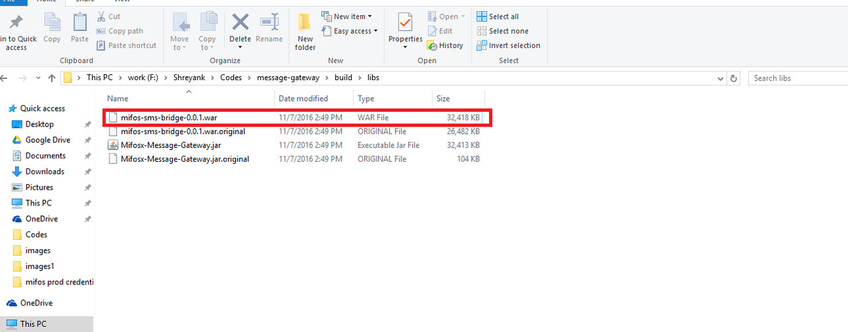
Step 3: Now open the message-gateway source directory, navigate to build>>libs. Copy message-gateway-0.0.1.war file.
On Windows:
On Ubuntu:
~/message-gateway$ cd build

~/message-gateway/build$ cd libs
Step 4: Next, navigate to Tomcat>>webapps and paste message-gateway-0.0.1.war file within this directory.
On Windows:

On Ubuntu:
~/message-gateway/build/libs$ sudo cp message-gateway-0.0.1.war /home/tomcat7/webapps/
How to Run
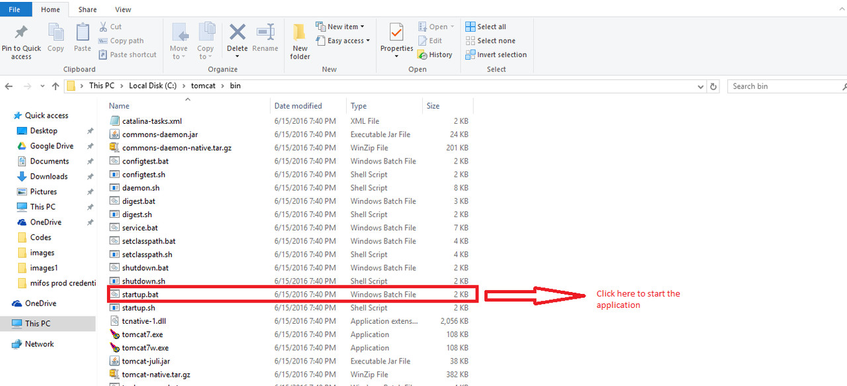
On Windows:
Go to Tomcat>>Bin directory and double click on startup.bat file to start the application.
On Ubuntu:
Now navigate to Tomcat >>bin folder and execute the following command to start the application.
~/tomcat7/bin$ sudo sh startup.sh
How to configure Message Gateway
Download Link
You can download the REST Client from this link:
Open the REST Client and perform the following steps:
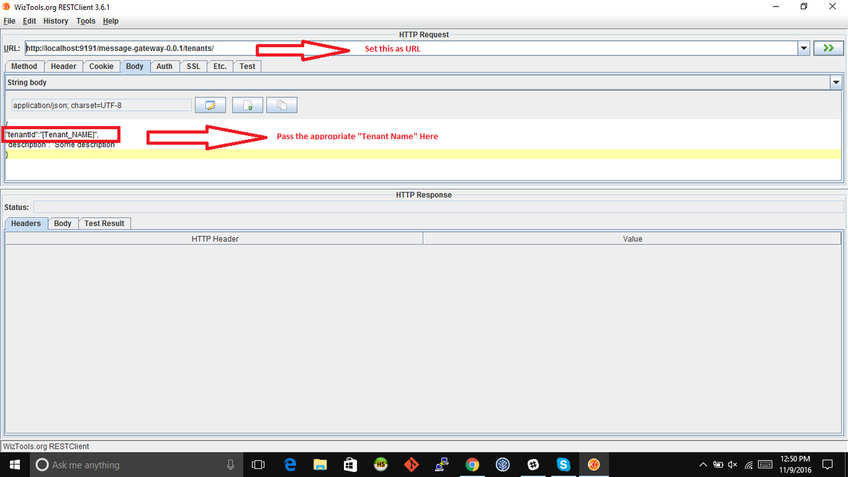
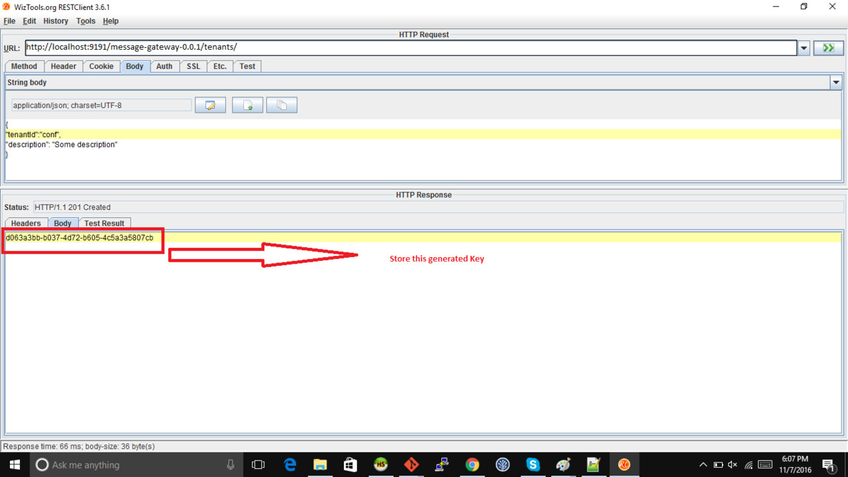
1.When you open the REST client set the URL as: http://localhost:9191/message-gateway-0.0.1/tenants/ . HTTP Method should be "POST" . Finally in HTTP request body pass the following data:
HTTP Request Body
{
"tenantId":"[Tenant_NAME]",
"description": "Some description"
}
Note: Pass the appropriate "tenantId"
When we fire this request, "tenant app key" is generated as response,this is shown in below screenshot:
2.In this step set REST client URL as http://localhost:9191/message-gateway-0.0.1/smsbridges . HTTP Method should be "POST". In HTTP request body pass the following data
HTTP Request Body
{
"phoneNo": "+12345678901",
"providerName": "Twilio SMS",
"providerDescription": "Twilio SMS Provider",
"providerKey":"Twilio",
"countryCode":"+xx",
"bridgeConfigurations": [
{
"configName":"Provider_Account_Id",
"configValue":"ACcb95cd9fb2e7d72f85c06aea6473f7iv"
},
{
"configName":"Provider_Auth_Token",
"configValue":"fed820a353def95f1m6fad077fef670e"
}
]
}
Note: 1.phoneNo, providerName, configName, configValue, configName, configValue are to be set based on the individual subscription
Pass these HTTP headers in REST client:
| Header | Value |
|---|---|
| Fineract-Platform-TenantId | {Pass the same Tenant ID that you have set in previous step} |
| Fineract-Tenant-App-Key | {Pass the same "Tenant app key" that is generated in previous step} |
Once headers are set fire the HTTP request.
3. In this step set REST client URL as http://localhost:9191/message-gateway-0.0.1/sms/. HTTP Method should be "POST". In HTTP request body pass the following data.
HTTP Request Body
[{
"internalId":"55",
"mobileNumber":"+91xxxxxxxx80",
"message":"Hello from Staging",
"providerId":"2"
}]
Note: (i)Set the appropriate "mobileNumber" to whom you want to send the message.
(ii)Set you required "message".
(iii)Set "providerId" that is generated in previous step.
Pass the same HTTP headers that we passed in the last step.