Using the New Address Module
Mifos users now can store their clients address into their databases. A new address module has been added to provide a way to store more clients' personal information for further usages. It's easy to set up and also has intuitive user interface that's easy to use.
Enabling the Address Module
To enable the newly added module you need to follow these steps:
- Log in to your Mifos account
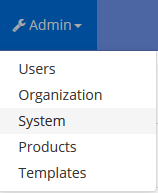
- Navigate the "admin" menu on the nav-bar and click the "system" sub-menu
- To enable the module, you need to click the "configurations" option
- You can finally enable the module by clicking the enable button next to "Enable-address"
- Now you have finally enabled the address module!
Adding More Address Types, Countries, and Provinces
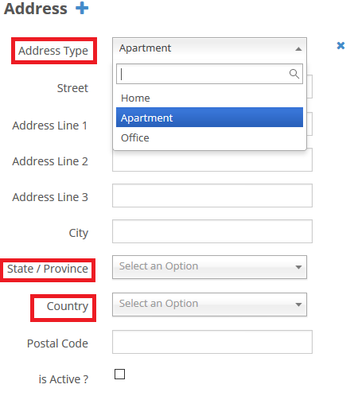
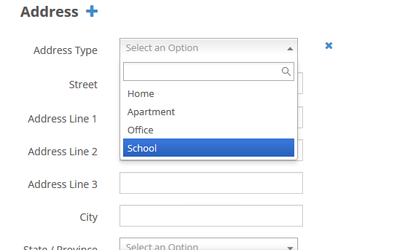
You probably have seen the default selection of the address type, country, and province when adding or editing some clients' data (The selection marked with red box)
You can add more default choices for address type, countries, and provinces selection by using this procedure:
- Navigate the nav-bar and select "System"
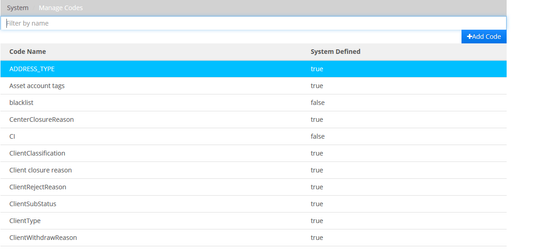
- Select "Manage Code" from the available options
- To edit the address type, locate "ADDRESS_TYPE" and click it. For editing country it's "STATE" instead of "ADDRESS_TYPE" and for province it's "state1". You can easily find them with the filter
- Now you can modify several more data types within the option. I'll use address type as an example
- To add a new address type you need to press the "Add Code Values" button
- Simply add the values you wanted. Note that the since position numbering starts from 0, and to add fourth selection you need to make it "3". You can add some description within the "Description" column. Make sure to tick the Active box if you want to make the added value to be active
Now, you can add the selections of countries and provinces using same procedure for "STATE" and "state1". You can also edit the previously added selections within the menu.
Now, try to edit a client's data or add a new client's data and see the difference. A new address type has been successfully added!
The Usage of the Address Module
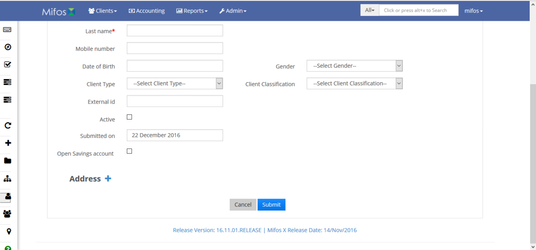
After you have enabled the module, now you can use it regularly for storing your clients' addresses into your database. Just go to your "add client" menu and click the "+" sign next-to the address heading.
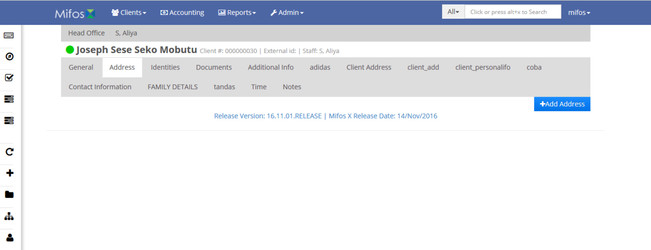
You can also easily add new addresses to previously added clients by locating their data and add the address within the address menu.
Modifying Some Previously Added Clients' Address
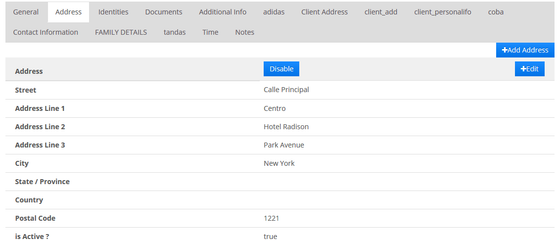
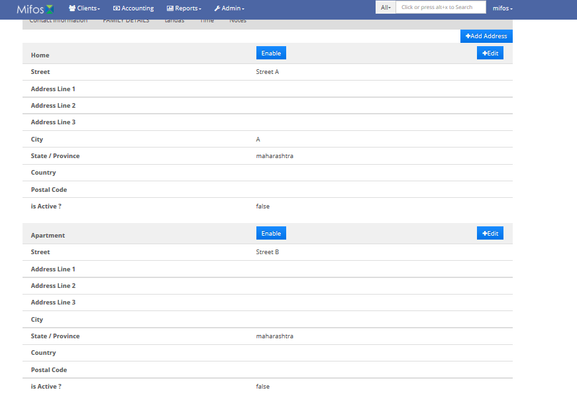
Now, since you have added the address, you can easily modify or disable the clients' address within the same menu. You can store more than 1 address at the same time.
This is an example of a client data that store more than 1 address:
