Pentaho Report Designer - connecting to local database
Downloading Pentaho Report Designer
Pentaho Report Designer is a reporting tool which can be downloaded from sourceforce. Mifos supports Pentaho Report Designer 3.6.0-stable. To download appropriate version follow the steps below:
- Go to http://reporting.pentaho.com/ page
- Find Reporting Creation Tools section and click on Downloads link
- It’ll send You to sourceforce page
- Select 3.6.0-stable link from the list
- Choose archive file from the list to download it
- Extract downloaded archive
Connecting to a database in Pentaho Report Designer
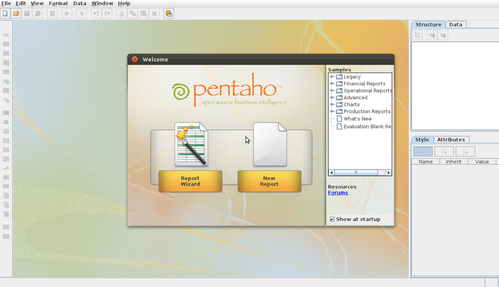
The application can be executed using report-designer.bat, report-designer.sh in unix or by launcher.jar which are in Pentaho Report Designer directory. The first step in creating a report is to create blanc report template. You can do this by choosing ‘New Report’ from Welcome window or by choosing File -> New
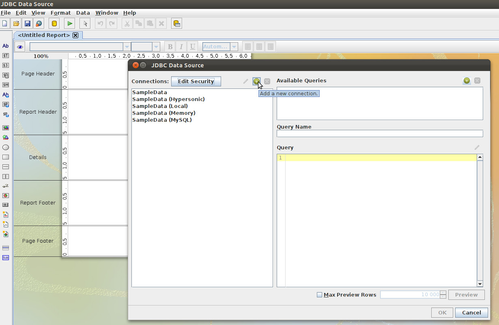
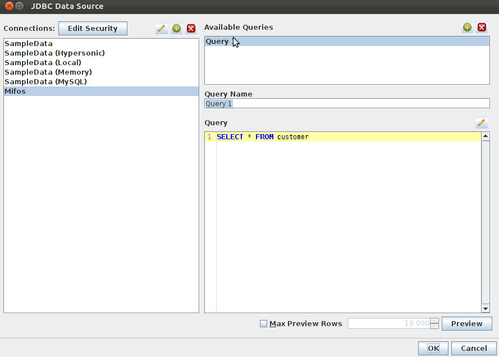
Next step is to choose Data->Add datasource->JDBC from Report Designer menu. It will open JDBC Data Source window. To add connection to local Mifos database You have to click on ‘Add a new connection’ button:
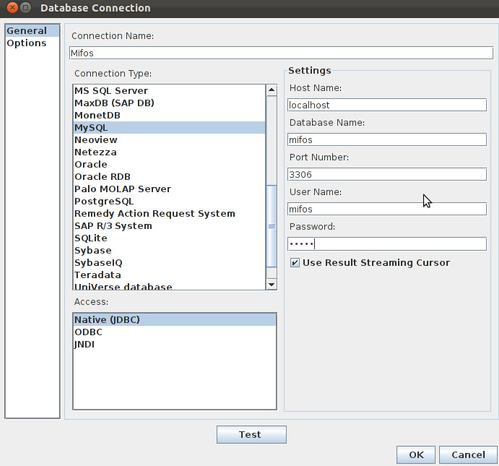
In the new window set the database connection settings:
- Connection name: Mifos
- Connection type: MySQL
- Host name: localhost
- Database name: mifos
- Port number: 3306
- User name: <username>
- Password: <password to database>
- Access: Native (JDBC)
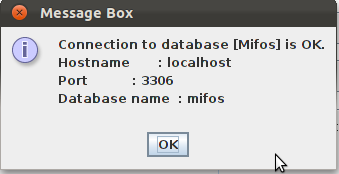
To verify connection You can click on ‘Test’ button. If everything is ok then Message Box will appear:
Click ok on ‘Message Box’ and ‘Database Connections’ windows. You will be send back to JDBC Data Source window. As You see recently created ‘Mifos’ connection has been added to Connections list. It will always be here so You will be able to use it any time You would like to create Pentaho Report for Mifos. Now You just need to add queries to Mifos database.
Creating new query to local database
In ‘JDBC Data Source’ window there are three other fields: ‘Available Queries’, ‘Query Name’ and ‘Query’. These fields are responsible for the management of queries sent to the database. Field ‘Available Queries’ is a list of queries which were added by User, ‘Query Name’ give You possibility to edit name of actually chosen query and ‘Query’ field contains queries written in SQL language, which are sent to the database in order to obtain data. Queries are saved only for report, not for connection!
Let’s try to add some query.
- From Connections list select ‘Mifos’.
- Click on ‘Add Query...’ button, ‘Query 1’ will appear on ‘Available Queries’ and ‘Query Name’ field. You can change it’s name.
- Click on yellow line on ‘Query’ field to start writing SQL command
- Type: SELECT * FROM customer
If You have some customers on Your Mifos instance then after clicking ‘Preview’ button You will see informations about them. This query is just example. You can select data from other tables, and use other SQL commands .
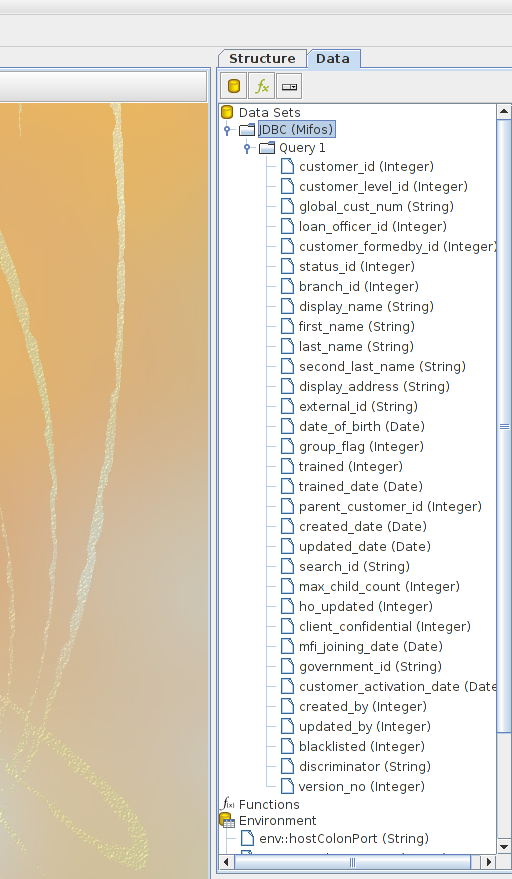
Click on ok and go to Report Designer Editor. On right side of the screen You can see sidebar with two tabs: ‘Structure’ and ‘Data’. Choose ‘Data’ and double click on ‘Data Sets’, You will see that JDBC (Mifos) connection has been added to Data Sets. Under this connection You will find recently added query (Query 1) and whole data from 'customer' table.
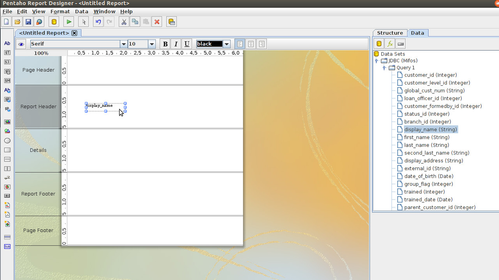
Displaying a field in the final report is very easy, simply click on it's name and drag the field to the Report Area.
If You want to check if it works just click on ‘Run’ button (green triangle) from task bar.
