Mifos X Microsoft Azure Install Guide
With each release of the Mifos X platform, we update and publish Mifos X as a publicly available Image. Latest image details is found at this link: http://en.wikipedia.org/wiki/Mifos_X. Follow these steps to deploy Mifos X on your own Azure instance in the cloud.
Installation of Mifos Platform using Azure Public Image

On this page:
Step 1
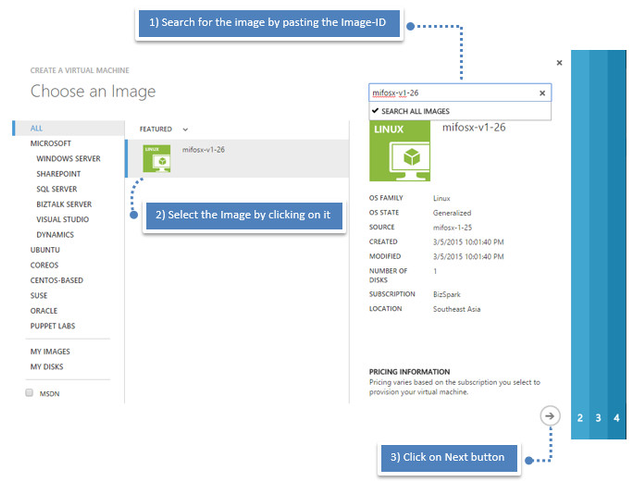
Getting Azure Image-ID
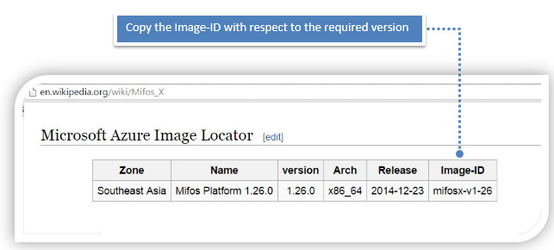
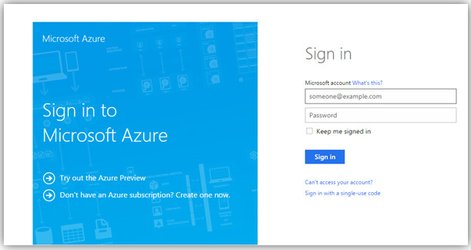
Login to Windows Azure
Provide your Windows Azure credentials and login. If you are a new user, create the user first, go back to the Mifos X Wikipedia page and then copy Image-ID.
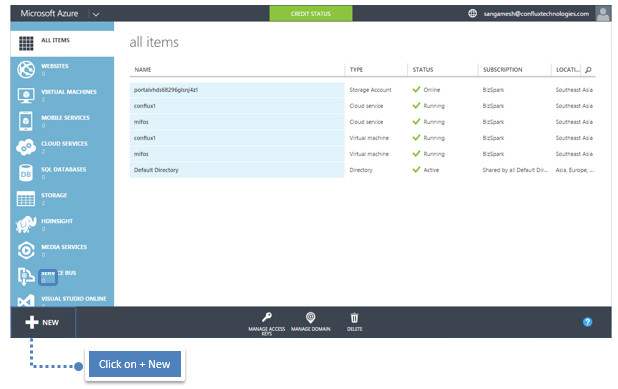
Step 2
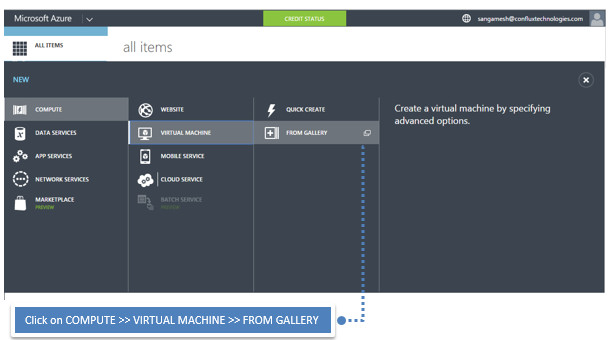
Step 3
Step 4
Step 5
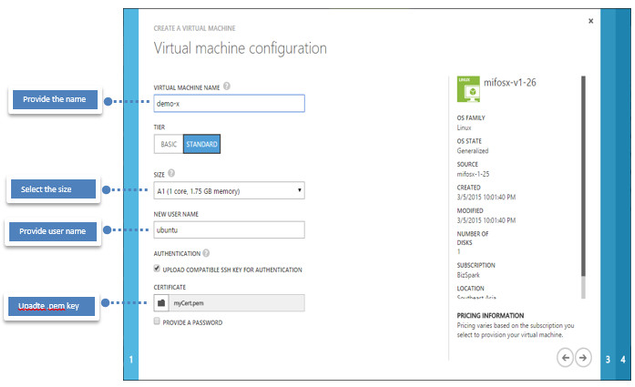
Note:- The current version of the Azure Management Portal only accepts SSH public keys that are encapsulated in an X509 certificate. Follow the link to generate and use SSH keys with Azure.:- http://azure.microsoft.com/en-in/documentation/articles/virtual-machines-linux-use-ssh-key/?rnd=1
Step 6
Step 7
Step 8

Step 9
Start the server from putty:
Command -
sudo /etc/init.d/tomcat7 start
Step 10
- Once the server is started, access the Mifos x from the browser:
https://ipaddress:8443/community-app
In the provided example it can be, Example:- https://demo-x.cloudapp.net:8443/community-app
Note - Capturing image
If you are capturing image, you need to delete all the keys before you capture the image. I.e using in ubuntu through putty.
# sudo waagent -deprovision+user