Advanced Accounting Rules
Creating an Advanced Accounting Rule
You can create the following Advanced Accounting Rules for Loan Products:
Advanced Accounting Rules based on Payment Type to automatically debit accounts based on payment type—for example, m-pesa payments are automatically debited from the m-pesa account and check payments are automatically debited from a different account.
Advanced Accounting Rules based on Fees to automatically credit a specified Income Account based on the Fee—for example, processing fees are automatically credited to the Fees and Charges account.
Advanced Accounting Rules based on Penalties to automatically credit a specified Income Account based on the Penalty—for example, late fees are automatically credited to the Penalties account.
Step 1: Configure Payment Type, Fees, and Penalties
To configure Advanced Accounting Rules based on Payment Type:
To create an Advanced Accounting Rule based on Payment Type, you configure the Payment Types drop-down list in the Manage Codes section of Admin System tools. In the following example, m-pesa payments are automatically debited from the m-pesa account.
To configure an Advanced Accounting Rule based on Payment Type, do the following:
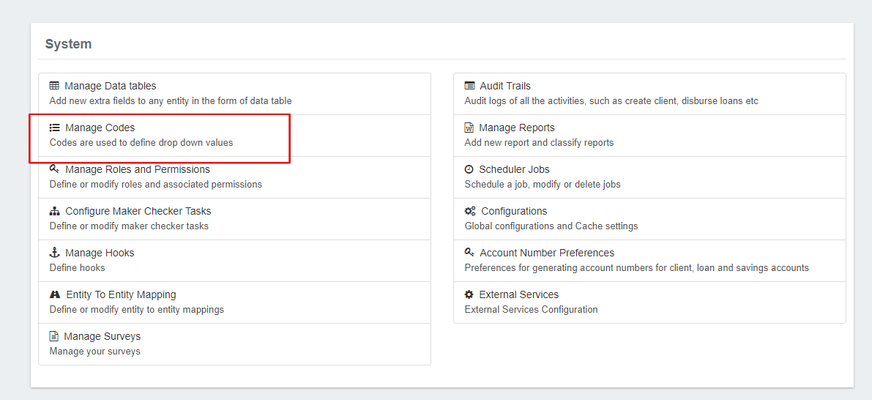
- On the Mifos toolbar, click Admin, and then click System to open the System menu.
- On the System menu, click Manage Codes to open the Manage Codes dialog.
- In Code Name list, select Payment Type.
- In the Payment Type dialog, click +Add Code Values.
- In the Code value text box, enter a name for your payment type and then click +Add.
NOTE: To edit the code value, click the Edit Code Value button. To delete the code value, click the Delete Code Value button.
To configure Advanced Accounting Rules based on Fees:
To create an Advanced Accounting Rule based on Fees, you define a loan charge in the Charges section of the Admin Products tools. In the following example, processing fees are automatically credited to the Fees and Charges account.
To map Fees to specific Income Accounts, do the following:
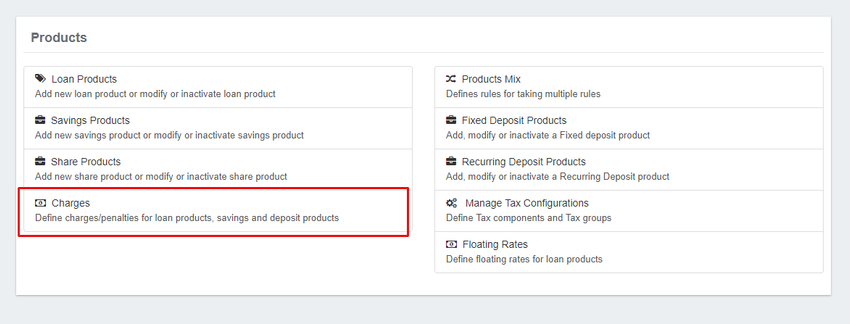
- On the Mifos toolbar, click Admin, and then click Products to open the Products menu.
- On the Products menu, click Charges.
- In the Charges dialog, click the Create Charge button.
- In the Charges applies to drop-down list, select a product.
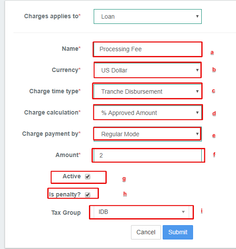
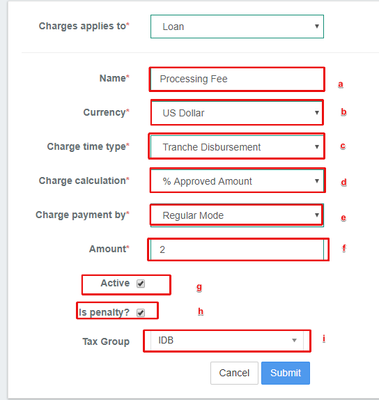
- In the Create Charge dialog, do the following:
- In the Name textbox, enter a name for the Fee.
- In the Currency drop-down list, select a currency.
- In the Charge time type drop-down list, select a charge time type.
- In the Charge calculation drop-down list, select a method for calculating the fee.
- In the Charge payment by drop-down list, select a method for payment.
- In the Amount textbox, enter the amount of the fee.
- Select the Active check box, and then click the Submit button.
To configure Advanced Accounting Rules based on Penalties:
To create an Advanced Accounting Rule based on Penalties, you define a loan penalty in the Charges section of the Admin Products tools. In the following example, late fees are automatically credited to the Penalties account.
To map Penalties to specific Income Accounts, do the following:
- On the Mifos toolbar, click Admin, and then click Products to open the Products menu.
- On the Products menu, click Charges.
- In the Charges dialog, click the Create Charge button.
- In the Charges applies to drop-down list, select a product.
- In the Create Charge dialog, do the following:
- In the Name textbox, enter a name for the penalty.
- In the Currency drop-down list, select a currency.
- In the Charge time type drop-down list, select a charge time type.
- In the Charge calculation drop-down list, select a method for calculating the penalty.
- In the Charge payment by drop-down list, select a method for payment.
- Select the Add Fee Frequency check box.
- In the Charge Frequency drop-down list, select the frequency (days, weeks, months, or years) to charge the penalty.
- In the Frequency Interval textbox, type a number for the frequency interval.
- In the Amount textbox, type the amount of the penalty.
- Select the Active check box.
- Select the Is Penalty check box, and then click the Submit button.
Step 2: Map Payment Type to fund sources, and map Fees and Penalties to income sources.
To create an Advanced Accounting Rule based on Payment Type, Fees, or Penalties, do the following:
- On the Mifos toolbar, click Admin, and then click Products to open the Products menu.
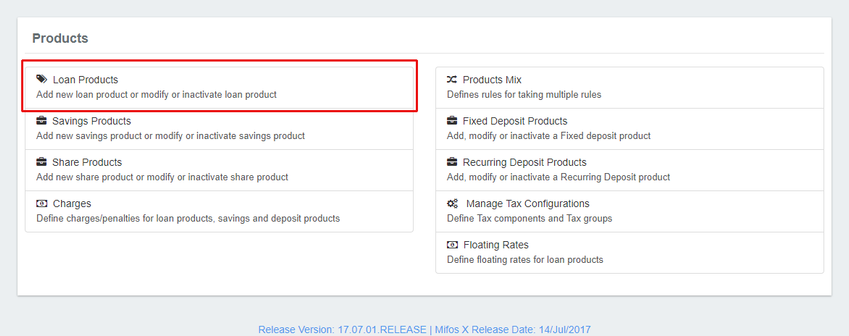
- On the Products menu, click Loan Products.
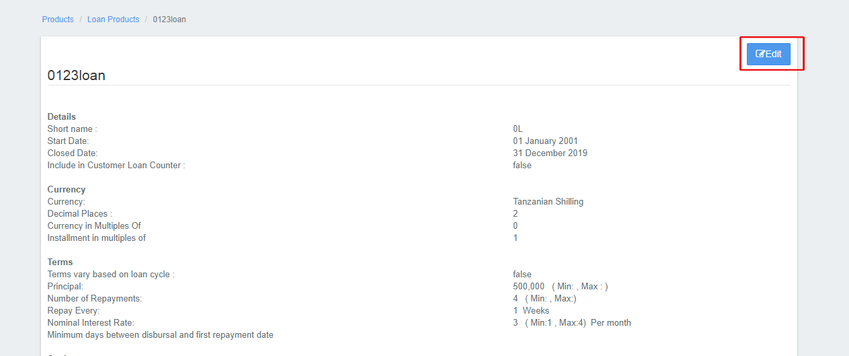
- In Loan Products list, select the Loan Product to which you want to add an advanced accounting rule.
- Click Edit.
- Scroll to the bottom of the Loan Product dialog. Under Accounting, if None is selected, select one of the other options to expand the Accounting section.
- At the bottom of the Accounting section, click show to expand Advanced Accounting Rules.
- Under the expanded Advanced Accounting Rules, you can add Payment Type, Fees, or Penalties Advanced Accounting Rules:
- To add a Payment Type Advanced Accounting Rule:
Under Configure Fund Sources for Payment Channels click the Add button and then select a Payment Type and a Fund Source from the drop-down lists.
Tip: To add Payment Types to the Payment Type drop-down list, see Advanced Accounting Rules based on Payment Type in Creating an Advanced Account Rule above.
- To add a Fees Advanced Accounting Rule:
Under Map Fees to Income Accounts, click the Add button and then select a Fee and an Income Account from the drop-down lists.
Tip: To add Fees to the Fee drop-down list, see Advanced Accounting Rules based on Fees in Creating an Advanced Account Rule above.
- To add a Penalties Advanced Accounting Rule:
Under Map Penalties to Specific Income Accounts, click the Add button and then select a Penalty and an Income Account from the drop-down lists.
Tip: To add Penalties to the Fee drop-down list, see Advanced Accounting Rules based on Penalties in Creating an Advanced Account Rule above.
- To add a Payment Type Advanced Accounting Rule:
- Click the Submit button.
Your Advanced Accounting Rule for your Loan Product appears under Accounting at the bottom of the dialog.
Applying an Advanced Accounting Rule
Walk through normal transactions that reflect the advanced accounting rule being applied (that is. a transaction of a certain payment type being applied to a different general ledger account)
Field Name (attribute) Description Example Validations (if applicable)
Key Error Messages
Related articles

