SMS Campaigns
Configuring Message Gateway in Platform
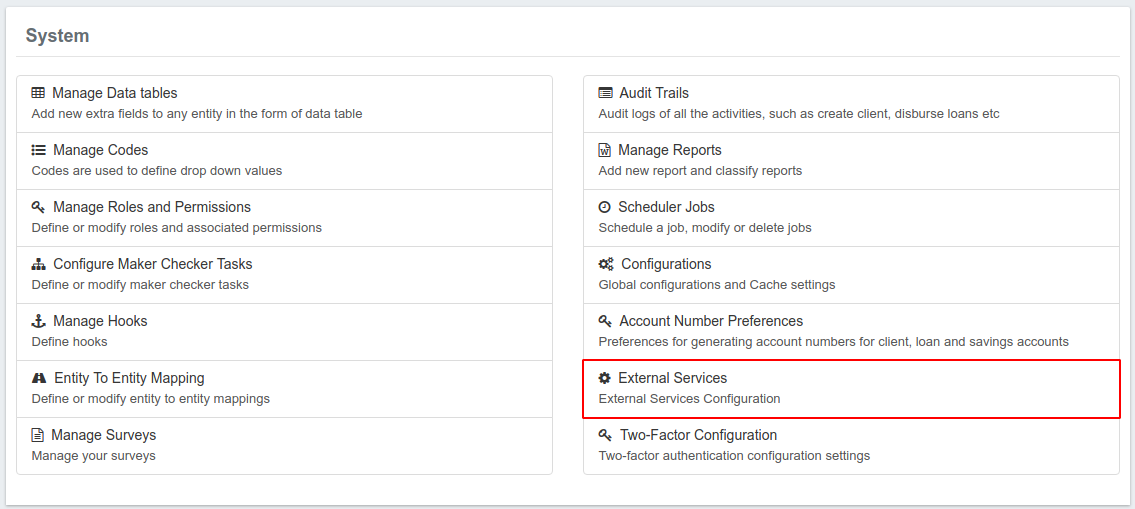
Step 1: At the top the screen, navigate to Admin and select System from the drop-down.
Select External Services
Step 2: Next Click External Services (SMS Service Configuration)
Step 3: Click button at the top-right of the page
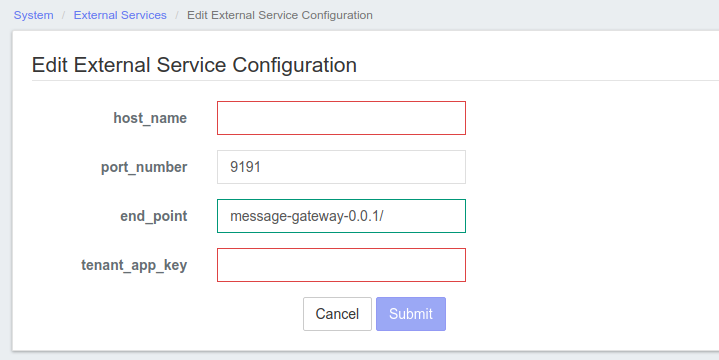
Step 4: Set the following parameters in Edit External Service Configuration
Edit External Service Configuration
host_name: Use the {Message-gateway host name}
Port_Number: It should be 9191
end_point: Set end point as message-gateway-0.0.1/
tenant_app_key: {Paste the same tenant_app_key that is generated while configuring Message-Gateway}
Step 5: Click Submit.
How to Create SMS Campaigns
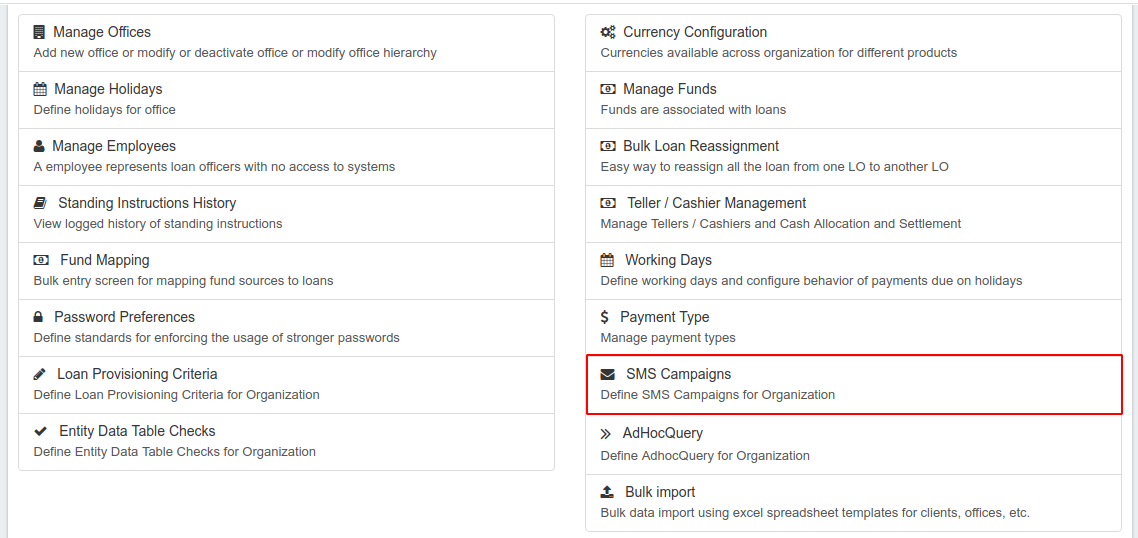
Step 1: At the top the screen, navigate to Admin and select Organization from the drop-down menu.
Select SMS Campaigns
Step 2: On the SMS Campaigns page, click on button to create a new SMS Campaign
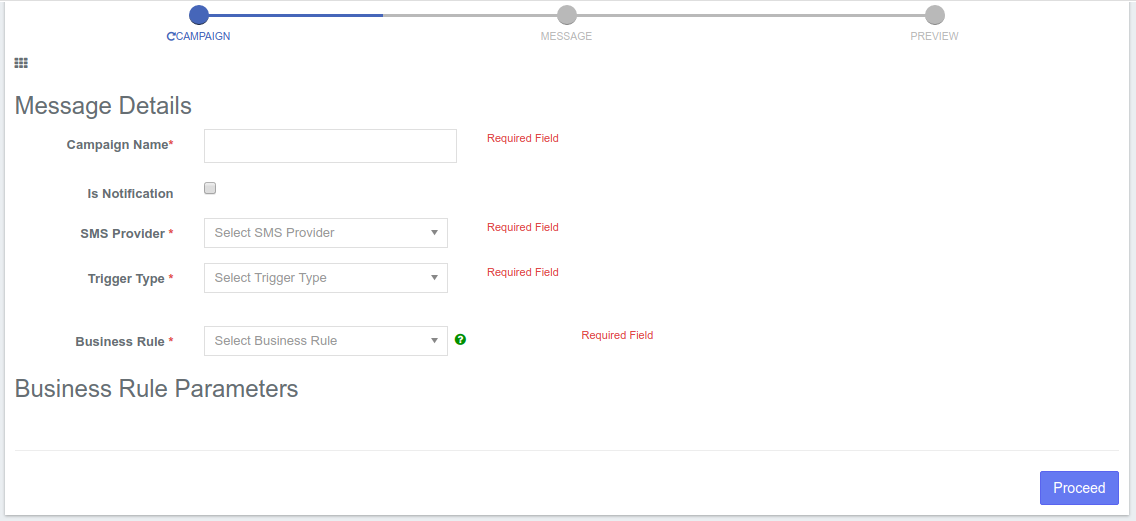
Step 3: Here you find a three step process from Campaign to Message to Preview. At the campaign stage, fill out these details;
Define the "Message Details" for the SMS Campaign.
- Campaign Name: Provide a name for the SMS Campaign.
- Is Notification: By default, the campaign is not a notification and therefore you are required to provide the SMS Provider. If the campaign is of notification kind, please check the check box. This will disable the SMS provider section and you may then proceed to the trigger type.
When it Is Not a Notification;
- SMS Provider: Select the appropriate SMS provider from the drop down menu.
When it Is a Notification;
No need for SMS provider
- Trigger Type: You can set "Trigger type" as either 'Direct', 'Scheduled', or 'Triggered'. Choose one from the drop down menu.
- Choose Direct when you want to send the SMS only once.
- Choose Scheduled if you want to send multiple SMS for a particular 'date' and 'Time'.
- Choose Triggered when you want to send 'transactional' SMS (For Example: Loan Repayment, Savings Deposit, Savings Withdrawal, etc. Currently 9 types of transactional campaigns are supported)
If you select Direct or Triggered, you may then proceed to the Business Rule part of the page. However, if you select Scheduled, then you will be required to provide additional information like Schedule Date and Schedule Time;
- Scheduled Date: Choose the date you want the campaign to take place or start (in the event that the campaign will not be for a day)
- Scheduled Time: Choose the time you want the campaign to run. Also select when you want the campaign to be repeated and the interval of repetition.
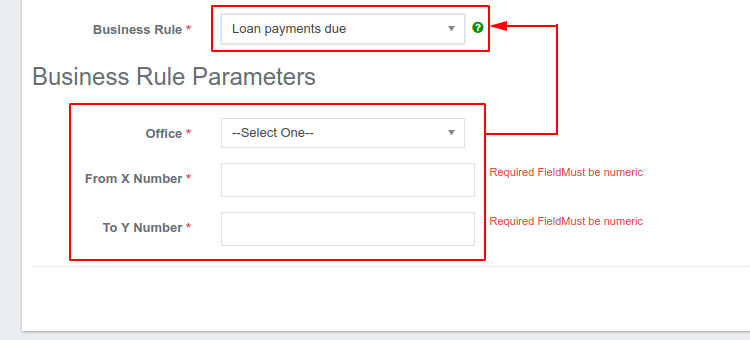
- Business Rule: Select the appropriate business rule from the drop down menu. Depending on the option you choose, a new set of sections will be displayed under the Business Rule Parameters section at the end of the page. As an example, we select Loan Payment Due as Business Rule and the Business Rule Parameters are Office, From X Number and To Y Number.
Depending on your Business Rule selection, fill in the required fields.
- Check to confirm your inputs and then Click
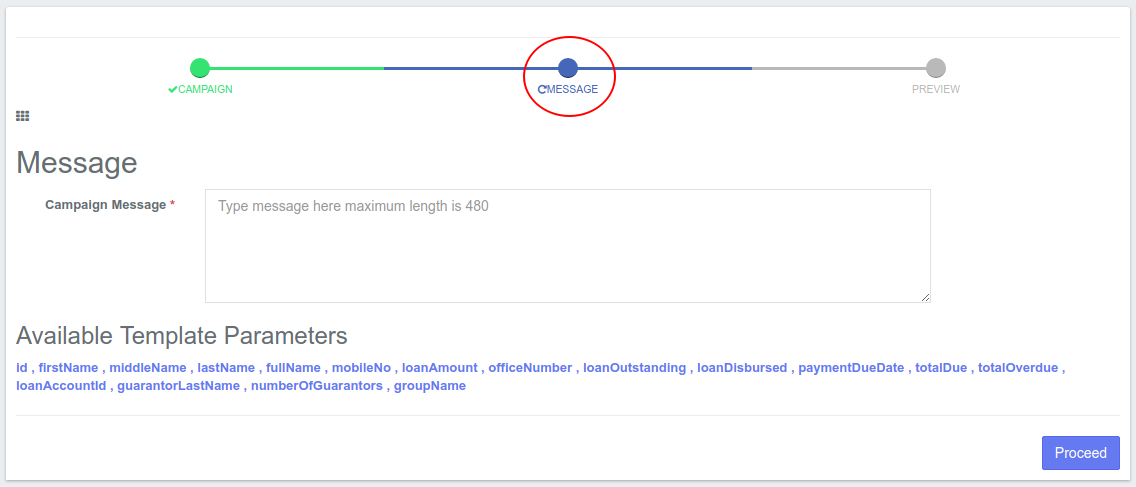
Step 4: Next is the Campaign Message Section.
The Available Template Parameters vary according to the Business Rule you selected in the previous section.
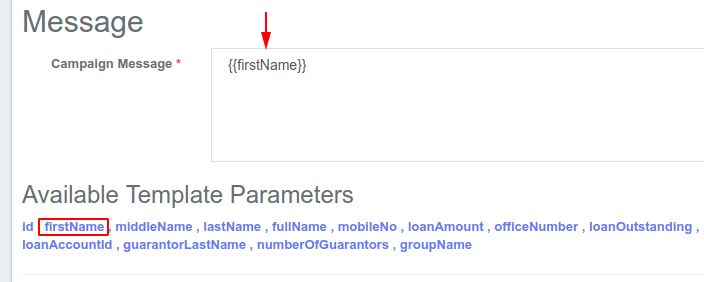
Choose those which apply to the campaign message you wish to broadcast. These available templates act as placeholders for the various options. For example, if you want to capture the first name of the client in the message, select firstName and it will be added into the Campaign Message textbox.
- After composing your message and adding the placeholders provided, click .
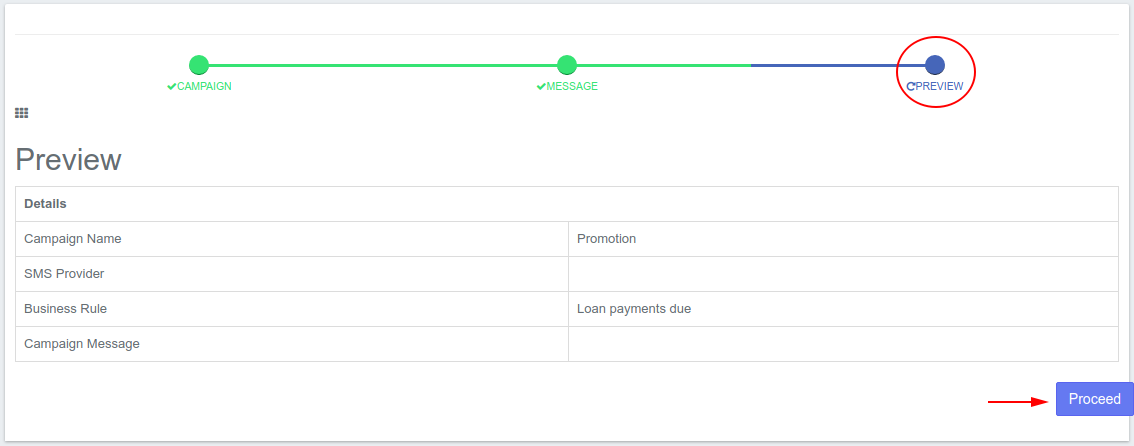
Step 5: Preview avails you the opportunity to check the information you have provided. Click the button to finish.
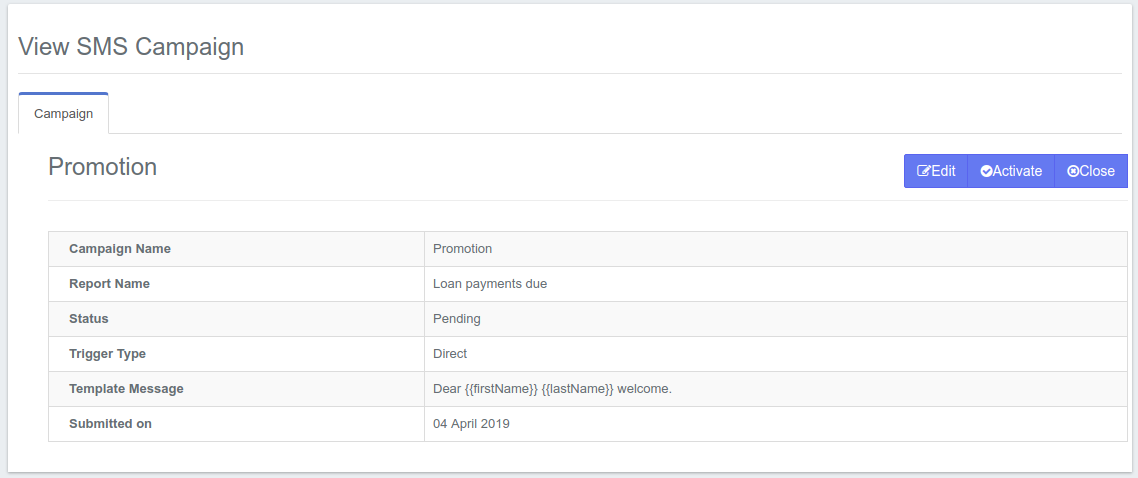
After which, you can then choose to activate the campaign or edit.
How to Activate an SMS Campaign
From the general list of SMS Campaign, select the Campaign you want to make active. This should launch the details of the campaign like the screenshot below:
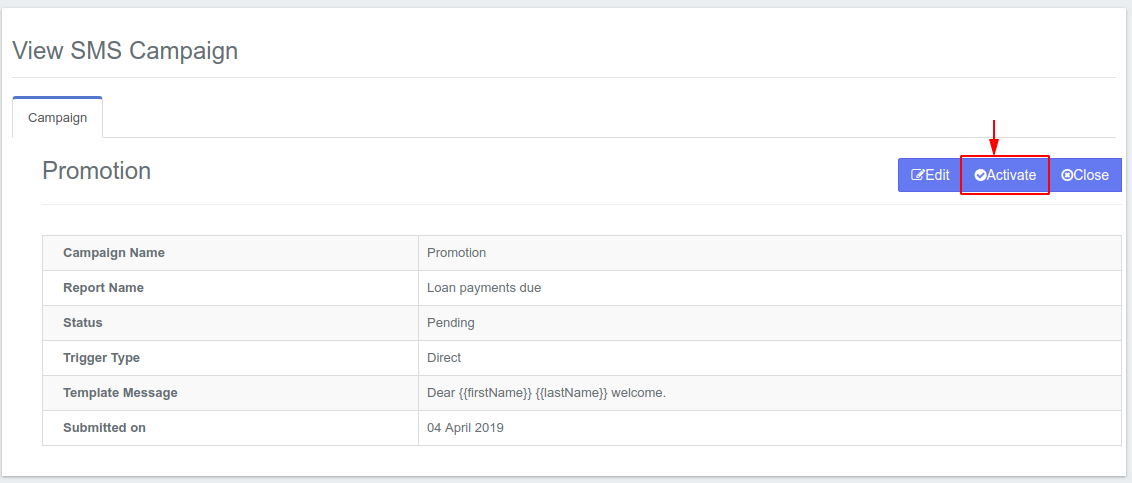
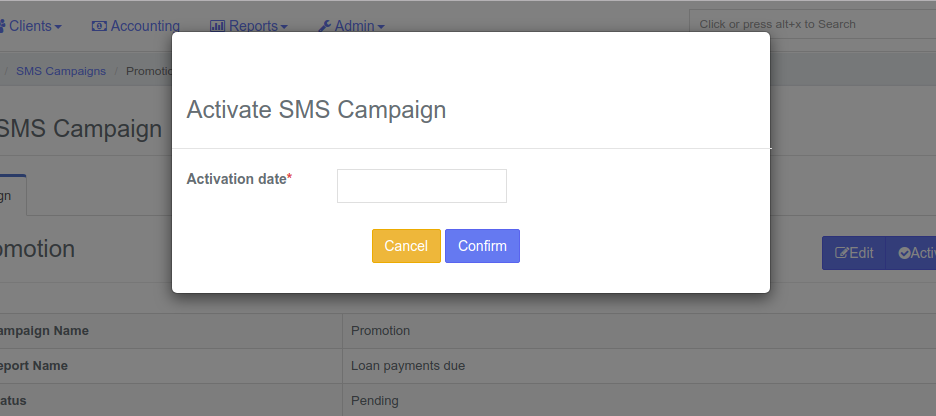
Click the Activate button which will launch a pop-up dialog box in which you should provide the current date.
After choosing the date, click the Confirm button.
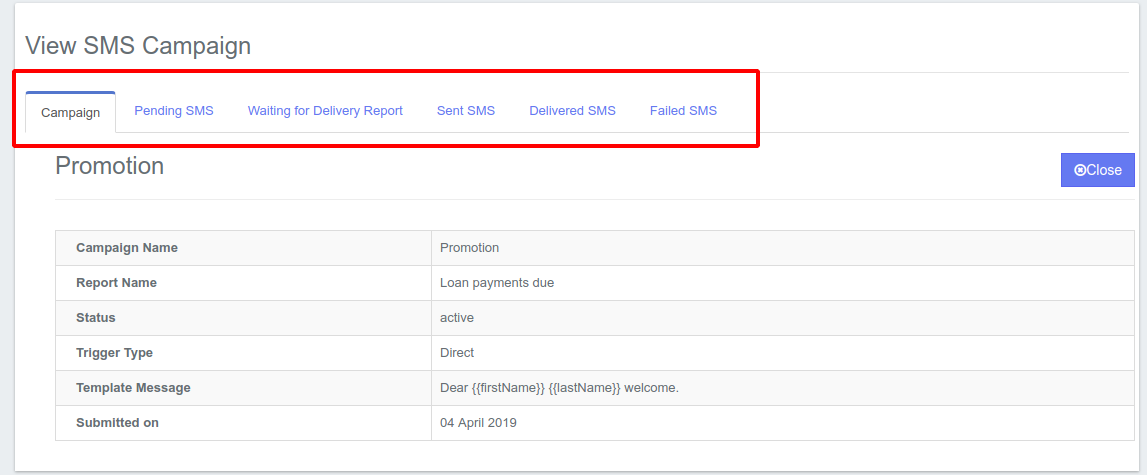
Your SMS Campaign has successfully been created and marked active in the general SMS Campaign page.
From the SMS campaign window, you can see the SMS campaign names that are at the active,closed and pending stages.
How to check the status of the SMS
To check the status of your campaign, select the campaign from the general SMS Campaign page. At the top of the campaign details, there are tabs with the different campaign statuses. Select the status you want to view.
In each case, set "From Date" and "To Date" parameters. This will provide a list of SMS if applicable.
Run Scheduler Job
To send pending SMS, please run the scheduler job "Send Messages to SMS Gateway". This can be achieved by navigating to Admin>>System>>Scheduler Jobs.
