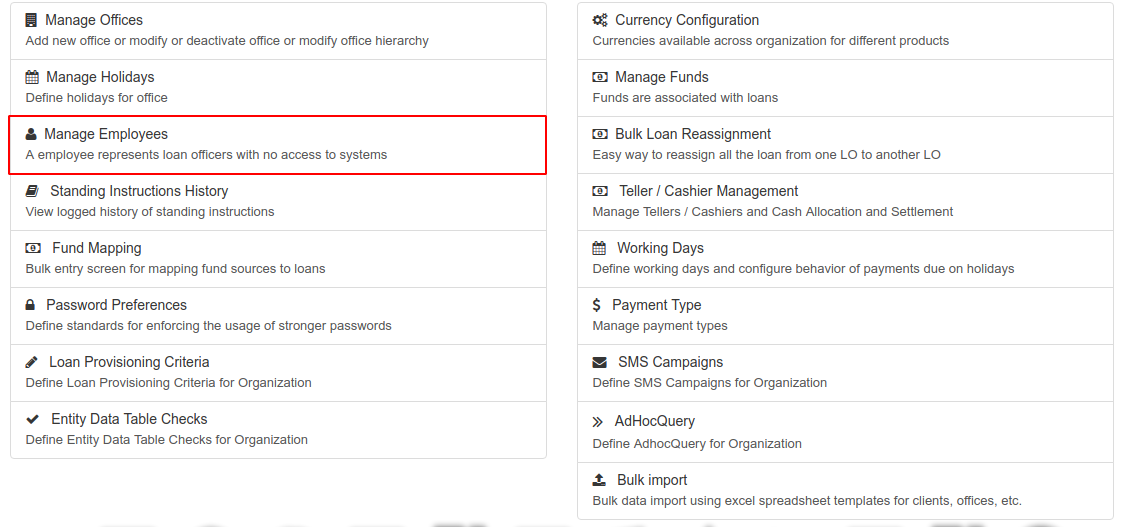
Manage Employees
From the main screen, click on the Admin button on the top menu bar and click on Organization from the drop down list. This will launch the Organization menu.
Select Manage Employees.
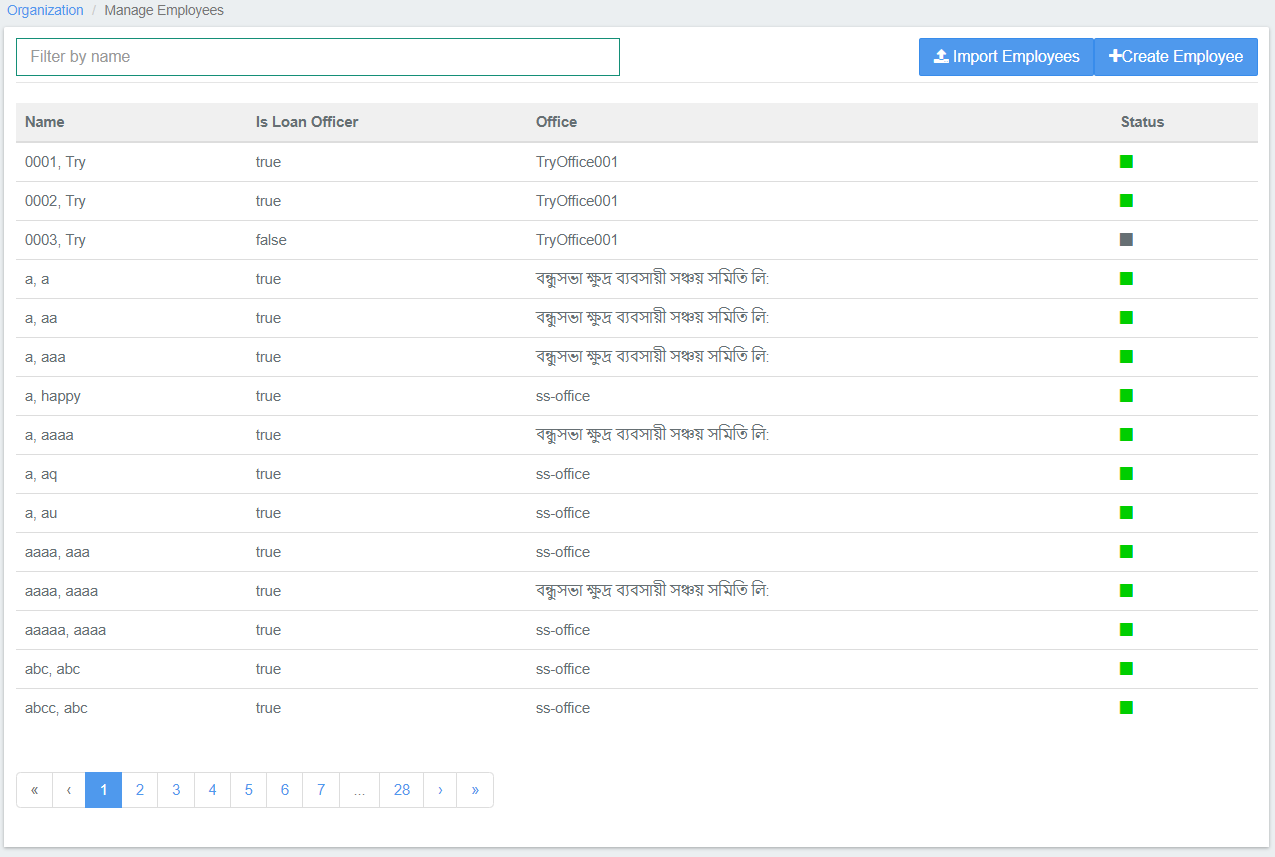
A list of all employees will be displayed:
Add Employees
Click the  button at the top-right of the page to create a new employee.
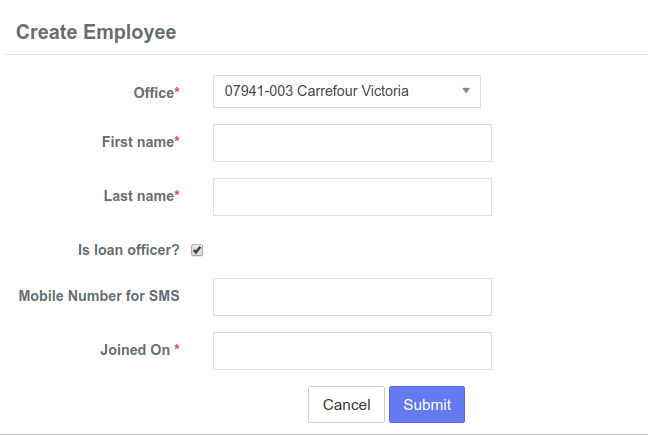
- Fill the following mandatory fields (denoted by a red asterisk "*"):
- Select the appropriate office from the Office drop-down menu.
- Enter the employee's First name.
- Enter the employee's Last name.
- Provide the Joining Date of the employee.
- Furthermore, fill the following optional fields:
- Designate the employee as a loan officer (if required) by checking the "Is loan officer?" checkbox.
- Add a Mobile Number for SMS to allow messages via text.
Click on Submit once you are done.
Import Employee
You can also import employee details from your local device. Click the  button at the top-right of the page (next to the blue Create Employee button) on the Manage Employees page.
This page has three sections (as shown below):
- Employee Template
- Import Employees
- Documents
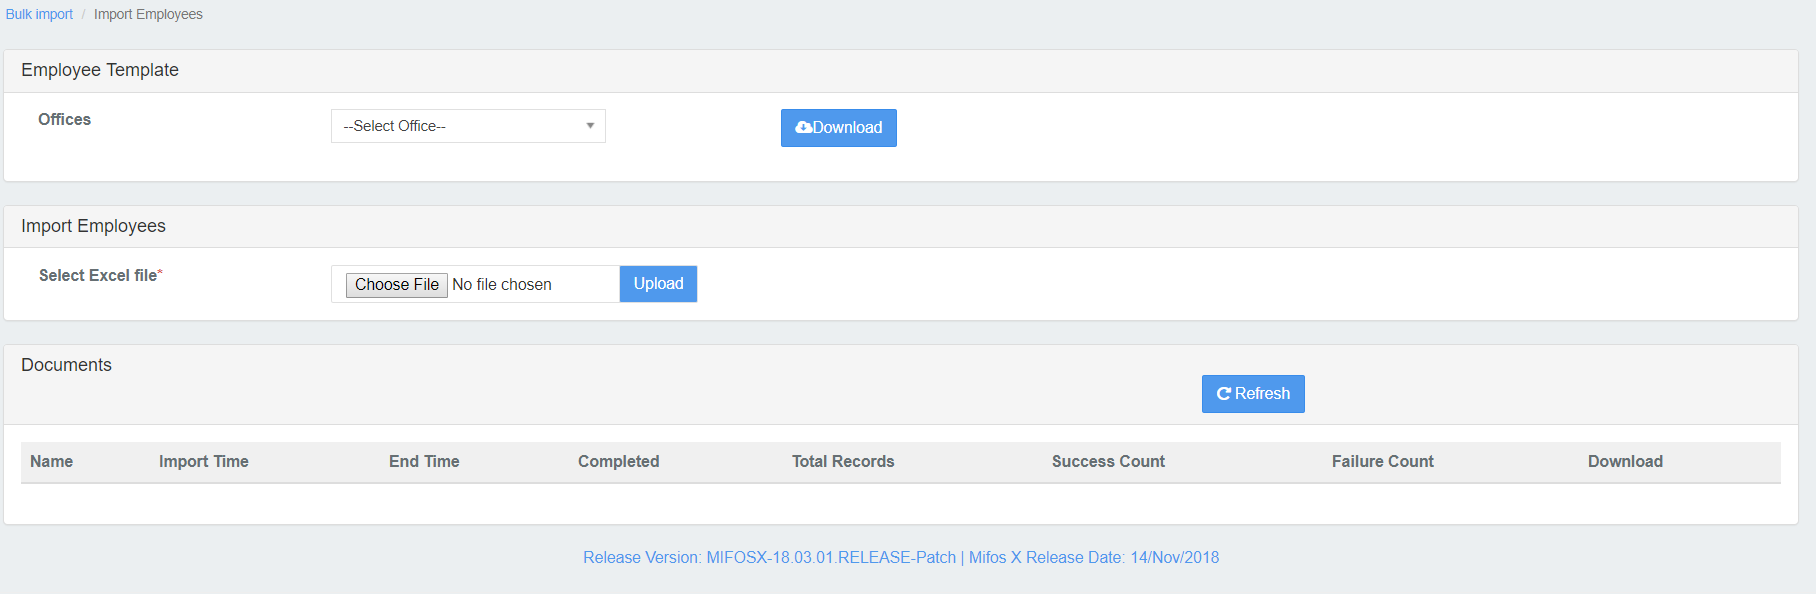
If you want to use an already existing template, go to the Employee Template section.

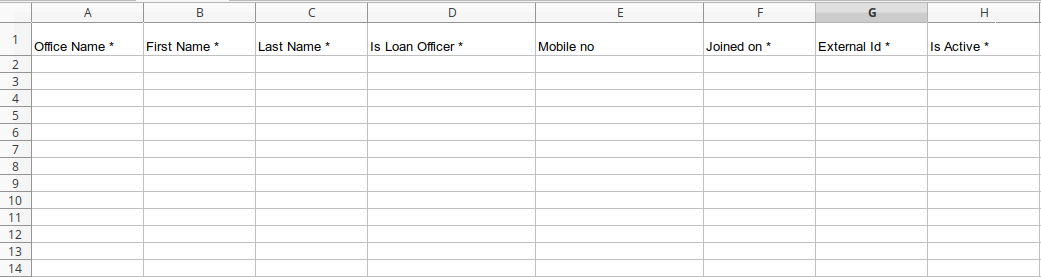
Select an office template in the Select Office drop-down menu. Click the Download button to the right of the search field. This will download a spreadsheet file in which you can add employee details. For example: let's assume we selected the Main Head Office template and the downloaded spreadsheet includes the following fields:
- Office Name
- First Name
- Last Name
- Loan Officer
- Mobile Number
- Joining date
- External Id
- Status
Once you have filled the details in the spreadsheet, save it and then import the file into Mifos X in the Import Employees section of the page.

Click the grey Choose File button, navigate to where you saved your file, select it and then click the blue Upload button to import your employee details.

In the Documents section at the bottom of the page, click the Refresh button to confirm that the file has been uploaded and can be used in Mifos X.
View Employees
Once you have selected Manage Employees, a chart of all employees will be displayed with the following information:
- The employee's Name
- Whether the employee Is a Loan Officer or not
- The employee's Office
- The employee's Status; whether active
 or inactive
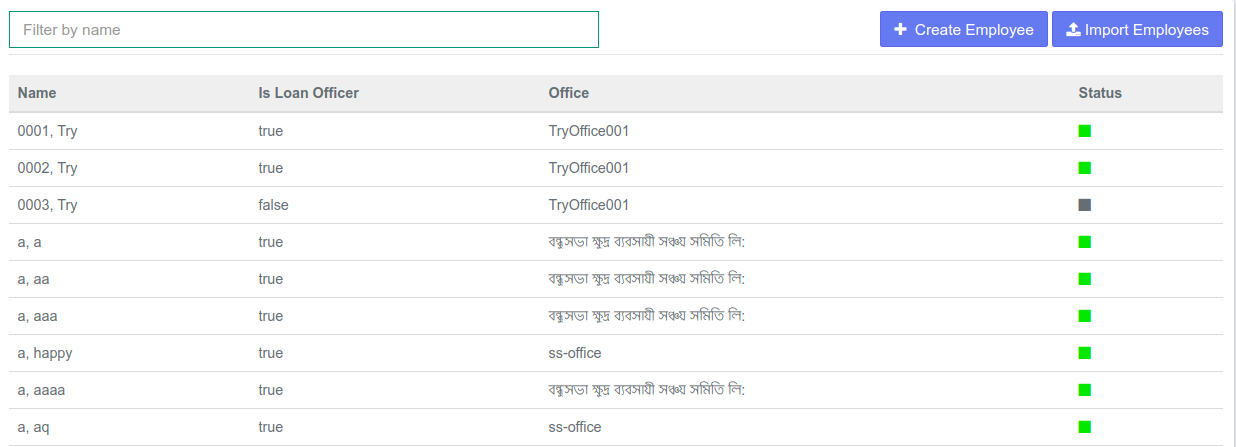
Tip: Use the Filter by Name field to quickly locate the employee you are searching for. Begin typing the employee's name and Mifos X will automatically filter the results.
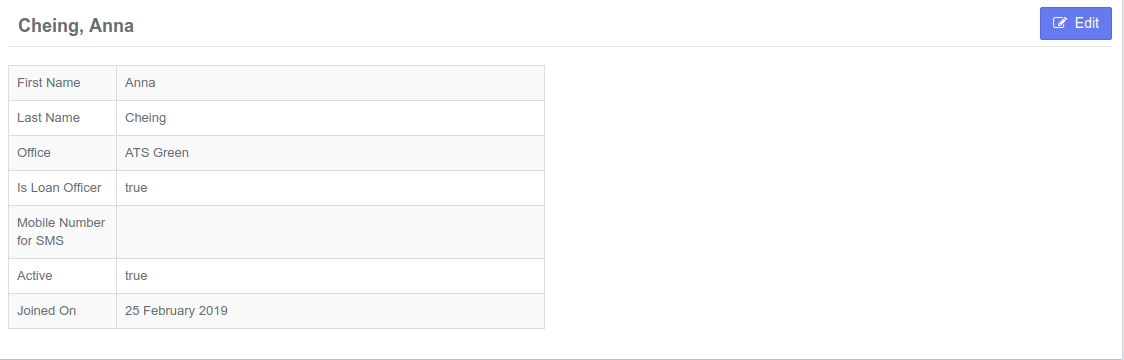
Clicking on an employee's name on the chart will open that employee's Profile:
Edit Employee
Click the blue Edit button at the top-right of the employee's profile to edit the employee's information. This will launch a new page where you may change the employee's information:
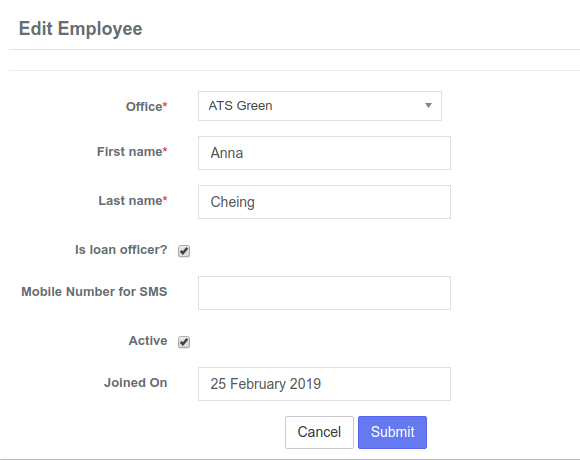
Once the appropriate changes have been made, click Submit.
Tip: An employee is not the same as a User (and is not interlinked with Users). Therefore, you may need to create users separately. Please see the Users section of this manual to learn more. In short, All users are the employees. But all employees may not be the users.
Related articles